Notice: this Wiki will be going read only early in 2024 and edits will no longer be possible. Please see: https://gitlab.eclipse.org/eclipsefdn/helpdesk/-/wikis/Wiki-shutdown-plan for the plan.
Using the Reflectivity Model
Contents
Introduction
This is a tutorial for setting up and running Reflectivity simulations using the Reflectivity Model in ICE. This allows for the calculation of the scattering density profile and the density profile for comparison.
Materials Database
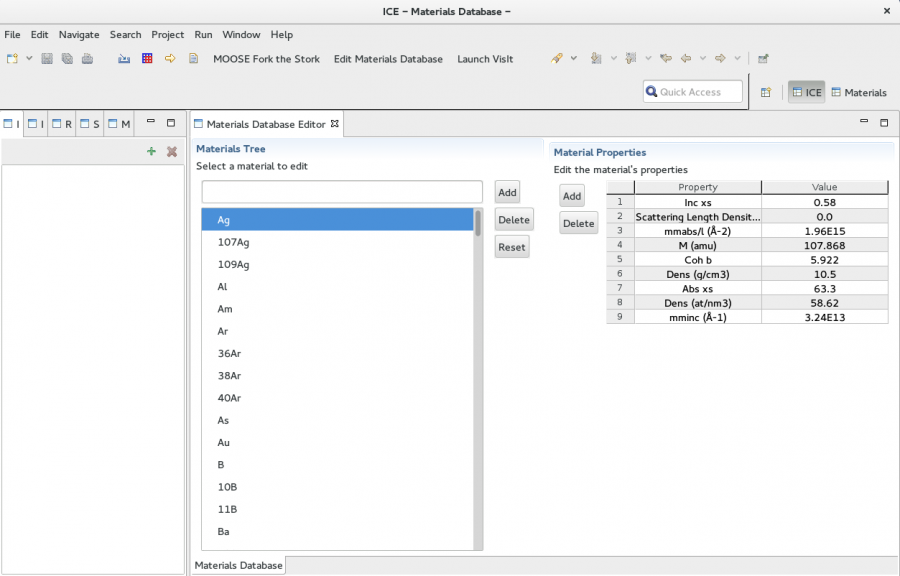
The Materials Database allows a user in ICE to create any composite or molecule desired from the list of defined isotopes. These isotopes are editable and can have additional properties specified to the user's specifications. In ICE, click the 'Edit Materials Database' button in the toolbar at the top. This should bring up the Materials Database Editor view in the editor, as shown below.
Editing Properties
From this editor, you can add, edit, or delete the properties shown in the properties inspector on the right. Select the element or isotope desired, and simply click on the property you want to change. For adding and removing properties use the Add and Delete buttons just to the left of the inspector.
Adding Materials
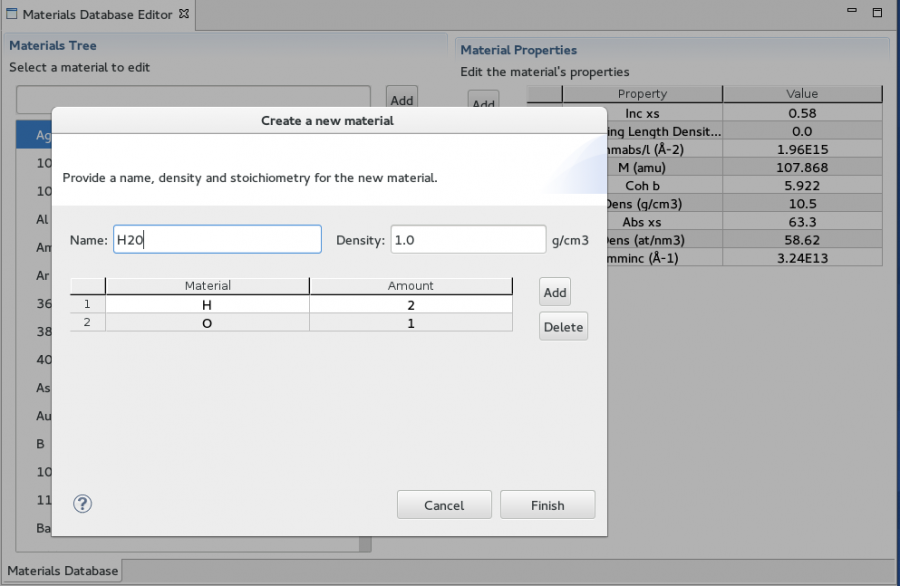
To add a material, simply click the Add button to start the new material wizard (shown above). It should prompt you for a new name, density, and stoichiometry. Enter the name and density, and use the Add button for adding elements or isotopes to comprise the stoichiometry of the new material. It should bring up a new dialog for picking easily through the existing materials. The amount of each material can be changed by clicking on that cell in the table. Once all of your information is entered and correct, click Finish and the new material's properties (like scattering density and molecular mass) will be calculated and added to the database. These new materials are what should be used in the Reflectivity Model to run your simulations.
The Reflectivity Model
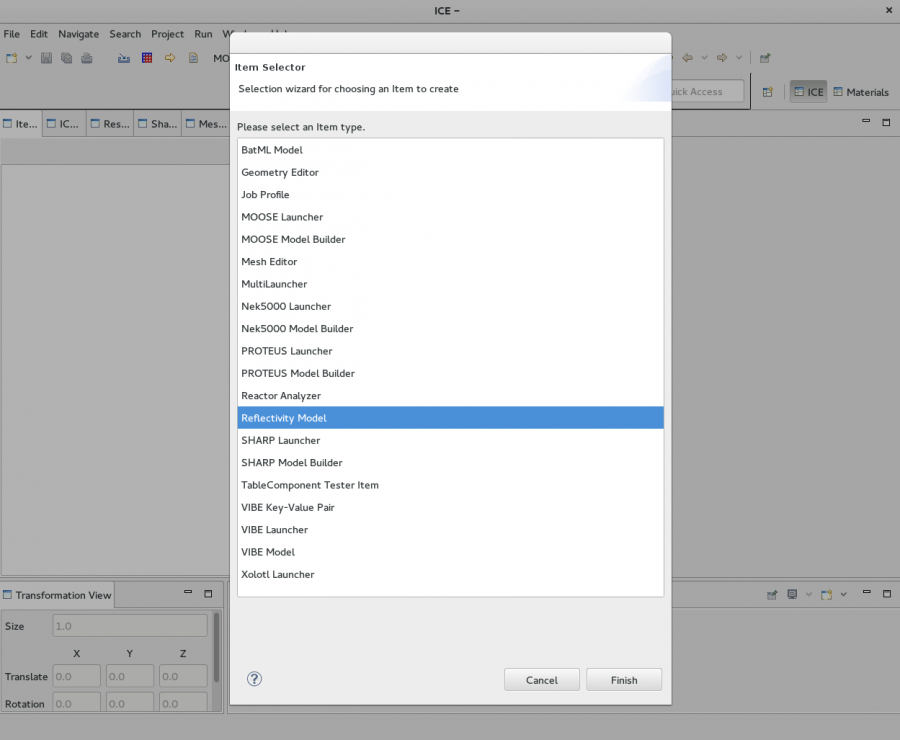
The Reflectivity Model should be used to run simulations of neutron scattering experiments on a liquid reflectometer. To open the Model, navigate to the Item tab on the left view in ICE and press the green add button to bring up the Item Selector. You should see something like this.
Select the Reflectivity Model from the Item Selector and click finish. The model should now appear in the editor.
Setting Parameters
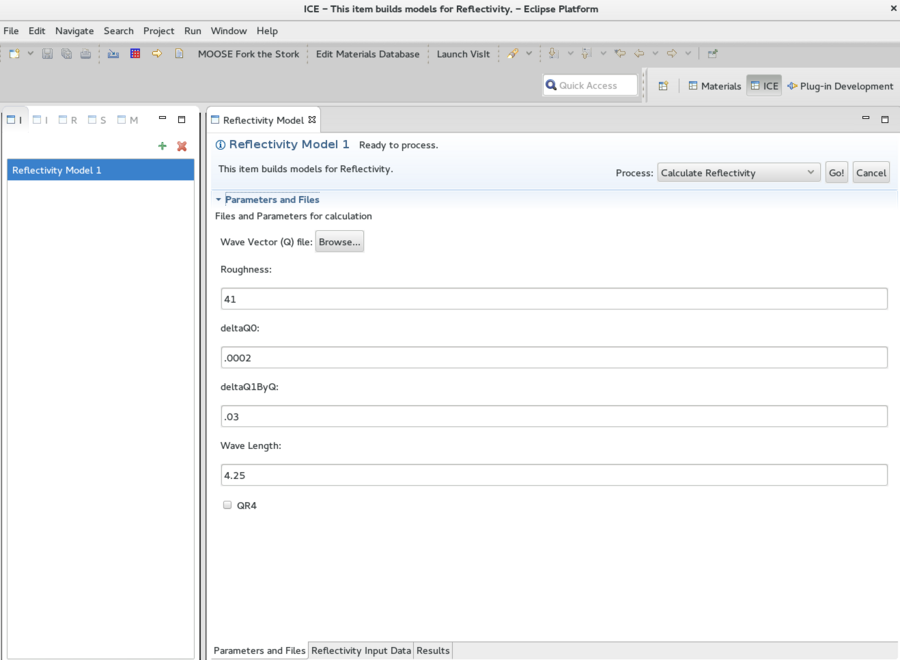
As you can see there are three different views associated with the model, presented with tabs. The first view presents the information on the user's parameters like the file containing the wave function (should be .csv), the number of layers of roughness, the angles and whether to use qr4. Simply input the values in the fields and save the form using Ctrl+s. Clicking the 'Browse...' button for the wave vector file will bring up a file selection menu.
Adding Layers to the Model
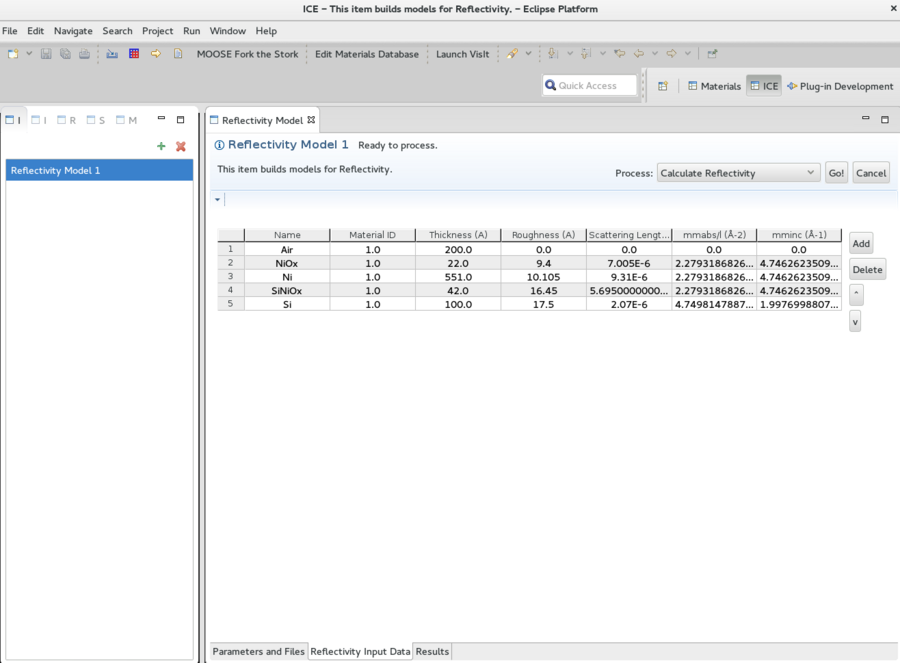
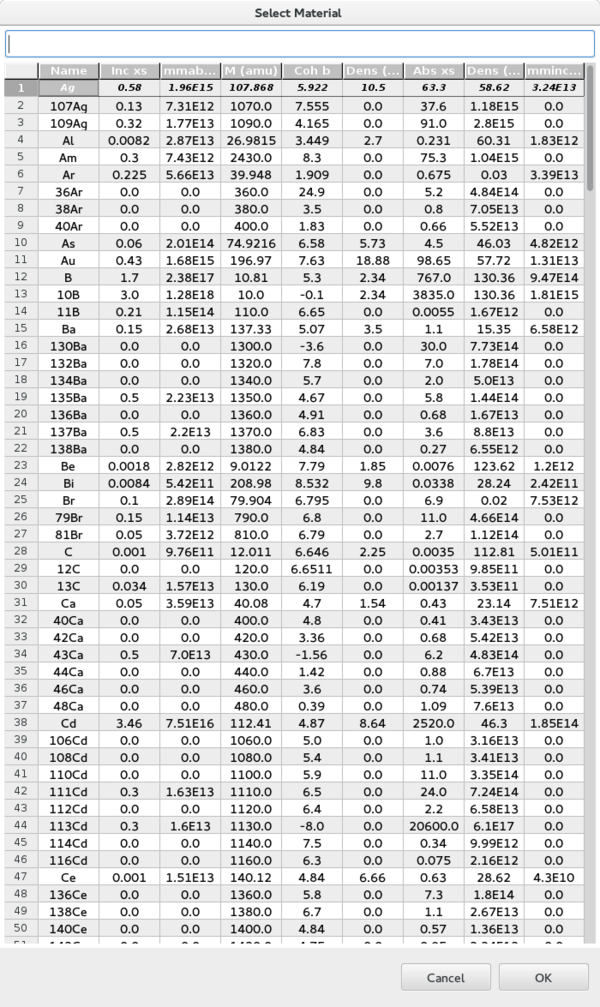
The second view is the input data, where the material being tested is built up using material layers. The fields in the model can all be edited to suit the user's needs just by clicking on them. The Tiles can be re ordered by selecting one or more in the Model and using the up and down buttons to rearrange them. They can be deleted using the Delete button and added using the Add button. Clicking the Add button on the model will pull up the selection dialog for picking a material for the new tile. It should look like this:
You can search for a material or scroll through the list. Once a material is selected click add to add it to the list in the Reflectivity Model.
Getting The Output
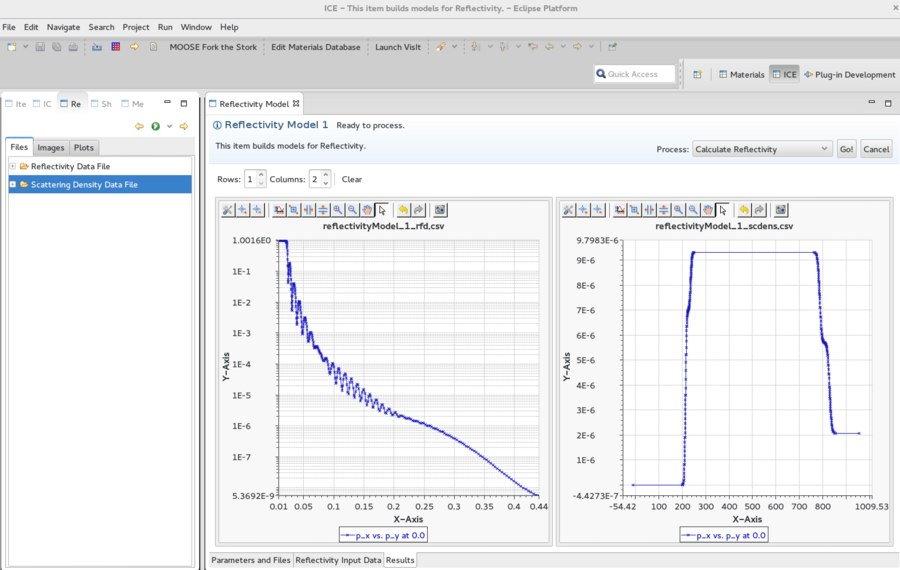
Clicking the 'Go!' button from any of the views will process the information and output the reflectivity profile and scattering density profile to their respective files. You can see the graphs from these files by double clicking on the file in the Resources tab when the Results view is open in the model.
The graphs can be edited and formatted however the user sees fit. The reflectivity profile shown on the left has a logarithmic scale set for the y axis for example. The files can be accessed as well by double clicking on Path: ... under the file you want to see in the Resources tab. Note that for .csv, the y axis is the first entry and the x is the second, going y,x for each line.

