Notice: this Wiki will be going read only early in 2024 and edits will no longer be possible. Please see: https://gitlab.eclipse.org/eclipsefdn/helpdesk/-/wikis/Wiki-shutdown-plan for the plan.
Difference between revisions of "Using Web Service Explorer to test a Web service"
(New page: By Kathy Chan December 22, 2005 Introduction This document is one of a series of tutorials to demonstrate the use of the Web Services tools in the Web Tools Platform Project using...) |
|||
| Line 1: | Line 1: | ||
| − | + | <TABLE WIDTH="800" CELLSPACING=12 align=center> | |
| − | + | <tr> | |
| + | <td valign="top" align="right"> </td><td valign="top"> | ||
| − | + | <b>By Trung Ha</b> | |
| − | + | <BR> | |
| − | + | Jan 30, 2008<BR> | |
| − | + | <BR> | |
| − | + | ||
| − | This tutorial | + | <P> |
| − | + | This tutorial will use the catalog.xsd from the "Editing and validating XML files" Examples. To create it, | |
| + | select New -> Examples... to launch the wizard. Follow the instructions described in the wizard, then click Finish to create the example project. | ||
| + | </P> | ||
| − | |||
| − | |||
| − | |||
| − | |||
| − | |||
| − | + | <P> | |
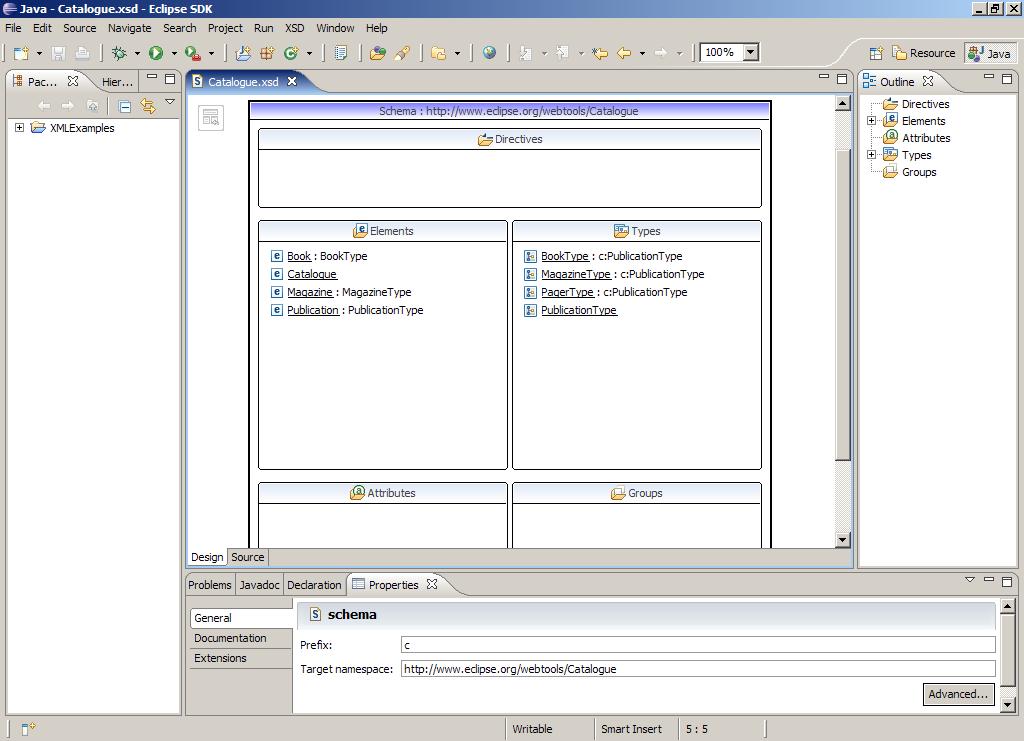
| − | + | Once created, under the PublicationCatalogue folder, locate the Catalogue.xsd file and double click the file to open it in the XML Schema Editor. As shown below, an Outline and Properties view is provided in addition | |
| − | + | to the editor pane. At the bottom of the editor area you'll see that there is a 'Source' and a 'Design' tab at the bottom of the editor area. The 'Source' tab is used | |
| + | for basic XML source editing. The 'Design' tab is used for higher level graphical editing. Select the 'Design' tab so that you're looking at the Graph view. As shown | ||
| + | below you should see a 'top-level' view of the XML Schema that summarizes all of the components (e.g. elements and types) that are defined in the schema. | ||
| + | <BR> | ||
| − | + | <BR> | |
| + | [[Image:Xsdeditor-figure1.JPG]] | ||
| + | </P> | ||
| − | |||
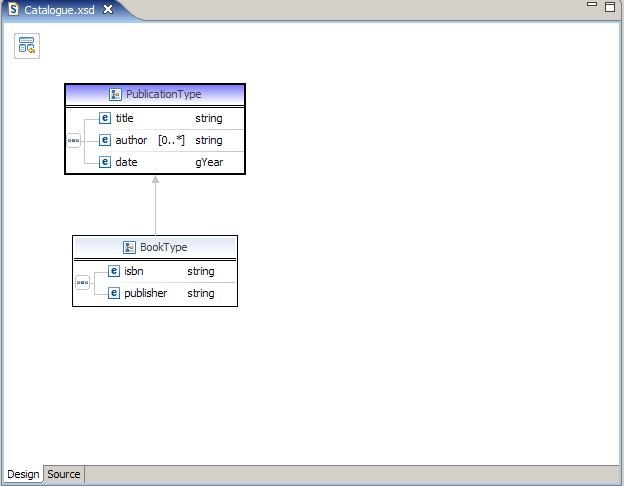
| − | + | <P>In order to see these components in detail you can 'drill down' on a component of interest by double clicking on it. For example, | |
| + | if we double click on the 'BookType' component, the editor will display the structure of the 'BookType' type as shown below. | ||
| + | To return to the 'top-level' view, press the back button | ||
| + | [[Image:Xsdeditor-toplevelbutton.JPG]] | ||
| + | at the top left of the editor, or right clicking within the editor and selecting 'Back to Schema' from the context menu.<BR> | ||
| − | + | <BR> | |
| + | [[Image:Xsdeditor-figure2.JPG]] | ||
| + | </P> | ||
| + | <BR> | ||
| − | + | <P>Editing the schema is achieved by invoking context menu actions on selected objects in the Graph view and | |
| + | using the properties view to modify the properties of the selected object. Go back to the top-level view and follow the steps below to create a new element | ||
| + | declaration and define its content.</P> | ||
| − | + | <OL> | |
| + | |||
| + | <LI>right click on the header of the 'Elements' section of the top level schema and choose 'Add Element'</LI> | ||
| + | |||
| + | <LI>use the properties view to change the name of the element to 'Paper' | ||
| + | [[Image:Xsdeditor-figure3.JPG]] | ||
| + | <BR> | ||
| + | <BR> | ||
| + | <BR> | ||
| + | </LI> | ||
| + | |||
| + | <LI> | ||
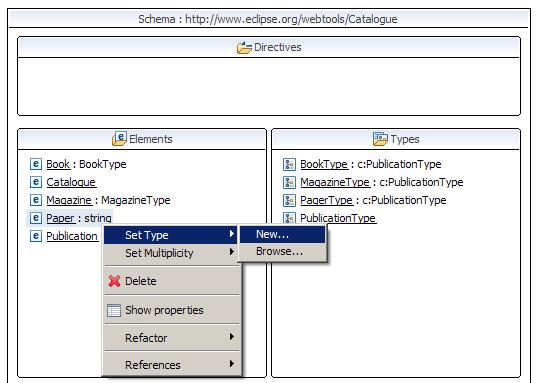
| − | + | right click on Paper and select 'Set Type'->'New..." to create a new type for the element.<BR> | |
| + | [[Image:Xsdeditor-figure4.JPG]] | ||
| + | <BR> | ||
| + | <BR> | ||
| + | <BR> | ||
| + | |||
| + | </LI> | ||
| + | |||
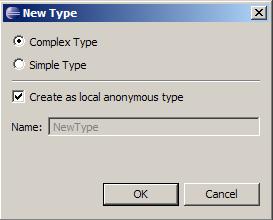
| + | <LI>select 'Complex Type' and check 'Create as anonymous type'. Click 'OK'.<BR> | ||
| + | |||
| + | [[Image:Xsdeditor-figure5.JPG]] | ||
| + | <BR> | ||
| + | <BR> | ||
| + | <BR> | ||
| + | </LI> | ||
| + | |||
| + | <LI> | ||
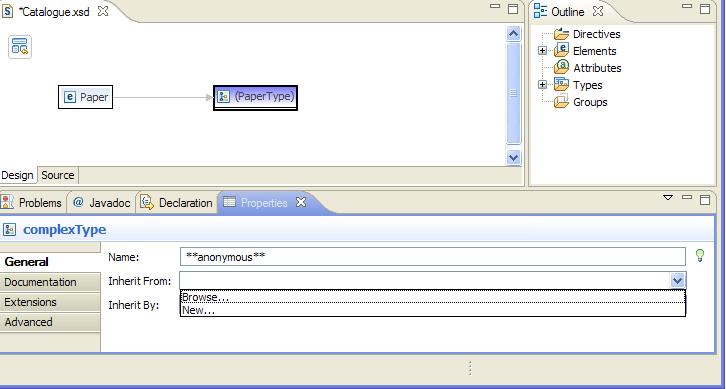
| + | Double click on 'Paper' to explore this element, note that 'PaperType' | ||
| + | is surrounded by parenthesis to indicate anonymity of this type. Click on this type to invoke the | ||
| + | properties sheet for its. <BR> | ||
| + | |||
| + | <BR> | ||
| + | |||
| + | </LI> | ||
| − | + | <LI> | |
| − | + | On the Properties sheet, select the 'Inherit From:' combo and then select 'Browse...' as shown below. | |
| − | + | ||
| + | [[Image:Xsdeditor-figure6.JPG]] | ||
| + | <BR> | ||
| + | <BR> | ||
| + | <BR> | ||
| + | </LI> | ||
| + | |||
| + | <LI> | ||
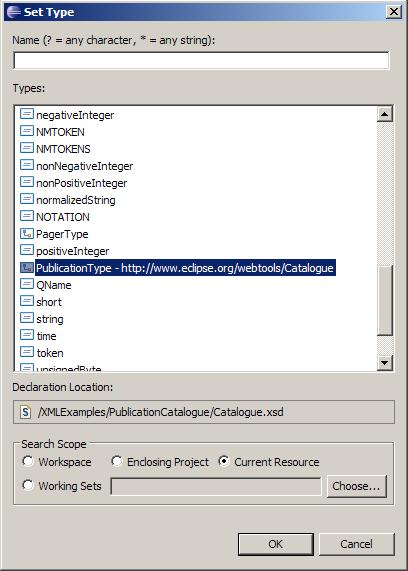
| + | The Set Type dialog will appear. Select 'PublicationType', and click OK.<BR> | ||
| + | |||
| + | [[Image:Xsdeditor-figure7.JPG]] | ||
| + | <BR> | ||
| + | <BR> | ||
| + | <BR> | ||
| + | </LI> | ||
| + | |||
| + | <LI> | ||
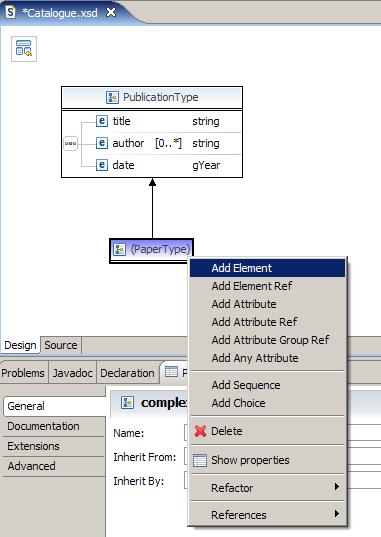
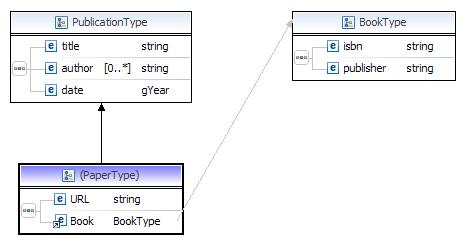
| + | Double click on Paper's type to edit its structure as shown below. Then right click on the '(PaperType)' and select 'Add Element'<BR> | ||
| + | |||
| + | [[Image:xsdeditor-figure8.JPG]] | ||
| + | <BR> | ||
| + | <BR> | ||
| + | <BR> | ||
| + | </LI> | ||
| + | |||
| + | <LI> | ||
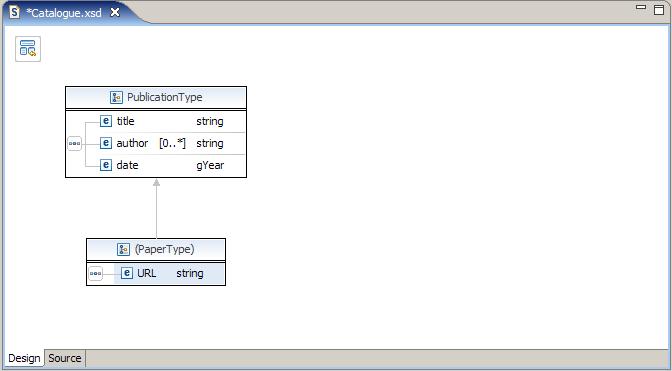
| + | Name the newly added element 'URL' because, say, the paper is found on the web.<BR> | ||
| + | |||
| + | [[Image:xsdeditor-figure9.JPG]] | ||
| + | <BR> | ||
| + | <BR> | ||
| + | <BR> | ||
| + | </LI> | ||
| + | |||
| + | <LI>The type of URL can be changed in the main editor panel by clicking on its current type 'string'. A combo box will be shown as below (For now we don't change the the type of URL yet) | ||
| + | <BR> | ||
| + | |||
| + | [[Image:xsdeditor-figure10.JPG]] | ||
| + | <BR> | ||
| + | <BR> | ||
| + | <BR> | ||
| + | </LI> | ||
| − | + | <LI>Right click on '(PaperType)', select 'Add Element Ref' to create element reference. Initally, the editor will pick a random element to be referred. In this case, it's 'Book' | |
| − | + | as shown below. | |
| − | + | <BR> | |
| − | + | ||
| + | [[Image:xsdeditor-figure11.JPG]] | ||
| + | <BR> | ||
| + | <BR> | ||
| + | <BR> | ||
| + | </LI> | ||
| − | + | <LI>We can change the element to be referred to in the main editor panel by click on 'Book'. A Combo will be shown as below. | |
| − | + | ||
| − | + | ||
| − | + | <BR> | |
| + | |||
| + | [[Image:xsdeditor-figure12.JPG]] | ||
| + | <BR> | ||
| + | <BR> | ||
| + | <BR> | ||
| + | </LI> | ||
| − | + | <LI> | |
| − | + | ||
| + | Now that we've finished editing the XML Schema you can save the file. | ||
| + | </LI> | ||
| + | |||
| + | </OL> | ||
| + | |||
| + | </td> | ||
| + | </tr> | ||
| + | |||
| + | </TABLE> | ||

