Notice: this Wiki will be going read only early in 2024 and edits will no longer be possible. Please see: https://gitlab.eclipse.org/eclipsefdn/helpdesk/-/wikis/Wiki-shutdown-plan for the plan.
Difference between revisions of "Using SHARP with ICE"
(→Generating SHARP Input Files) |
|||
| Line 195: | Line 195: | ||
[[File:ICE_SHARPInputFile.png|625px]] | [[File:ICE_SHARPInputFile.png|625px]] | ||
| + | |||
| + | == Launching SHARP Jobs == | ||
| + | |||
| + | The process for launching SHARP from ICE is not entirely different from creating an input file. ICE abstracts activities in such a way that they are not so different mechanically, even if the information exchanged is significantly different. | ||
| + | |||
| + | === Creating the Launcher === | ||
| + | |||
| + | To begin, create a ICE job by clicking on the green plus icon ('''<span style="color:green;">+</span>''') above the ''Item Selection'' column on the left-hand side. | ||
| + | |||
| + | [[File:ICE_CreateItem.png]] | ||
| + | |||
| + | In the list that appears, select ''SHARP Launcher''. Note that because of all of the different items supported, you may need to scroll down to the bottom of the list to find the ''SHARP Launcher''. | ||
| + | |||
| + | [[File:ICE_SHARPSelectLauncher.png]] | ||
| + | |||
| + | The main editor area of the workbench will change once you click ''OK''. A form will appear that requires some information about the job that you would like to run. | ||
| + | |||
| + | [[File:ICE_SHARPLauncherForm.png]] | ||
| + | |||
| + | === Setting the Input File & Hostname === | ||
| + | |||
| + | The first thing that you need to do is select the input file for SHARP, which is just the neutronics input file that you created in the last section. Start by clicking the box labelled ''Input File'' and select your SHARP neutronics <tt>*.inp</tt> file. Remember that the file you created in the previous section will be named <tt>sharp_neutronics_{num}.inp</tt> where <tt>{num}</tt> is the number of your model Item. In the case below, the model was number one and the input file is <tt>sharp_neutronics_1.inp</tt>. | ||
| + | |||
| + | [[File:ICE_SHARPChooseInput.png]] | ||
| + | |||
| + | The next step is selecting the machine on which ICE will launch SHARP. This can be either locally or remotely in general, although for now the SHARP Launcher only works locally and with a remote machine at ORNL. '''This will change after further testing.''' | ||
| + | |||
| + | [[File:ICE_SHARPChooseHost.png]] | ||
| + | |||
| + | === Launching the Job === | ||
| + | |||
| + | After selecting both the input file and the host machine, save the project by clicking the floppy disk icon (or ''Ctrl''+''S'' / ''⌘''+''S''). Use the drop-down menu in the upper right-hand corner to tell ICE to launch the SHARP job. Select the ''Launch the Job'' task from the drop-down menu and click the ''Go!'' button. | ||
| + | |||
| + | [[File:ICE_SHARPLaunchJob.png]] | ||
| + | |||
| + | ICE will then launch SHARP on your host machine. If you are trying to launch on a remote machine, you may also be asked for login credentials. | ||
Revision as of 11:33, 28 May 2015
This document is designed to outline the basic steps of setting up and using the SHARP plugins in ICE. There are three different tasks in ICE for the input generation, launching, and post-run analysis of SHARP data in ICE:
- SHARP Model Builder - Using selected parameters, generates a set of input files necessary to launch the SHARP suite of multi-physics simulation codes.
- SHARP Launcher - Initiates the SHARP codes to run on a local or remote system using the files generated from the SHARP Model Builder.
- Reactor Analyzer - Provides post-simulation analysis tools for "quantities of interest" from the SHARP output.
Installation & Configuration
Follow the instructions in the Getting ICE article to download and install the latest version of ICE on your system. Pay special attention to the installation of HDF5 since the SHARP plugins require that library.
Prerequisites
You should have SHARP installed on a machine, either locally or remotely.
Developer Instructions for SHARP Installations
If you are just using ICE to work with SHARP, you can skip this section.
In the future it will be possible to generate ICE I/O files directly from SHARP. If you are a developer or IT specialist who is configuring this capability, you need to install the ICE I/O libraries on the same machine where SHARP is installed. There is no easy way to do this since these are not distributed as a binary. You have to checkout the ICE trunk onto your machine and run the following instructions in your shell from the trunk directory:
mkdir nativeBuild
cd nativeBuild
cmake ..
make
make test
make install
If installing ICE I/O is too difficult, contact the ICE development team at ice-dev <at> eclipse.org.
Data Configuration
ICE requires a data file for SHARP that contains a specification of the PROTEUS input parameters; contact the ICE development team for a copy of this file. After downloading it, create a directory named SHARP in the /home/{user}/ICEFiles/default directory on your local system, and place the ICEProteusInput.xml file here before launching ICE. You may also need to create the /ICEFiles/default directory as well if you have never launched ICE before.
On Windows, the directory strutcure is: C:\Users\{user}\ICEFiles\default\SHARP
Creating SHARP Input
After ICE is properly installed and configured, the first step in utilizing the SHARP plugins is using ICE to generate the appropriate input files for the SHARP simulations.
Getting Started
This tutorial will generate the SHARP input files for the SAHEX1 simplified single hexagonal assembly problem, outlined in the SHARP Assembly-Scale Multiphysics Demonstration Simulations Report.
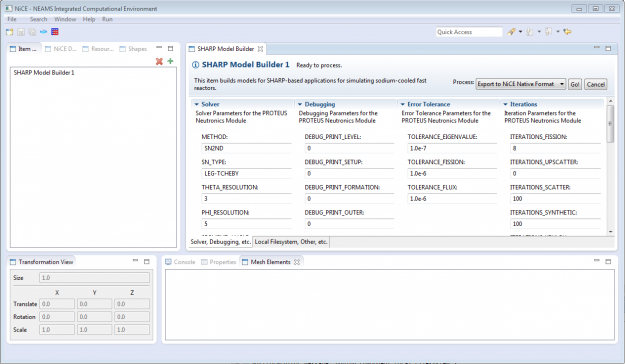
Once you have downloaded and placed the XML file in the correct directory, go ahead and launch ICE. Once ICE opens, we must first create a SHARP Model Builder Item. To do this, click the green plus icon (+) located at the top of the left-hand column.
This will launch a dialog prompting you to select a new Item to create. Find SHARP Model Builder in the Item list and select Finish.
Defining Input Parameters
A SHARP Model Builder containing a number of parameters will appear in the main workspace. These parameters are specific to the input required by PROTEUS and have a number of restrictions. The specifics of PROTEUS input are beyond the scope of this tutorial, but the table below provides a brief outline of the parameters used for the SAHEX1 problem. Since we prepared and placed a ICE-native input file in the /ICEFiles/default/SHARP/ directory ahead of time, you will find the parameters are already filled out with appropriate values.
| Parameter Name | Value | Description |
|---|---|---|
| METHOD | <name> | |
| SN_TYPE | <16 character name> | Specifies the type of SN cubature to use |
| THETA_RESOLUTION | <value> > 0 | Specifies the resolution of the SN cubature. Valid numbers for a hex reflected geometry are 1, 3, 5, 7, 9, ... |
| PHI_RESOLUTION | <value> > 0 | Only needed for product cubatures to select the resolution to apply in the radial plane. Valid numbers for a hex reflected geometry are 2, 5, 8, 11, 14, 17, 20, 23, ... |
| SEGMENT_ANGLE | <value> ≥ 0 | The number of segments to attempt in the angular approximation |
| DEBUG_PRINT_LEVEL | <integer> ≥ 0 | Specify level of debug printing for entire routine |
| DEBUG_PRINT_SETUP | <integer> ≥ 0 | Specify level of debug printing of setup related operations |
| DEBUG_PRINT_FORMATION | <value> in range [0, 10] | This controls the debug printing during the tracking/matrix formation |
| DEBUG_PRINT_OUTER | <value> in range [0, 10] | This controls the debug printing during the outer iterations |
| THERMAL_POWER | <value> | Specifies the normalization power in watts |
| SCATTERING_ORDER | <integer> ≥ 0 | Indicates the Legendre expansion order of the scattering kernel |
| EIGENVALUE_GUESS | <value> | The guess for the initial eigenvalue |
| USE_TCHEBYCHEV_ACCEL | YES, NO | Indicates whether Tchebychev acceleration is used |
| TOLERANCE_EIGENVALUE | <value> | The maximum relative error to allow on the eigenvalue |
| TOLERANCE_FISSION | <value> | The maximum relative error to allow on the outer iterations for the flux |
| TOLERANCE_FLUX | <value> | The maximum relative error to allow on the inner iterations for the flux |
| ITERATIONS_FISSION | <value> | The maximum number of outer iterations |
| ITERATIONS_UPSCATTER | <value> | The maximum number of Gauss-Siedel 'upscatter' iterations |
| ITERATIONS_SCATTER | <value> | The maximum number of inner iterations per outer iteration |
| ITERATIONS_SYNTHETIC | <value> | The maximum number of Krylov iterations to allow for the synthetic diffusion solver |
| ITERATIONS_KRYLOV | <value> | The maximum number of Krylov iterations to allow in the iterative flux solver |
| SOURCEFILE_MESH | <128 character pathname> | Specifies the UNIX file path to a spatial geometry mesh file |
| SOURCEFILE_XS | <128 character pathname> | Specifies the UNIX file path to a cross section data file |
| SOURCEFILE_MATERIAL | <128 character pathname> | Specifies the UNIX file path to a material mapping file |
| EXPORT_FLUX | YES, NO | Indicates whether the scalar flux is to be exported in addition to primary reaction rates |
| EXPORT_FILE | <128 character pathname> | Specifies the flux file name designation of a HDF5 or pmo file to export the solution |
| SN2ND_COMPUTES_DENSITY | YES, NO | |
| BASIC_BWO | YES, NO | |
| P_MULTIGRID_ORDER | <value> | |
| BC_ALIAS | <name name> | Used to change a boundary surface name to VOID or REFLECTIVE at runtime. |
Once you have entered all the required parameters, or have made any changes to the existing ones, save the SHARP Model Builder by clicking the floppy disk icon located in the toolbar at the top of the ICE workbench (or Ctrl+S / ⌘+S).
Generating SHARP Input Files
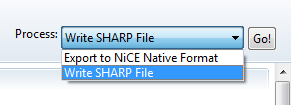
The last step involved is actually generating the SHARP-specific input files. To do so, simply find the Process drop-down menu located in the top right-hand corner of your SHARP Model Builder tab. Select Write SHARP File from the drop-down menu, and press the Go! button. Doing this will launch a script in the background to convert your input parameters into a file format that SHARP can understand. This operation should take no more than a second or two, and the message "Done!" should appear near the top of the SHARP Model Builder tab when it is complete.
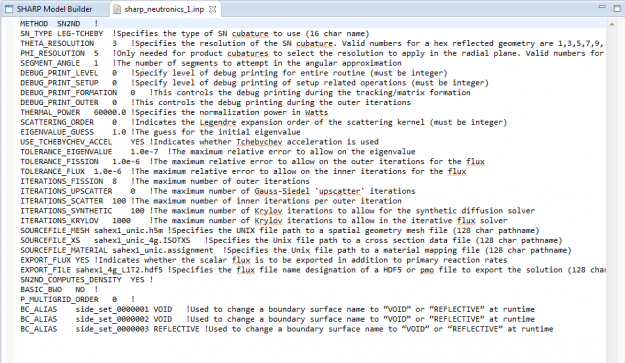
This file will be created in your /home/{user}/ICEFiles/default directory and will have the filename sharp_neutronics_{num}.inp, where {num} is your model builder Item number (i.e. SHARP Model Builder 1, SHARP Model Builder 2, etc.). It's important to note, that if you have a previously generated SHARP input file in your default directory, generating another input file with the same Item number will overwrite your existing file without warning.
This completes the SHARP input generation task. The file generated will be used in the next step by the SHARP Launcher to run SHARP remotely. However, if you'd like to review your input file before launching SHARP, you can do so by opening the File > Open File... menu in ICE, and navigating to the sharp_neutronics_{num}.inp file. Once opened, you will be able to review the input file generated.
Launching SHARP Jobs
The process for launching SHARP from ICE is not entirely different from creating an input file. ICE abstracts activities in such a way that they are not so different mechanically, even if the information exchanged is significantly different.
Creating the Launcher
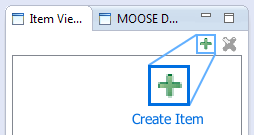
To begin, create a ICE job by clicking on the green plus icon (+) above the Item Selection column on the left-hand side.
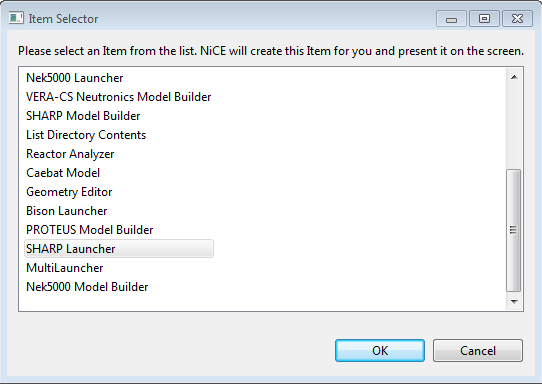
In the list that appears, select SHARP Launcher. Note that because of all of the different items supported, you may need to scroll down to the bottom of the list to find the SHARP Launcher.
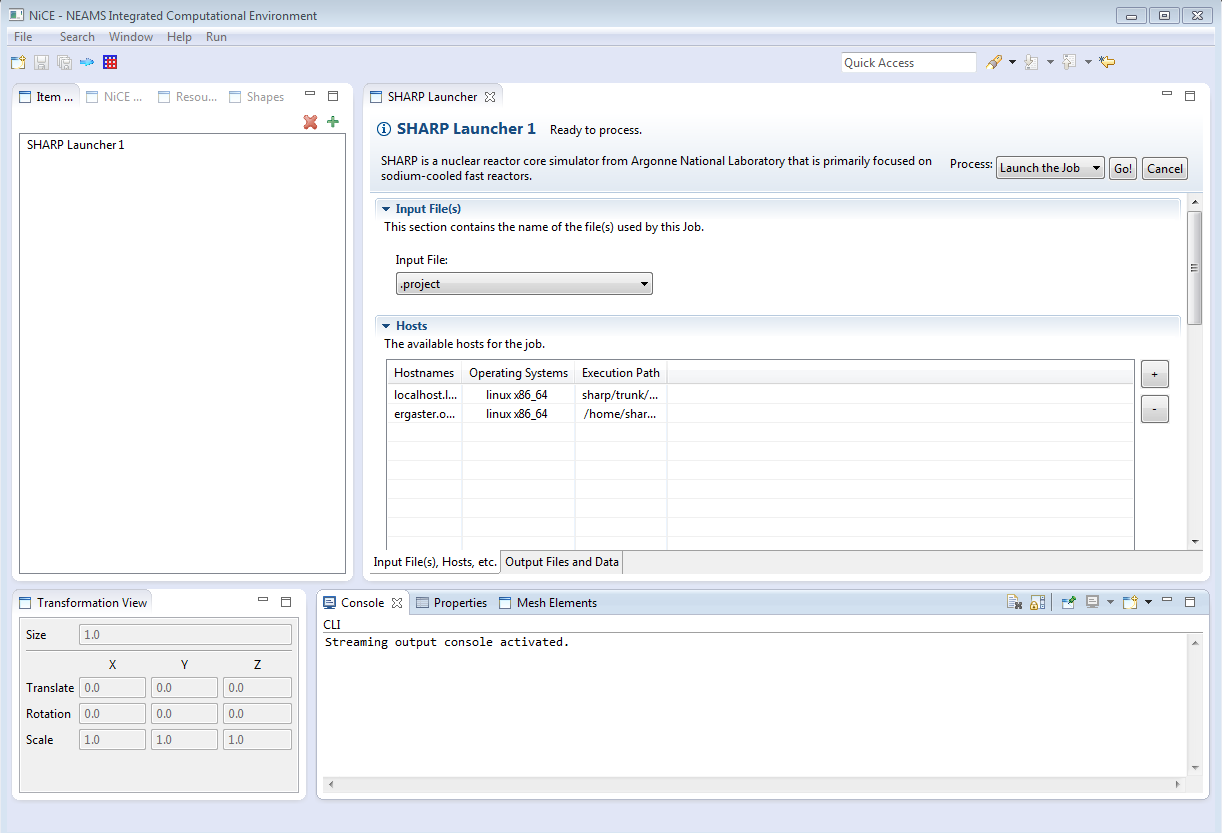
The main editor area of the workbench will change once you click OK. A form will appear that requires some information about the job that you would like to run.
Setting the Input File & Hostname
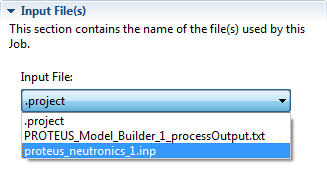
The first thing that you need to do is select the input file for SHARP, which is just the neutronics input file that you created in the last section. Start by clicking the box labelled Input File and select your SHARP neutronics *.inp file. Remember that the file you created in the previous section will be named sharp_neutronics_{num}.inp where {num} is the number of your model Item. In the case below, the model was number one and the input file is sharp_neutronics_1.inp.
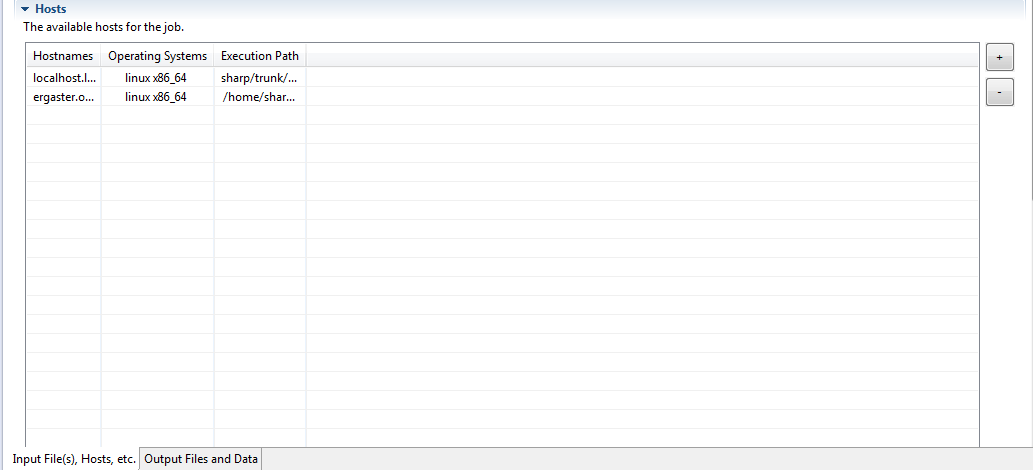
The next step is selecting the machine on which ICE will launch SHARP. This can be either locally or remotely in general, although for now the SHARP Launcher only works locally and with a remote machine at ORNL. This will change after further testing.
Launching the Job
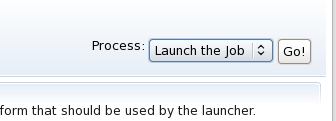
After selecting both the input file and the host machine, save the project by clicking the floppy disk icon (or Ctrl+S / ⌘+S). Use the drop-down menu in the upper right-hand corner to tell ICE to launch the SHARP job. Select the Launch the Job task from the drop-down menu and click the Go! button.
ICE will then launch SHARP on your host machine. If you are trying to launch on a remote machine, you may also be asked for login credentials.

