Notice: this Wiki will be going read only early in 2024 and edits will no longer be possible. Please see: https://gitlab.eclipse.org/eclipsefdn/helpdesk/-/wikis/Wiki-shutdown-plan for the plan.
Difference between revisions of "Template:Riena/Installing the Target Platform"
| Line 8: | Line 8: | ||
[[Image:target_platform_editor_RienaSetup.png]] | [[Image:target_platform_editor_RienaSetup.png]] | ||
| − | '''''Note: the above screenshot might NOT show the correct version for the individual components. i.e. you might see 6.1. instead of 5.0 | + | '''''Note: the above screenshot might NOT show the correct version for the individual components. i.e. you might see 6.1. instead of 5.0 |
''''' | ''''' | ||
== Next Step == | == Next Step == | ||
*[[Riena/Examples|Run the Examples]] | *[[Riena/Examples|Run the Examples]] | ||
Revision as of 10:22, 27 January 2015
Installing the Target Platform based on {{{2}}}
For a Riena-based application to compile, a certain set of bundles (plug-ins) must be available at compile time. This set of bundles is known as Target Platform. Follow these steps to set up the target platform for Riena applications.
Manually set the Target Platform
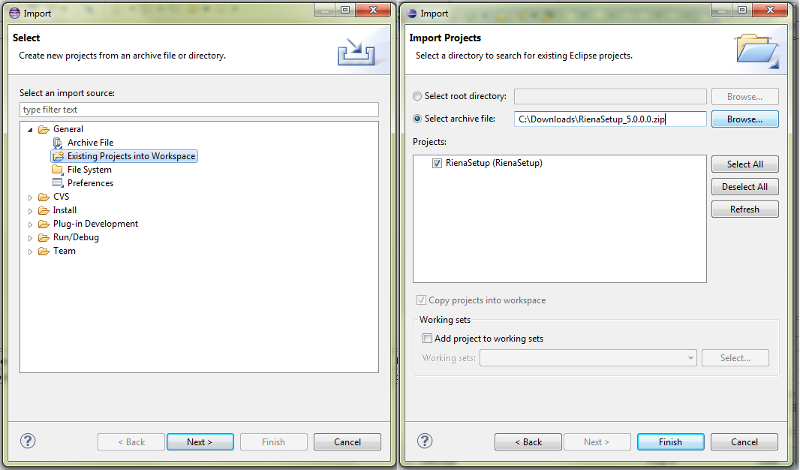
- Download the RienaSetup project and import it into your Eclipse workspace.
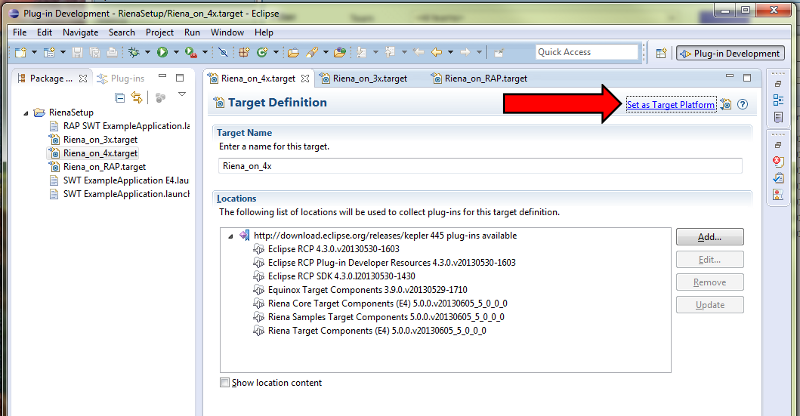
- In the imported project, open the file Riena Based on Eclipse {{{1}}}.target and set the target platform.
Note: the above screenshot might NOT show the correct version for the individual components. i.e. you might see 6.1. instead of 5.0


