Notice: this Wiki will be going read only early in 2024 and edits will no longer be possible. Please see: https://gitlab.eclipse.org/eclipsefdn/helpdesk/-/wikis/Wiki-shutdown-plan for the plan.
Stardust/Knowledge Base/Customization/Portal/Custom Launch Panel Using a Plugin
Contents
Extending the Workflow Perspective with a custom launch panel using a portal plugin
Project Setup
Use a project of type Utility Project and link it into your RAD environment:

In this example the project was named exampleCustom.
You can use the standard project structure created by eclipse or change it into a maven folder structure. Add the utility project as a J2EE module dependency to your dynamic web project. This way it will automatically be built and included as a jar in the web application's WEB-INF\lib folder.

Create the following folder structure under the project’s source folder:
META-INF
MEAT-INF\spring  (for spring configuration files)
MEAT-INF\xhtml\yourPluginName (for markup files used by your plugin)
Then create a file yourPluginFileName.portal-plugin. The file contents should be the relative path to your plugin’s markup folder starting from the src folder:
/META-INF/xhtml/yourPluginName/
Any xhtml file placed into this folder can later be referenced and accessed via
/plugins/yourPluginFileName/markupFileName.xhtml

Spring Configuration
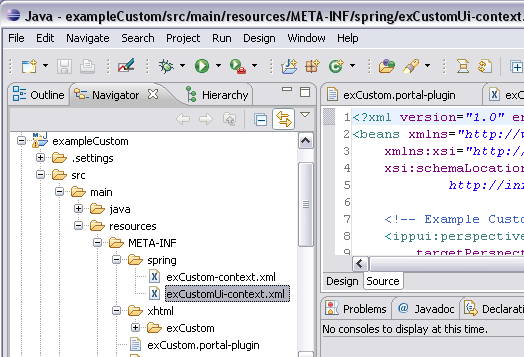
Create two spring configuration files:
META-INF\spring\yourPluginName-context.xml
META-INF\spring\yourPluginNameUi-context.xml
 The backing beans for the custom pages will be decaled in yourPuginName-context.xml.

UI extensions to the Infinity Process Platform portal will be declared in yourPluginNameUi-context.xml. By default the contextConfigLocation parameters in the IPP web application is configured to include META-INF/spring/*-context.xml. Therefore these context files will be added to the spring context automatically and no configuration changes should be required.
JSF markup, backing beans and message bundle
The pages added to the web application via the plugin are be place in META-INF/xhtml/pluginName and its subfolders. Backing beans used by those pages should be defined in META-INF\spring\yourPluginName-context.xml. The corresponding source code can be stored as usual under the src folder (eclipse structure: under src, maven structure: under src/main/java). A launch panel has to extend com.infinity.bpm.ui.web.processportal.launchpad.AbstractLaunchPanel. Its constructor has to invoke the super constructor providing a unique name for the bean which can be used as reference when the ui extension is declared:
public ExampleLaunchPanelBean() {super("exCustomPanelName");}
If the JSF pages use a message bundle to provide internationalized texts, then the corresponding bean can also be declared in META-INF\spring\yourPluginName-context.xml and the properties files can be placed in the src folder. A message bundle that should be used in the portal has to implement com.infinity.bpm.portal.common.util.AbstractMessageBean.
Regular iceFaces tags can be used inside a launch panel’s markup. To include a link opening a view use:
<ice:commandLink action="#{ippPortalApp.openView}" styleClass="action-link">
    <f:param name="viewId" value="exCustomView" />
    <f:param name="msgBean" value="#{exCustomMessages}" />
    <ice:outputText value="#{exCustomPanel.messages['exampleViewLabel']}" escape="false" styleClass="action-link" />
</ice:commandLink>
The bean ippPortalApp is provided by the portal. The viewed parameter specifies which view should be opened. It has to match a view which has been declared in META-INF\spring\yourPluginNameUi-context.xml as described below or a preexisting view id.
The msgBean parameter needs to be used if you want to pass a message bundle bean reference to the view scope. A text from this message bundle can then be included in the view markup using:
<ice:outputText id="exampleId" value="#{msgs['key.for.text']}" />
Linking Extensions into the Portal
The portal extensions provided by the plugin are configured in META-INF\spring\yourPluginNameUi-context.xml. There are several ippui tags which can be used to add or extend different parts of the portal. The following example extends the existing workflow perspective. It adds a custom launch panel and registers a custom view which will be accessible via this launch panel.
<ippui:perspectiveExtension targetPerspective="WorkflowExecution" id="customPerspective" messageBundles="exCustomBundle">
  <ippui:launchpadExtension>
    <ippui:launchPanel name="exCustomPanelName" include="/plugins/exCustom/launchpad/exCustomPanel.xhtml"/>
  </ippui:launchpadExtension>

  <ippui:viewsExtension>
    <ippui:view name="exCustomView" include="/plugins/exCustom/view/exCustomView.xhtml"/>
  </ippui:viewsExtension>
</ippui:perspectiveExtension>
The ippui:perspectiveExtension tag is used to define an extension to a preexisting perspective. Its targetPerspective attribute defines which perspective is extended. In this case we are extending the WorkflowExecution perspective. The id attribute defines a unique id for the extension. The messageBundles attribute defines which message bundle (property files for internationalization) should be used to look up the key which are referenced in extension’s JSF pages.
Theippui:launchpadExtension tag defines an extension containing additional launch panels. Within this tag launch panels can be added using theippui:launchPanel tag. A launchPanel needs to specify the attributes name and include. The name attribute has to match the name provided as constructor parameter in the backing bean (see above) which should be linked to this ui element. The include attribute has to specify the location of the JSF page which defines the actual launch panel contents.
Additional views that will be available via the launch panel need to be declared as ippui:viewExtensions. Within this tag view can be declared using the ippui:view tag. Again a unique view name has to be declared in the name attribute and the include attribute should point to the JSF page whih should be rendered as contents of the view.
Other extensions, for instance custom perspectives or view-specific toolbars are described in the product documentation:
Developer Handbooks> Programming Guide > Using the Portal Framework