Notice: this Wiki will be going read only early in 2024 and edits will no longer be possible. Please see: https://gitlab.eclipse.org/eclipsefdn/helpdesk/-/wikis/Wiki-shutdown-plan for the plan.
Scout/Tutorial/3.10/UpdateWithF2
The Scout documentation has been moved to https://eclipsescout.github.io/. F2 is a simple update manager created by BSI. In this tutorial you learn how to update a scout client application with f2.
Contents
Prerequisites
We assume that you already have The Scout documentation has been moved to https://eclipsescout.github.io/.. You also need to create a new Scout application that you will be updating with this tutorial. Create a new Scout Project called org.eclipse.scout.helloworld.
Add F2 Support
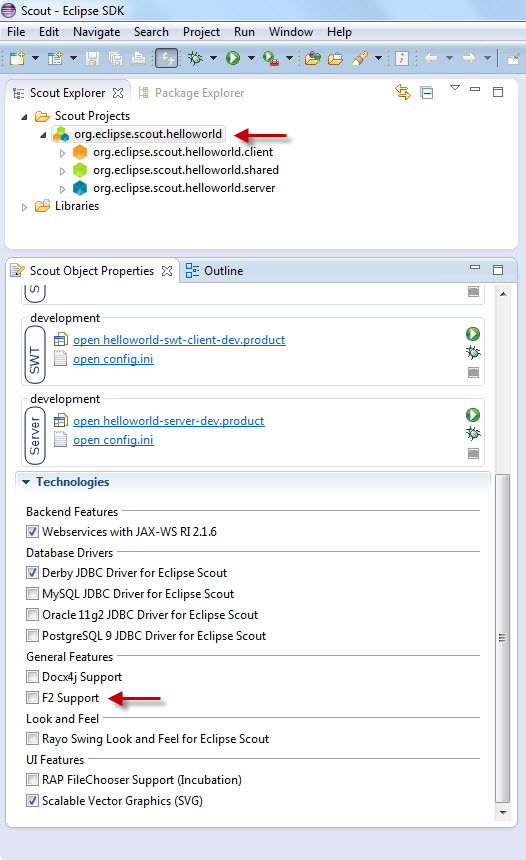
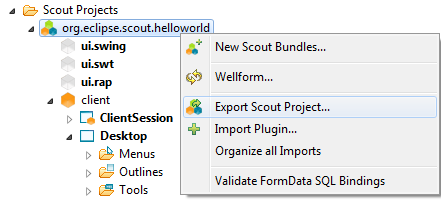
Adding F2 Support can be done by simply selecting the root node of the project in the Scout Explorer and checking the technology checkbox F2 Support:
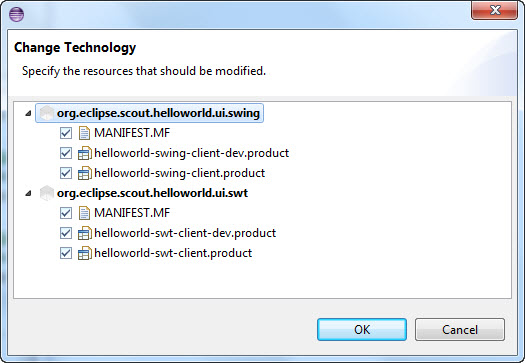
In the Change Technology Dialog check all checkboxes to add f2 as a dependency to your Manifest files and include it in the client product files. Accept the license, wait until the update is installed and restart eclipse when asked.
Add Automatic Update to Client
Calling F2 during Client Startup
Now you can add the code to update your client application automatically after startup, if an update is needed. You can do that by simply calling F2Updater.update with update strategy DoUpdate and a new EclipseUserAgent. UpdateResult.UpdateSuccessful indicates that there was actually something updated and the update was successful. In development mode updating the application does not make sense. Therefore make sure there is never an update done in development mode.
Putting it all together leads to the following changes that need to be done in org.eclipse.scout.helloworld.ui.swing.SwingApplication.startSecure:
//...
private Object startSecure(IApplicationContext context) throws Exception {
  try {
    NetActivator.install();
  }
  catch (Throwable t) {
    // no net handler found
    logger.warn("NetActivator is not available", t);
  }
  if (Platform.inDevelopmentMode()) {
    if (logger.isInfoEnabled()) {
      logger.info("No F2 update in development mode");
    }
  }
  else {
    // use f2 to update application
    UpdateResult result = F2Updater.update(UpdateStrategy.DoUpdate, null, new EclipseUserAgent(getProgressMonitor(), null));
    if (result == UpdateResult.UpdateSuccessful) {
      return EXIT_RESTART;
    }
  }
  return super.start(context);
}
//...
Update your SwingApplication accordingly.
The update in for SWT in org.eclipse.scout.helloworld.ui.swt.application.Application is quite similar:
//...
import org.eclipse.core.runtime.Platform;
//...

public class Application implements IApplication {
  private static IScoutLogger logger = ScoutLogManager.getLogger(Application.class);

  //...
  public Integer startSecure(final IApplicationContext context) throws Exception {
    Display display = PlatformUI.createDisplay();
    NetActivator.install();
    if (Platform.inDevelopmentMode()) {
      if (logger.isInfoEnabled()) {
        logger.info("No F2 update in development mode");
      }
    }
    else {
      // use f2 to update application
      UpdateResult result = F2Updater.update(UpdateStrategy.DoUpdate, null, new EclipseUserAgent(new NullProgressMonitor(), null));
      if (result == UpdateResult.UpdateSuccessful) {
        return EXIT_RESTART;
      }
    }
    if (PlatformUI.createAndRunWorkbench(display, new ApplicationWorkbenchAdvisor()) == PlatformUI.RETURN_RESTART) {
      return EXIT_RESTART;
    }
    return EXIT_OK;
  }
  //...
}
Configuration in config.ini
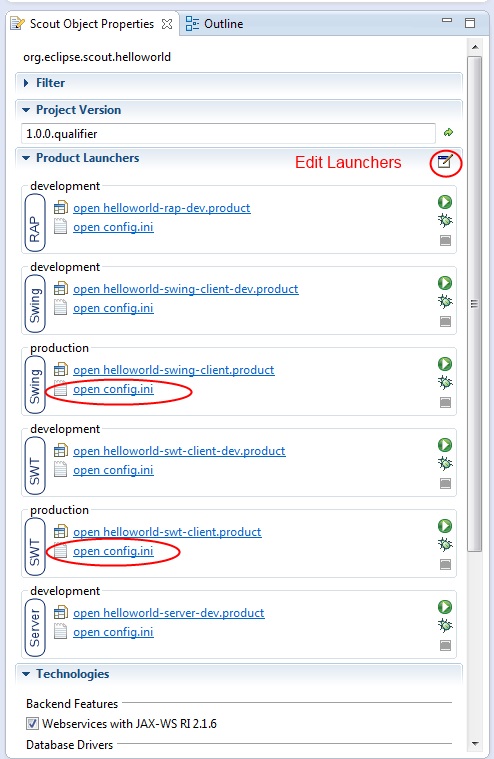
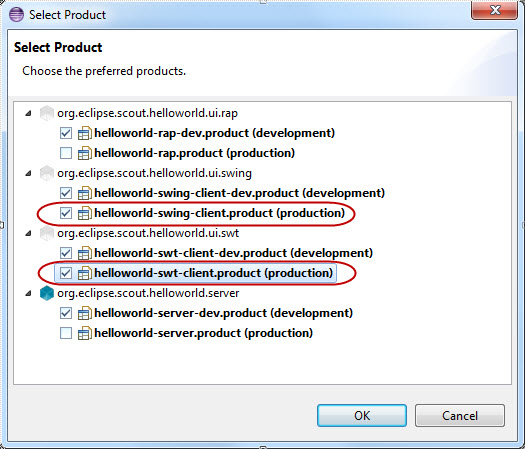
There are a number of properties that can be set for f2. At least the server URL needs to be set. Open the config.ini for swt production: In the Scout Explorer Edit the Launcher Content and add the production products.
Now we can Open the config.ini swt and set the URL to the location of the updatesite. In our case we will use localhost with port 8080. The name for our application is helloworld.
f2.url=http://localhost:8080/updatesite
f2.name=helloworld
Initial Installation
The initial distribution of the client is not done by f2. By default the client application is available for download on the deployed server. Therefore you need to deploy your application to Tomcat first.
Download the client from the deployed server: http://localhost:8080/helloworld_server/ and install it by extracting it. We use C:\Program Files\helloworld as installation folder in this tutorial. Make sure that helloworld.exe is located under C:\Program Files\helloworld\helloworld.exe.
Add the JRE to the client, such that is also can be updated. Copy the jre folder to C:\Program Files\helloworld\jre. And update helloworld.ini to include the relative path to the jre:
-vm
jre\bin\client\jvm.dll
-vmargs
-Xms64m
-Xmx512m
-XX:MaxPermSize=256m
Start the client to see if the initial installation is correct.
Creating the F2 Updatesite
In order to update a client you need to create an updatesite, which contains the information about what has to be updated. The updatesite needs to be accessed over an URL. Therefore the easiest way is usually to deploy it to your servlet container (e.g. tomcat) where your server is located as a separate web application.
Prepare Updatesite Web Application
For simplicity we only describe the win32 case here.
Now we create an initial upatesite for the version 1.0.0. For that purpose we copy the installec helloworld client (with the included jre), rename it to helloworld_1.0.0 and zip it such that the folder helloworld_1.0.0 is included in the zip file. On Windows just right click helloworld_1.0.0 and choose Send to->Compressed (zipped) folder.
In the tomcat webapps folder create a new folder called updatesite. Copy the following files to the updatesite:
- The exported client zip "helloworld_1.0.0.zip" to webapps/updatesite/win32/helloworld_1.0.0.zip
- The f2 plugin (/org.eclipse.update.f2_[version].jar) from the plugins folder in your eclipse installation to webapps/updatesite/WEB-INF/lib/org.eclipse.update.f2_[version].jar.
You end up with the following file structure:
/webapps/updatesite/WEB-INF/lib/org.eclipse.update.f2_1.0.0.20130702-0803.jar
/webapps/updatesite/win32/helloworld_1.0.0.zip
Generate Updatesite
Now the f2 updatesite can be created using the f2 jar. We do this using the command line. First change to the tomcat webapps folder, e.g.
cd C:\tomcat-7\webapps
Then call the f2 jar. Replace [version] with the actual f2 version (e.g. 1.0.0.20130702-0803).
java -jar updatesite/WEB-INF/lib/org.eclipse.update.f2_[version].jar -create -site updatesite -os win32 -name helloworld -verbose
Now the initial updatesite is created ready for use with the following files:
updatesite\win32\helloworld_1.0.0.zip  //initial application version)
updatesite\win32\f2.txt          //contains all zip and delta files names with corresponding length, crc and hash (initially only for helloworld_1.0.0.zip)
Test Client Update
When you restart the client the f2 updatesite is contacted and all the necessary information for later updates is downloaded. Windows User Account Control is automatically enabled by default, if the platform is win32 and the client zip contains the f2 plugin jar.
Updating Client Application and Distributing Changes
Change Client Application
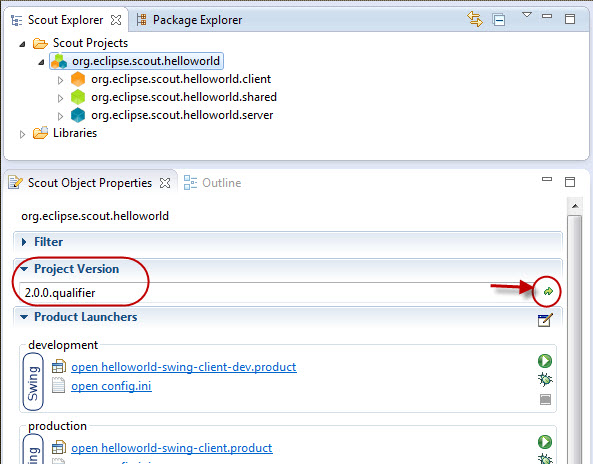
In order to see that the update really works we first need to change the client application. We increase the project version for the helloworld project: Select the project root node in the scout explorer and change the project version to 2.0.0.
This will change the Bundle-Versions of all helloworld plugins. F2 does not require the bundle version to be changed, but we consider it is best practice for an update.
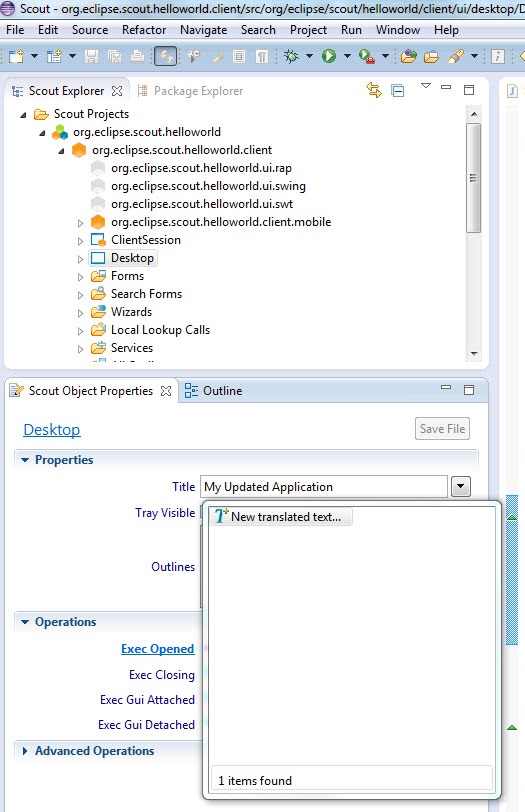
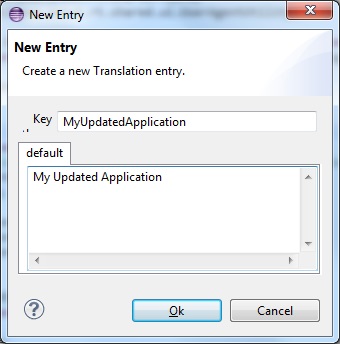
Furthermore, we change the application title in the new version: Open the scout explorer, select the desktop and change the title.
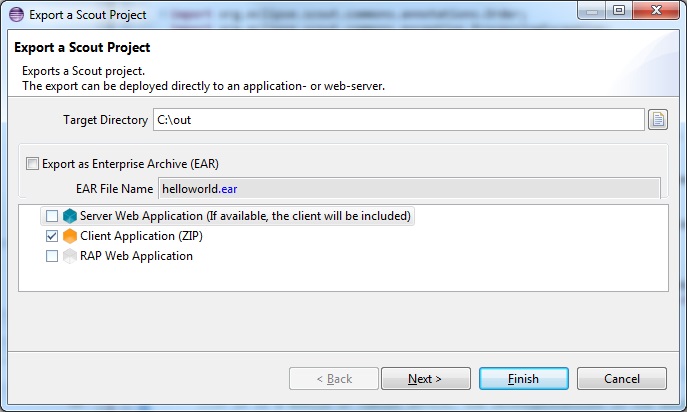
Now you can reexport the client to a temporary location.
Extact an rename it to helloworld_2.0.0. Add the JRE and update helloworld.ini as described in chapter Initial_Installation and zip helloworld_2.0.0.zip.
Rebuild Updatesite
Copy helloworld_2.0.0.zip to the updatesite folder: webapps\updatesite\win32\helloworld_2.0.0.zip and regenerate the updatesite as described in Generate_Updatesite .
From the console output you see that the zip files are verified. The delta between the two versions is created and a test is executed to simulate the actual update.
C:\tomcat-7\webapps>java -jar updatesite/WEB-INF/lib/org.eclipse.update.f2_1.0.0.20130702-0803.jar -create -site updatesite -os win32 -name helloworld -verbose
Arguments:
 verbose
 create
 site=updatesite
 os=win32
 name=helloworld
INFO: verifying content of helloworld_1.0.0.zip
INFO: verifying content of helloworld_2.0.0.zip
INFO:  adding helloworld.exe
INFO:  adding helloworld.ini
INFO:  adding helloworld_2.0.0/update.exe
INFO:  adding helloworld_2.0.0/update.ini
INFO: helloworld_2.0.0.zip is not matching size/crc/content-hash of f2.txt. Invalidating it.
INFO: Create delta from helloworld_1.0.0 to helloworld_2.0.0
INFO: TEST: verify delta delta$helloworld_1.0.0$helloworld_2.0.0
INFO: TEST: simulating update from helloworld_1.0.0 to test-update-helloworld_1.0.0-helloworld_2.0.0
INFO: TEST: comparing zip hashes
INFO: TEST: OK
INFO: Create f2.txt
INFO: Done
Now the updatesite has the following structure:
updatesite\win32\helloworld_1.0.0.zip                         //initial application version
updatesite\win32\helloworld_2.0.0.zip                         //version 2.0.0
updatesite\win32\delta$helloworld_1.0.0$helloworld_2.0.0.zip  //delta between 1.0.0 and 2.0.0
updatesite\win32\f2.txt                                       //contains all zip and delta files names with corresponding length, crc and hash
Restart Application
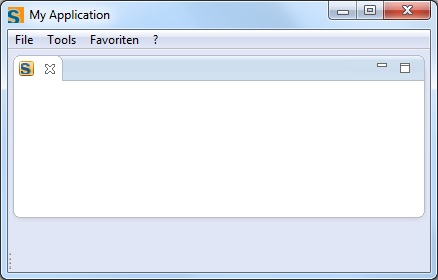
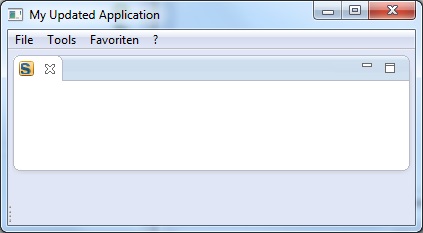
Restart the client. Now it should be updated and show the new application title.
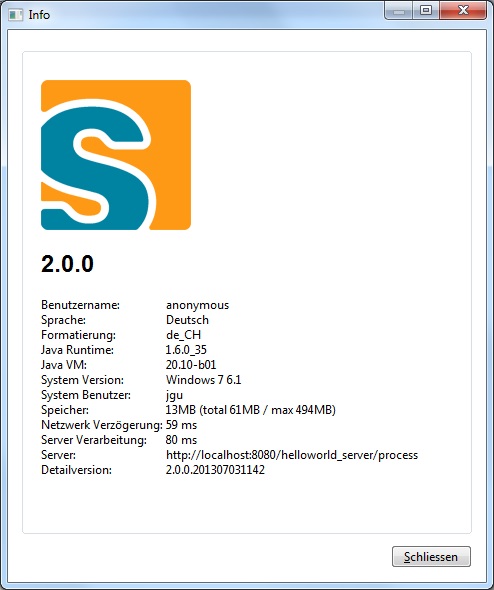
In the Menu ? the Version is displayed.

