Notice: this Wiki will be going read only early in 2024 and edits will no longer be possible. Please see: https://gitlab.eclipse.org/eclipsefdn/helpdesk/-/wikis/Wiki-shutdown-plan for the plan.
STEM Installation Guide
STEM Installation Guide
STEM Video on YouTubeTM
The following url contains a full length tutorial on STEM. http://www.youtube.com/watch?v=LfiibQX4IFE We are in the process of creating versions in several different languages.
Installing Java™ JVM
STEM requires at least Java Version 1.6. IBMers should obtain the IBM version of Java 1.6. Others can use either IBM's Java 1.6 or the Sun Java 1.6 [[1]].
Mac OS X Users can use the JVM included with the operating system.
Installing/Running the STEM application
You can run STEM in two ways: as a user or as a developer.
As a user, you can run a standalone version of STEM as a modeling and simulation tool. If you run Windows, Linux or Mac and have Java 6 installed, you can download the STEM application and use it as a standalone application. To download STEM, use this link STEM downloads We recommend you get the latest version of the code available under "Integration Weekly Builds"
As a developer, you can use any platform supported by Eclipse. You will also need to install Java and download the Eclipse development tools and the STEM source code. Follow the instructions here: Getting the STEM source
Installing Additional Plugins (STEM Add-Ons)
STEM uses the Automated Eclipse Updates to make it easier for users to add additional features to STEM. Today, one feature you may want to add is the Earth Science data plugin that contains global climate data for the years 2001-2010. This plugin is required if you want to use the Anopheles Mosquito model for example.
To get the plugin: 1. Launch STEM 2. On the Menu Bar enter >Help>Install New Features 3. Select the STEM update site (see figure below) and chose the plugins you wish to add (or select them bundle with data from all years).
Running STEM as a standalone application
If you want to first run STEM as an application, we provide a standalone version of STEM that requires only that you have Java 6 or higher installed.
You can get the file by going to this page and downloading the latest integration weekly build for your environment.
Once you have downloaded the zip file (Warning: the download is a very large file and will take awhile to download.), you will have to "unzip" the file into your favorite directory.
This is a self-contained stand-alone version of STEM that is launched by double-clicking on the "STEM.exe" executable file in the root directory of the expanded archive (windows). You'll need to have Java 1.6 installed for it to run, but if you do and it's on the path, you should be greeted by the STEM "splash screen" while it starts up.
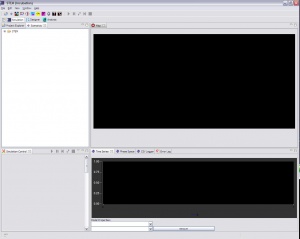
The Eclipse application at this point shows the STEM Simulation Perspective.
STEM Simulation screen.

- The Help->Help Context menubar selection has extensive information on running STEM.
- The following "views" are shown in the STEM Simulation window.
- Map
Canvas that will show the image of the geographic area where the simulation is being run. - Simulation Control view
Panel that both describes the status of the simulation and provides buttons to start and stop the simulation. - Scenarios
The Scenarios window is use to select a prebuilt scenario for a simulation. By selecting leaves in the tree, you can discover an existing scenario for running a simulation. Select the scenario of choice and click the Run or Advance icon on the toolbar. - ErrorLog
This log will contain information about any errors that occur while running the application. If things don't work as you expect, check this view to see if there are any errors or exceptions that have occurred. Note that the ErrorLog on the secondary Eclipse will show errors and exceptions that occur in the application being tested but stdout/stderr will be sent to the Console of the Primary Eclipse. Thus, if an exception is caught by the application and not passed to the built-in log facility, it will only show up on the Primary console. Likewise, if an exception is not caught and sent to stdout/stderr, then it will show up only on the secondary ErrorLog. Confusing!
- Map
There are also secondary application that may be selected from the Windows menu.
- Select windows
- Select GoogleEarth View
This is an interface between STEM and the GoogleEarth application.
- Select GoogleEarth View
The basic idea of the GoogleEarth Interface is to allow the information about the geographic spread of diseases to be reflected on the GoogleEarth Web map. Detailed instructions for using the GoogleEarth Interface are included below. [2]
Setting up the STEM Development Environment in Eclipse
If you might contribute to STEM development or if you want to always have the most recent code, then you will need to install Eclipse.
Go to STEM Eclipse Setup
Preparing to Run STEM as a STEM Developer
- See page on prerequisites for Setting up a STEM Development Environment

