Notice: this Wiki will be going read only early in 2024 and edits will no longer be possible. Please see: https://gitlab.eclipse.org/eclipsefdn/helpdesk/-/wikis/Wiki-shutdown-plan for the plan.
Difference between revisions of "STEM Installation Guide"
(→Running STEM as a standalone application) |
|||
| Line 80: | Line 80: | ||
The basic idea of the GoogleEarth Interface is to allow the information about the geographic spread of diseases to be reflected on the GoogleEarth Web map. Detailed instructions for using the GoogleEarth Interface are included below. | The basic idea of the GoogleEarth Interface is to allow the information about the geographic spread of diseases to be reflected on the GoogleEarth Web map. Detailed instructions for using the GoogleEarth Interface are included below. | ||
[http://wiki.eclipse.org/index.php/Welcome_STEM_Developers#STEM_-_GoogleEarth_Interface] | [http://wiki.eclipse.org/index.php/Welcome_STEM_Developers#STEM_-_GoogleEarth_Interface] | ||
| + | |||
| + | == Updating STEM == | ||
| + | Starting with version 1.4, you can use the update mechanism built into STEM to perform upgrades without re-downloading the full installation bundle. Most of the time, this means you don't have to re-download the large denominator data sets packaged in STEM or have to export and import your scenarios. | ||
| + | |||
| + | # Verify the computer is connected to a network and launch '''STEM''' | ||
| + | #: '''If STEM is already open, save all edited files and stop any running simulations''' | ||
| + | # Open the '''Help''' Menu and choose '''Check for Updates''' | ||
| + | #: [[Image:STEM-Update-CheckForUpdatesMenu.png|200px]] | ||
| + | # ''Wait while STEM contacts the updates server and checks for new versions'' | ||
| + | #* If no updates are available, a message saying '''No updates were found''' will appear. Click '''OK''' to return to STEM. | ||
| + | #* If an update is available, the '''Available Updates''' wizard will appear | ||
| + | # On the '''Available Updates''' page, verify '''STEM''' is selected, and click '''Next''' | ||
| + | #: [[Image:STEM-Update-AvailableUpdates.png|400px]] | ||
| + | # Verify the list of items to be installed is correct and click '''Next''' | ||
| + | # Review the the licenses of the software being installed to verify you still accept | ||
| + | #: If you accept the terms, select ''' I Accept the terms of the license agreements''' and click '''Finish''' | ||
| + | #: If you do not accept the terms, click '''Cancel''' | ||
| + | # ''Wait while STEM downloads and installs the updates'' | ||
| + | # If prompted with a security warning about installing unsigned software, click '''OK''' | ||
| + | # When prompted to apply changes, verify all open files are saved and click '''Restart Now''' | ||
| + | # STEM should automatically restart. If not, relaunch it manually. | ||
| + | |||
| + | === Checking the Version of STEM Installed === | ||
| + | After updating STEM, the version displayed on the splash screen at startup may not change to reflect the new version. To verify STEM updated successfully, check the STEM Installation Details. | ||
| + | # Open the '''Help''' menu and select '''About STEM''' | ||
| + | # Click '''Installation Details''' | ||
| + | # In the '''STEM Installation Details''' dialog, verify the installed version for '''STEM''' | ||
| + | #: [[Image:STEM-Update-InstalledDetailsVersion.png]] | ||
| + | |||
| + | === Updating to Latest Integration or Milestone Build === | ||
| + | By default, the STEM update feature only checks for the latest, official release approved by the Eclipse Foundation. However, users will often want to take advantage of new features published in weekly integration and/or periodic milestone and release candidate builds. You can easily configure STEM to download and install these updates. | ||
| + | |||
| + | # Launch '''STEM''' | ||
| + | # Open the '''Window''' menu and select '''Preferences''' | ||
| + | #: '' On Mac OS X, '''Preferences''' is under the '''STEM''' menu '' | ||
| + | # In the '''Preferences''' window, expand '''Install/Update''' and select '''Available Software Sites''' | ||
| + | # Under '''Available Software Sites''', Click '''Add''' | ||
| + | # In the '''Add Site''' dialog, enter the appropriate '''Name''' and '''Location''' | ||
| + | #: For weekly integration builds: | ||
| + | #:* '''Name''': STEM Integration Builds | ||
| + | #:* '''Location:''' <nowiki>http://download.eclipse.org/stem/update-site/integration/</nowiki> | ||
| + | #: For periodic milestone and release candidate builds: | ||
| + | #:* '''Name''': STEM Stable Builds | ||
| + | #:* '''Location:''' <nowiki>http://download.eclipse.org/stem/update-site/stable/</nowiki> | ||
| + | # Click '''OK''' to add the site | ||
| + | # Click '''OK''' to save '''Preferences''' and return to '''STEM''' | ||
| + | # Follow the steps in the [[#Updating_STEM|previous section]] to update '''STEM''' | ||
| + | # ''To disable checking for non-release versions, disable or remove the sites added to the '''Available Software Sites''' list '' | ||
| + | |||
== Setting up the STEM Development Environment in Eclipse == | == Setting up the STEM Development Environment in Eclipse == | ||
Revision as of 15:30, 9 November 2012
STEM Installation Guide
STEM Video on YouTubeTM
The following url contains a full length tutorial on STEM. http://www.youtube.com/watch?v=LfiibQX4IFE We are in the process of creating versions in several different languages.
Installing Java™ JVM
STEM requires at least Java Version 1.6. IBMers should obtain the IBM version of Java 1.6. Others can use either IBM's Java 1.6 or the Sun Java 1.6 [[1]].
Mac OS X Users can use the JVM included with the operating system.
Installing/Running the STEM Application
You can run STEM in two ways: as a user or as a developer.
As a user, you can run a standalone version of STEM as a modeling and simulation tool. If you run Windows, Linux or Mac and have Java 6 installed, you can download the STEM application and use it as a standalone application. To download STEM, use this link STEM downloads We recommend you get the latest version of the code available under "Integration Weekly Builds"
As a developer, you can use any platform supported by Eclipse. You will also need to install Java and download the Eclipse development tools and the STEM source code. Follow the instructions here: Getting the STEM source
Either way you run STEM, please be aware that Eclipse does not permit use of a space character in any url or path.
Please be sure not use a space character in your workspace path.
Installing Additional STEM Features
- See section on STEM Add-ons
STEM uses the Automated Eclipse Updates to make it easier for users to install additional features to STEM. Today, one feature you may want to add is the Earth Science data plugin that contains global climate data for the years 2001-2010. This plugin is required if you want to use the Anopheles Mosquito model for example.
To get the plugin:
1. Launch STEM
2. On the Menu Bar enter >Help>Install New Features
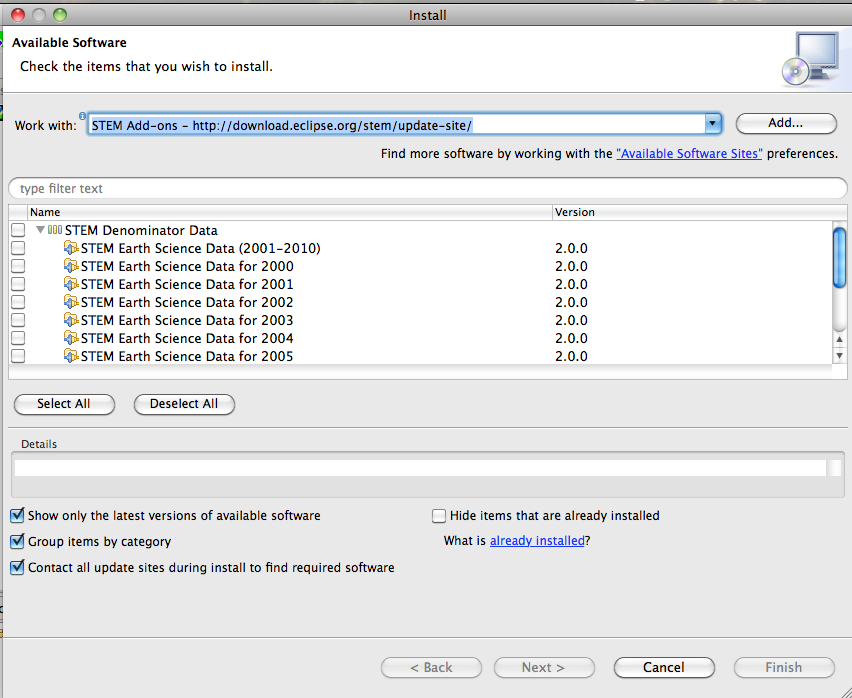
3. Select the STEM update site (see figure below) and chose the plugins you wish to add (or select them bundle with data from all years).
Running STEM as a Standalone Application
If you want to first run STEM as an application, we provide a standalone version of STEM that requires only that you have Java 6 or higher installed.
You can get the file by going to this page and downloading the latest integration weekly build for your environment.
Once you have downloaded the zip file (Warning: the download is a very large file and will take awhile to download.), you will have to "unzip" the file into your favorite directory.
This is a self-contained stand-alone version of STEM that is launched by double-clicking on the "STEM.exe" executable file in the root directory of the expanded archive (windows). You'll need to have Java 1.6 installed for it to run, but if you do and it's on the path, you should be greeted by the STEM "splash screen" while it starts up.
The Eclipse application at this point shows the STEM Simulation Perspective.
STEM Simulation screen.
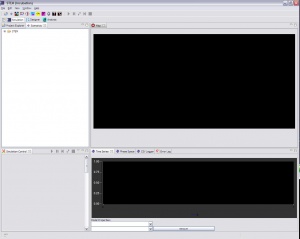
- The Help->Help Context menubar selection has extensive information on running STEM.
- The following "views" are shown in the STEM Simulation window.
- Map
Canvas that will show the image of the geographic area where the simulation is being run. - Simulation Control view
Panel that both describes the status of the simulation and provides buttons to start and stop the simulation. - Scenarios
The Scenarios window is use to select a prebuilt scenario for a simulation. By selecting leaves in the tree, you can discover an existing scenario for running a simulation. Select the scenario of choice and click the Run or Advance icon on the toolbar. - ErrorLog
This log will contain information about any errors that occur while running the application. If things don't work as you expect, check this view to see if there are any errors or exceptions that have occurred. Note that the ErrorLog on the secondary Eclipse will show errors and exceptions that occur in the application being tested but stdout/stderr will be sent to the Console of the Primary Eclipse. Thus, if an exception is caught by the application and not passed to the built-in log facility, it will only show up on the Primary console. Likewise, if an exception is not caught and sent to stdout/stderr, then it will show up only on the secondary ErrorLog. Confusing!
- Map
There are also secondary application that may be selected from the Windows menu.
- Select windows
- Select GoogleEarth View
This is an interface between STEM and the GoogleEarth application.
- Select GoogleEarth View
The basic idea of the GoogleEarth Interface is to allow the information about the geographic spread of diseases to be reflected on the GoogleEarth Web map. Detailed instructions for using the GoogleEarth Interface are included below. [2]
Updating STEM
Starting with version 1.4, you can use the update mechanism built into STEM to perform upgrades without re-downloading the full installation bundle. Most of the time, this means you don't have to re-download the large denominator data sets packaged in STEM or have to export and import your scenarios.
- Verify the computer is connected to a network and launch STEM
- If STEM is already open, save all edited files and stop any running simulations
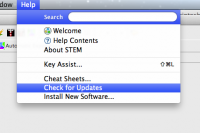
- Open the Help Menu and choose Check for Updates
- Wait while STEM contacts the updates server and checks for new versions
- If no updates are available, a message saying No updates were found will appear. Click OK to return to STEM.
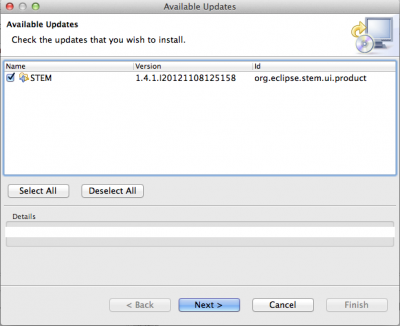
- If an update is available, the Available Updates wizard will appear
- On the Available Updates page, verify STEM is selected, and click Next
- Verify the list of items to be installed is correct and click Next
- Review the the licenses of the software being installed to verify you still accept
- If you accept the terms, select I Accept the terms of the license agreements and click Finish
- If you do not accept the terms, click Cancel
- Wait while STEM downloads and installs the updates
- If prompted with a security warning about installing unsigned software, click OK
- When prompted to apply changes, verify all open files are saved and click Restart Now
- STEM should automatically restart. If not, relaunch it manually.
Checking the Version of STEM Installed
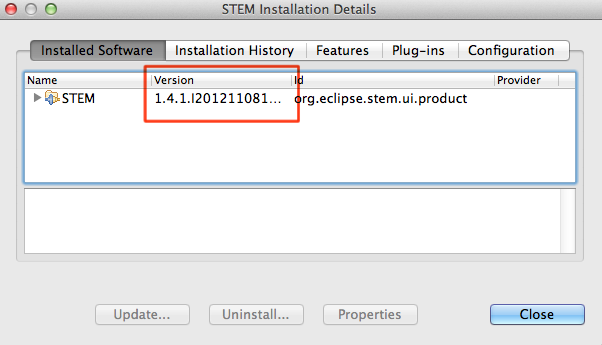
After updating STEM, the version displayed on the splash screen at startup may not change to reflect the new version. To verify STEM updated successfully, check the STEM Installation Details.
- Open the Help menu and select About STEM
- Click Installation Details
- In the STEM Installation Details dialog, verify the installed version for STEM
Updating to Latest Integration or Milestone Build
By default, the STEM update feature only checks for the latest, official release approved by the Eclipse Foundation. However, users will often want to take advantage of new features published in weekly integration and/or periodic milestone and release candidate builds. You can easily configure STEM to download and install these updates.
- Launch STEM
- Open the Window menu and select Preferences
- On Mac OS X, Preferences is under the STEM menu
- In the Preferences window, expand Install/Update and select Available Software Sites
- Under Available Software Sites, Click Add
- In the Add Site dialog, enter the appropriate Name and Location
- For weekly integration builds:
- Name: STEM Integration Builds
- Location: http://download.eclipse.org/stem/update-site/integration/
- For periodic milestone and release candidate builds:
- Name: STEM Stable Builds
- Location: http://download.eclipse.org/stem/update-site/stable/
- For weekly integration builds:
- Click OK to add the site
- Click OK to save Preferences and return to STEM
- Follow the steps in the previous section to update STEM
- To disable checking for non-release versions, disable or remove the sites added to the Available Software Sites list
Setting up the STEM Development Environment in Eclipse
If you might contribute to STEM development or if you want to always have the most recent code, then you will need to install Eclipse.
- Go to tutorial on Setting up a STEM Development Environment


