Notice: this Wiki will be going read only early in 2024 and edits will no longer be possible. Please see: https://gitlab.eclipse.org/eclipsefdn/helpdesk/-/wikis/Wiki-shutdown-plan for the plan.
Difference between revisions of "STEM Installation Guide"
(add javadoc instructions) |
(→Downloading and Installing STEM) |
||
| (138 intermediate revisions by 8 users not shown) | |||
| Line 1: | Line 1: | ||
| − | + | [[Image:STEM TOP BAR.gif|800px]] | |
| + | {| align="right" | ||
| + | | __TOC__ | ||
| + | |} | ||
| − | + | '''[[STEM|Back to STEM Contents Page]]''' | |
| − | + | ||
| − | + | ||
| − | + | ||
| − | + | == STEM Video on YouTube<sup>TM</sup> == | |
| + | The STEM Project published full-length video tutorials for STEM on YouTube in several languages. | ||
| − | == | + | #[http://www.youtube.com/watch?v=MtQlS7g7Qnw STEM Model Generator (new!!)] ''requires STEM V2.0 milestone'' |
| − | + | #Full length video [http://www.youtube.com/watch?v=LfiibQX4IFE In English] | |
| + | #Full length video [http://www.youtube.com/watch?v=AFYXvazKkms In Hebrew] | ||
| + | #Full length video [http://www.youtube.com/watch?v=NM5X8-MaiKo In Japanese] | ||
| + | #Full length video [http://www.youtube.com/watch?v=3S5DbjCHsx4 In Spanish] | ||
| + | #[http://www.youtube.com/watch?v=OoiFLemepw4 5 min Video (English)] | ||
| + | #Avian Influenza | ||
| + | ##Only [https://youtu.be/tI0Ogy-8O10 Poultry-Human Transmission] | ||
| + | ##Including [https://youtu.be/0YJ6FxdhFm8 Human-Human Transmission] | ||
| − | + | == Getting Started == | |
| + | There are two paths to running STEM: from a downloaded binary installed as a standalone application or built from source and launched in Eclipse. Here are some considerations regarding which path to choose: | ||
| − | + | * If you want to use STEM to compose models, scenarios, and run simulations, you can download and install STEM as a standalone application following the instructions in this guide. | |
| − | If you want to | + | * If you want to extend or add new functionality to STEM, including new disease and computational models, you need to build STEM from source. See the [[STEM_Eclipse_Setup|Setting up a STEM Development Environment]] page for more instructions. |
| − | + | === Prerequisites === | |
| + | STEM is a Java application built on top of the Eclipse Rich Client Platform (RCP). To run STEM, please verify you have the following prerequisites installed: | ||
| − | + | # A workstation running an Eclipse-supported operating system: | |
| + | #* Windows (XP, Vista, 7) | ||
| + | #* Linux (GTK) | ||
| + | #* Mac OS X (10.5 or later) | ||
| + | #* A supported Java Standard Edition from either Oracle (Sun) or IBM | ||
| + | #'''For STEM V3.0.0M1 or above the minimum requirement is (J2SE) 8.0 JVM''' | ||
| + | #: [https://java.com/en/download/ Oracle Java SE 8.0 (JRE8U65 or higher)] | ||
| + | # For STEM V 2.0.x or earlier | ||
| + | #: (J2SE) 6.0 JVM | ||
| + | #: [http://www.oracle.com/technetwork/java/javase/downloads/jre6u37-downloads-1859589.html Oracle Java SE 6.0 (6.0.26 or higher)] | ||
| + | #: [http://www.ibm.com/developerworks/java/jdk/ IBM Java SE 6.0] | ||
| + | #* '' '''Note:''' Mac OS X users can use the version included with the operating system '' | ||
| + | #* '' '''Note:''' The GNU for Java (GCJ) compiler and libraries are not supported. If you're running on Linux, it's strongly recommended you use an Oracle or IBM JRE'' | ||
| + | #* '' '''Note:''' While STEM V2.0.x should work with Java 7, it is not tested or supported at this time. STEM V3.0.x is is based on Eclipse 4.x and requires Java 8'' | ||
| + | # A tool to extract zipped archives | ||
| + | #: ''Most operating systems have this built-in, although Windows users may wish to install a standalone utility like [http://www.7-zip.org/ 7-Zip]'' | ||
| + | === Which File To Download? === | ||
| + | The STEM Project publishes several different binary versions of the application. Please consider these options when choosing which to download. | ||
| − | + | ==== 32-bit vs. 64-bit ==== | |
| + | Most modern operating systems from 2009 and on support 64-bit (x86_64) compiled binaries. The 64-bit version of STEM can take advantage of larger memory spaces (beyond 2 GB), which is necessary to run very large (global) simulations. | ||
| − | The | + | The STEM project publishes both 32-bit ('''x86''') and 64-bit ('''x86_64''') versions of the application for each supported operating system. ''' The version you download strictly depends on whether you have a 32-bit or 64-bit Java Runtime Environment (JRE) installed. ''' If you have a 64-bit JRE installed, download the '''x86_64''' version. Otherwise, download the '''x86''' version. |
| − | Java, the | + | |
| − | + | Some 64-bit JREs can run in 32-bit mode. Please see your JRE's documentation for instructions. | |
| − | + | ==== Release, Milestone, or Integration Builds ==== | |
| + | The best version of STEM to download is generally the latest '''Release'''. In addition to being fully tested and stable, it's approved for distribution by the Eclipse Foundation and subject to the terms of the [http://www.eclipse.org/legal/epl/notice.php Eclipse Software User Agreement] and the [http://www.eclipse.org/legal/epl-v10.html Eclipse Public License]. | ||
| − | + | However, power users or those looking for the latest features may choose to download the latest '''Weekly Integration''', '''Milestone''', or '''Release Candidate''' build. These builds may not be stable and are not sanctioned by the Eclipse Foundation. ''Use at your own risk''. | |
| − | + | ||
| − | + | ||
| − | + | ||
| − | + | == Downloading and Installing STEM == | |
| − | + | The STEM application is bundled as a platform-specific, zipped archive and does not contain an installer. To install STEM, download the appropriate bundle and unzip it to your desired installation path. | |
| − | + | <span style="color:#ff0000">'''The STEM installation path cannot contain whitespace characters. Ensure that the install path contains no spaces, tabs, etc.'''</span> | |
| − | + | ||
| − | + | ||
| − | + | ||
| − | + | ||
| − | + | ||
| − | + | ||
| − | + | ||
| − | + | ||
| − | + | ||
| − | + | ||
| − | + | ||
| − | + | ''' If you already have STEM 1.4 or newer installed and wish to upgrade, see the [[#STEM_Updates|STEM Updates section]]. ''' | |
| − | + | # In your browser, go to the '''[http://www.eclipse.org/stem/downloads.php STEM Downloads page]''' | |
| − | + | # Choose the appropriate bundle to download (see [[#Which_File_To_Download.3F|previous section]] for help) and click the link | |
| + | # On the mirrors page, select a nearby mirror site. This will begin the download. | ||
| + | # If prompted, choose to '''Save''' the file. Note where the file is downloading to. | ||
| + | #: '' On some systems, the browser may automatically execute (unzip) the file when it finishes downloading. If this is the case, skip to '''step 8''' when the download finishes. '' | ||
| + | # ''Wait while the STEM bundle downloads...'' | ||
| + | #: '' '''Note:''' STEM is approximately 150 MB in size. Depending on your connection and mirror speeds, the download will take from a few minutes to an hour or more. '' | ||
| + | # When the download finishes, open the folder where the downloaded file sits | ||
| + | # Extract/unzip the STEM archive | ||
| + | #: '' '''Note:''' On most systems, double clicking the the .zip file will automatically extract it. '' | ||
| + | # Extracting the archive should create a folder called '''stem'''. Move this folder to the path you wish to install STEM at. | ||
| + | #: '' ''' IMPORTANT REMINDER: ''' Verify that the install path does not contain whitespace or non-ASCII characters, including spaces, tabs, etc. '' | ||
| + | #* Windows users may want to place '''stem''' folder in a drive root. Example is '''c:\stem''' | ||
| + | #* Mac OS X users may want to place the '''stem''' folder in the '''Applications''' folder | ||
| + | # Optionally, you can create a shortcut on your desktop, start menu, dock, etc to quickly launch STEM | ||
| + | # Increasing the system memory available to STEM. Some large scenarios (e.g. with thousands of nodes and edges), require that you make sure you allocate enough system memory for STEM. If you don't do this the application may hang or crash with a "Heap Space" error. To allocate enough memory in Windows, create a shortcut for launching STEM. You may place this anywhere (e.g., on your desktop or on the quicklaunch bar). | ||
| + | #* Right click on the shortcut. Select "Properties" You should see a field in the Properties Dialogue labeled Target: to the right in the text field you will see something like: | ||
| + | #: C:\stem_builds\stem\STEM.exe -vmargs -Xms812M -Xmx812M | ||
| + | #* To launch STEM with more memory you must add "virtual machine arguments" to the target line. For example, to set the min heap size to 1 GB and max heap size to 4GB use: | ||
| + | #: C:\stem_builds\stem\STEM.exe -vmargs -Xms1024M -Xmx4096M | ||
| + | #* On MAC OS X, using the finder, navigate to where the STEM application is located, right click and select "Show Package Content". Navigate to Contents->MacOS and open the STEM.ini file in an editor. Change the -Xms and the -Xmx lines to increase the memory, e.g. -Xms1024M -Xmx4096M or more depending on how much memory is available. | ||
| − | |||
| − | |||
| − | |||
| − | + | That's it! STEM is now installed. See the next section for instructions to launch STEM. | |
| − | + | ||
| − | + | == Launching and Running STEM == | |
| + | After STEM is unzipped and placed in the install folder, you can launch the application. STEM can run both with a full Graphical User Interface (GUI) or "headlessly" in a text-only console. For more information about the text-only option, see the [[STEM Headless|headless STEM article]]. | ||
| − | + | # Navigate to the folder STEM is installed in | |
| − | * | + | # Double click the STEM executable file |
| − | * | + | #: [[Image:STEM-Install-FinderView.png|400px]] |
| − | + | #* For Windows, the file is named '''STEM.exe''' | |
| − | * | + | #* For Mac OS X, the file is named '''STEM''' or '''STEM.app''' |
| − | + | #* For Linux, the file is named '''STEM''' | |
| − | + | # On some system, you may get a security warning about launching a downloaded application. Click '''OK''' or '''Open''' | |
| − | + | #: '' '''Note:''' This warning message varies depending on your operating system '' | |
| − | + | #: [[Image:STEM-Install-DownloadedApplicationWarning.png|200px]] | |
| − | + | # The STEM splash screen should immediately appear | |
| − | + | #: [[Image:STEM-Install-Splash.png|200px]] | |
| − | + | # The first time STEM is launched, several configuration tasks have to run in the background | |
| − | + | #: ''These tasks may take 1-2 minutes depending on system speed. During this time, only the splash screen is displayed.'' | |
| + | # When STEM finishes loading, the workbench will launch the '''Simulation''' perspective | ||
| + | #: The first time you run STEM, the '''Welcome to STEM''' screen will display. You can close this by click the '''X''' on the '''Welcome''' tab. | ||
| + | #: [[Image:STEM-Install-WelcomeScreen.png|200px]] | ||
| + | # Congratulations! STEM is loaded and ready to use | ||
| + | #: [[Image:STEM-Install-Workbench.png|500px]] | ||
| + | # To get started using STEM, start by going through the tutorials on the [[STEM#STEM_Documentation|STEM Documentation]] page | ||
| + | #: '' You may find it helpful to watch the [http://www.youtube.com/watch?v=LfiibQX4IFE YouTube tutorial] before you go on to learn to [[Creating_a_STEM_Scenario|create a scenario]] '' | ||
| + | ===Installing Additional STEM Features=== | ||
| + | : '' See section on [[STEM Addons | STEM Add-ons]] '' | ||
| − | + | STEM uses the Automated Eclipse Updates to make it easier for users to install additional features to STEM. Today, one feature you may want to add | |
| − | + | is the Earth Science data plugin that contains global climate data for the years 2001-2010. This plugin is '''required''', for example, if you want to use the ''Anopheles'' Mosquito model. | |
| − | + | ||
| − | + | ||
| − | + | ||
| − | + | ||
| − | + | ||
| − | + | ||
| − | + | ||
| − | + | ||
| − | + | ||
| − | + | See the [[STEM Addons | main article]] for instructions on how to install new features into STEM. | |
| − | + | == Updating STEM == | |
| + | Starting with version 1.4, you can use the update mechanism built into STEM to perform upgrades without re-downloading the full installation bundle. Most of the time, this means you don't have to re-download the large denominator data sets packaged in STEM or have to export and import your scenarios. | ||
| − | + | PLEASE NOTE. STEM V2.0.x and earlier are based on Eclipse 3.x The Latest versions of STEM beginning with STEM V 3.0.0M1 are base on Eclipse 4.x and therefore require that Java 8 be installed. | |
| − | + | Please see system requirements above. The following procedure will not update your Java installation. This must be done first. | |
| − | + | ||
| − | + | ||
| − | + | ||
| − | + | ||
| − | + | ||
| − | + | ||
| − | + | ||
| − | + | ||
| − | + | # Verify the computer is connected to a network and launch '''STEM''' | |
| − | + | #: '''If STEM is already open, save all edited files and stop any running simulations''' | |
| − | + | # Open the '''Help''' Menu and choose '''Check for Updates''' | |
| − | + | #: [[Image:STEM-Update-CheckForUpdatesMenu.png|200px]] | |
| − | + | # ''Wait while STEM contacts the updates server and checks for new versions'' | |
| − | If | + | #* If no updates are available, a message saying '''No updates were found''' will appear. Click '''OK''' to return to STEM |
| + | #* If an update is available, the '''Available Updates''' wizard will appear | ||
| + | # On the '''Available Updates''' page, verify '''STEM''' is selected, and click '''Next''' | ||
| + | #: [[Image:STEM-Update-AvailableUpdates.png|400px]] | ||
| + | # Verify the list of items to be installed is correct and click '''Next''' | ||
| + | # Review the the licenses of the software being installed to verify you still accept | ||
| + | #: If you accept the terms, select ''' I Accept the terms of the license agreements''' and click '''Finish''' | ||
| + | #: If you do not accept the terms, click '''Cancel''' | ||
| + | # ''Wait while STEM downloads and installs the updates'' | ||
| + | # If prompted with a security warning about installing unsigned software, click '''OK''' | ||
| + | # When prompted to apply changes, verify all open files are saved and click '''Restart Now''' | ||
| + | # STEM should automatically restart. If not, relaunch it manually | ||
| − | === | + | === Checking the Version of STEM Installed === |
| + | After updating STEM, the version displayed on the splash screen at startup may not change to reflect the new version. To verify STEM updated successfully, check the STEM Installation Details. | ||
| + | # Open the '''Help''' menu and select '''About STEM''' | ||
| + | # Click '''Installation Details''' | ||
| + | # In the '''STEM Installation Details''' dialog, verify the installed version for '''STEM''' | ||
| + | #: [[Image:STEM-Update-InstalledDetailsVersion.png]] | ||
| − | + | === Updating to Latest Integration or Milestone Build === | |
| − | + | By default, the STEM update feature only checks for the latest, official release approved by the Eclipse Foundation. However, users will often want to take advantage of new features published in weekly integration and/or periodic milestone and release candidate builds. You can easily configure STEM to download and install these updates. | |
| − | + | # Launch '''STEM''' | |
| − | + | # Open the '''Window''' menu and select '''Preferences''' | |
| − | + | #: '' On Mac OS X, '''Preferences''' is under the '''STEM''' menu '' | |
| − | + | # In the '''Preferences''' window, expand '''Install/Update''' and select '''Available Software Sites''' | |
| − | + | # Under '''Available Software Sites''', click '''Add''' | |
| − | + | # In the '''Add Site''' dialog, enter the appropriate '''Name''' and '''Location''' | |
| − | + | #: For weekly integration builds: | |
| − | * | + | #:* '''Name''': STEM Integration Builds |
| − | * | + | #:* '''Location:''' <nowiki>http://download.eclipse.org/stem/update-site/integration/</nowiki> |
| − | ** | + | #: For periodic milestone and release candidate builds: |
| − | + | #:* '''Name''': STEM Stable Builds | |
| − | + | #:* '''Location:''' <nowiki>http://download.eclipse.org/stem/update-site/stable/</nowiki> | |
| + | # Click '''OK''' to add the site | ||
| + | # Click '''OK''' to save '''Preferences''' and return to '''STEM''' | ||
| + | # Follow the steps in the [[#Updating_STEM|previous section]] to update '''STEM''' | ||
| + | # ''To disable checking for non-release versions, disable or remove the sites added to the '''Available Software Sites''' list '' | ||
| − | + | == Setting up the STEM Development Environment in Eclipse == | |
| + | If you might contribute to STEM development or if you want to always have the most recent code, then you will need to install Eclipse. | ||
| − | + | : '' Go to tutorial on [[STEM Eclipse Setup | Setting up a STEM Development Environment]] | |
| − | + | ||
| − | + | ||
| − | + | ||
| − | + | ||
| − | + | ||
| − | + | ||
| − | + | ||
| − | + | ||
| − | + | ||
| − | + | ||
| − | + | ||
| − | + | ||
| − | + | ||
| − | + | ||
| − | + | ||
| − | + | ||
| − | + | ||
| − | + | ||
| − | + | ||
| − | + | ||
| − | + | ||
| − | + | ||
| − | + | ||
| − | + | ||
| − | + | ||
| − | + | ||
| − | + | ||
| − | + | ||
| − | + | ||
| − | + | ||
| − | + | ||
| − | + | ||
| − | + | ||
| − | + | ||
| − | + | ||
| − | + | ||
| − | + | ||
| − | + | ||
| − | + | ||
| − | + | ||
| − | + | ||
| − | + | ||
| − | + | ||
| − | + | ||
| − | + | ||
| − | + | ||
| − | + | ||
| − | + | ||
| − | + | ||
| − | + | ||
| − | + | ||
| − | + | ||
| − | + | ||
| − | + | ||
| − | + | ||
| − | + | ||
| − | + | ||
| − | + | ||
| − | + | ||
| − | + | ||
| − | + | ||
| − | + | ||
| − | + | ||
| − | + | ||
| − | + | ||
| − | + | ||
| − | + | ||
| − | + | ||
| − | + | ||
| − | + | ||
| − | + | ||
| − | + | ||
| − | + | ||
| − | + | ||
| − | + | ||
| − | + | ||
| − | + | ||
| − | + | ||
| − | + | ||
| − | + | ||
| − | + | ||
| − | + | ||
| − | + | ||
| − | + | ||
| − | + | ||
| − | + | ||
| − | + | ||
| − | + | ||
| − | + | ||
| − | + | ||
| − | + | ||
| − | + | ||
| − | + | ||
| − | + | ||
| − | + | ||
| − | + | ||
| − | + | ||
| − | + | ||
| − | + | ||
| − | + | ||
| − | + | ||
| − | + | ||
| − | + | ||
| − | + | ||
| − | + | ||
| − | + | ||
| − | + | ||
| − | + | ||
| − | + | ||
| − | + | ||
| − | + | ||
| − | + | ||
| − | + | ||
| − | + | ||
| − | + | ||
| − | + | ||
| − | + | ||
| − | + | ||
| − | + | ||
| − | + | ||
| − | + | ||
| − | + | ||
| − | + | ||
| − | + | ||
| − | + | ||
| − | + | ||
| − | + | ||
| − | + | ||
| − | + | ||
| − | + | ||
| − | + | ||
| − | + | ||
| − | + | ||
| − | + | ||
| − | + | ||
| − | + | ||
| − | + | ||
| − | + | ||
| − | + | ||
| − | + | ||
| − | + | ||
| − | + | ||
| − | + | ||
| − | + | ||
| − | + | ||
| − | + | ||
| − | + | ||
| − | + | ||
| − | + | ||
| − | + | ||
| − | + | ||
| − | + | ||
Revision as of 13:45, 24 July 2017

STEM Video on YouTubeTM
The STEM Project published full-length video tutorials for STEM on YouTube in several languages.
- STEM Model Generator (new!!) requires STEM V2.0 milestone
- Full length video In English
- Full length video In Hebrew
- Full length video In Japanese
- Full length video In Spanish
- 5 min Video (English)
- Avian Influenza
- Only Poultry-Human Transmission
- Including Human-Human Transmission
Getting Started
There are two paths to running STEM: from a downloaded binary installed as a standalone application or built from source and launched in Eclipse. Here are some considerations regarding which path to choose:
- If you want to use STEM to compose models, scenarios, and run simulations, you can download and install STEM as a standalone application following the instructions in this guide.
- If you want to extend or add new functionality to STEM, including new disease and computational models, you need to build STEM from source. See the Setting up a STEM Development Environment page for more instructions.
Prerequisites
STEM is a Java application built on top of the Eclipse Rich Client Platform (RCP). To run STEM, please verify you have the following prerequisites installed:
- A workstation running an Eclipse-supported operating system:
- Windows (XP, Vista, 7)
- Linux (GTK)
- Mac OS X (10.5 or later)
- A supported Java Standard Edition from either Oracle (Sun) or IBM
- For STEM V3.0.0M1 or above the minimum requirement is (J2SE) 8.0 JVM
- For STEM V 2.0.x or earlier
- (J2SE) 6.0 JVM
- Oracle Java SE 6.0 (6.0.26 or higher)
- IBM Java SE 6.0
- Note: Mac OS X users can use the version included with the operating system
- Note: The GNU for Java (GCJ) compiler and libraries are not supported. If you're running on Linux, it's strongly recommended you use an Oracle or IBM JRE
- Note: While STEM V2.0.x should work with Java 7, it is not tested or supported at this time. STEM V3.0.x is is based on Eclipse 4.x and requires Java 8
- A tool to extract zipped archives
- Most operating systems have this built-in, although Windows users may wish to install a standalone utility like 7-Zip
Which File To Download?
The STEM Project publishes several different binary versions of the application. Please consider these options when choosing which to download.
32-bit vs. 64-bit
Most modern operating systems from 2009 and on support 64-bit (x86_64) compiled binaries. The 64-bit version of STEM can take advantage of larger memory spaces (beyond 2 GB), which is necessary to run very large (global) simulations.
The STEM project publishes both 32-bit (x86) and 64-bit (x86_64) versions of the application for each supported operating system. The version you download strictly depends on whether you have a 32-bit or 64-bit Java Runtime Environment (JRE) installed. If you have a 64-bit JRE installed, download the x86_64 version. Otherwise, download the x86 version.
Some 64-bit JREs can run in 32-bit mode. Please see your JRE's documentation for instructions.
Release, Milestone, or Integration Builds
The best version of STEM to download is generally the latest Release. In addition to being fully tested and stable, it's approved for distribution by the Eclipse Foundation and subject to the terms of the Eclipse Software User Agreement and the Eclipse Public License.
However, power users or those looking for the latest features may choose to download the latest Weekly Integration, Milestone, or Release Candidate build. These builds may not be stable and are not sanctioned by the Eclipse Foundation. Use at your own risk.
Downloading and Installing STEM
The STEM application is bundled as a platform-specific, zipped archive and does not contain an installer. To install STEM, download the appropriate bundle and unzip it to your desired installation path.
The STEM installation path cannot contain whitespace characters. Ensure that the install path contains no spaces, tabs, etc.
If you already have STEM 1.4 or newer installed and wish to upgrade, see the STEM Updates section.
- In your browser, go to the STEM Downloads page
- Choose the appropriate bundle to download (see previous section for help) and click the link
- On the mirrors page, select a nearby mirror site. This will begin the download.
- If prompted, choose to Save the file. Note where the file is downloading to.
- On some systems, the browser may automatically execute (unzip) the file when it finishes downloading. If this is the case, skip to step 8 when the download finishes.
- Wait while the STEM bundle downloads...
- Note: STEM is approximately 150 MB in size. Depending on your connection and mirror speeds, the download will take from a few minutes to an hour or more.
- When the download finishes, open the folder where the downloaded file sits
- Extract/unzip the STEM archive
- Note: On most systems, double clicking the the .zip file will automatically extract it.
- Extracting the archive should create a folder called stem. Move this folder to the path you wish to install STEM at.
- IMPORTANT REMINDER: Verify that the install path does not contain whitespace or non-ASCII characters, including spaces, tabs, etc.
- Windows users may want to place stem folder in a drive root. Example is c:\stem
- Mac OS X users may want to place the stem folder in the Applications folder
- Optionally, you can create a shortcut on your desktop, start menu, dock, etc to quickly launch STEM
- Increasing the system memory available to STEM. Some large scenarios (e.g. with thousands of nodes and edges), require that you make sure you allocate enough system memory for STEM. If you don't do this the application may hang or crash with a "Heap Space" error. To allocate enough memory in Windows, create a shortcut for launching STEM. You may place this anywhere (e.g., on your desktop or on the quicklaunch bar).
- Right click on the shortcut. Select "Properties" You should see a field in the Properties Dialogue labeled Target: to the right in the text field you will see something like:
- C:\stem_builds\stem\STEM.exe -vmargs -Xms812M -Xmx812M
- To launch STEM with more memory you must add "virtual machine arguments" to the target line. For example, to set the min heap size to 1 GB and max heap size to 4GB use:
- C:\stem_builds\stem\STEM.exe -vmargs -Xms1024M -Xmx4096M
- On MAC OS X, using the finder, navigate to where the STEM application is located, right click and select "Show Package Content". Navigate to Contents->MacOS and open the STEM.ini file in an editor. Change the -Xms and the -Xmx lines to increase the memory, e.g. -Xms1024M -Xmx4096M or more depending on how much memory is available.
That's it! STEM is now installed. See the next section for instructions to launch STEM.
Launching and Running STEM
After STEM is unzipped and placed in the install folder, you can launch the application. STEM can run both with a full Graphical User Interface (GUI) or "headlessly" in a text-only console. For more information about the text-only option, see the headless STEM article.
- Navigate to the folder STEM is installed in
- Double click the STEM executable file
- For Windows, the file is named STEM.exe
- For Mac OS X, the file is named STEM or STEM.app
- For Linux, the file is named STEM
-
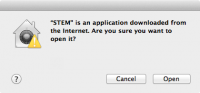
- On some system, you may get a security warning about launching a downloaded application. Click OK or Open
- Note: This warning message varies depending on your operating system
-
- The STEM splash screen should immediately appear
-
- The first time STEM is launched, several configuration tasks have to run in the background
- These tasks may take 1-2 minutes depending on system speed. During this time, only the splash screen is displayed.
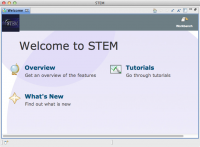
- When STEM finishes loading, the workbench will launch the Simulation perspective
- The first time you run STEM, the Welcome to STEM screen will display. You can close this by click the X on the Welcome tab.
-
- Congratulations! STEM is loaded and ready to use
-
- To get started using STEM, start by going through the tutorials on the STEM Documentation page
- You may find it helpful to watch the YouTube tutorial before you go on to learn to create a scenario


Installing Additional STEM Features
- See section on STEM Add-ons
STEM uses the Automated Eclipse Updates to make it easier for users to install additional features to STEM. Today, one feature you may want to add is the Earth Science data plugin that contains global climate data for the years 2001-2010. This plugin is required, for example, if you want to use the Anopheles Mosquito model.
See the main article for instructions on how to install new features into STEM.
Updating STEM
Starting with version 1.4, you can use the update mechanism built into STEM to perform upgrades without re-downloading the full installation bundle. Most of the time, this means you don't have to re-download the large denominator data sets packaged in STEM or have to export and import your scenarios.
PLEASE NOTE. STEM V2.0.x and earlier are based on Eclipse 3.x The Latest versions of STEM beginning with STEM V 3.0.0M1 are base on Eclipse 4.x and therefore require that Java 8 be installed.
Please see system requirements above. The following procedure will not update your Java installation. This must be done first.
- Verify the computer is connected to a network and launch STEM
- If STEM is already open, save all edited files and stop any running simulations
- Open the Help Menu and choose Check for Updates
-
- Wait while STEM contacts the updates server and checks for new versions
- If no updates are available, a message saying No updates were found will appear. Click OK to return to STEM
- If an update is available, the Available Updates wizard will appear
- On the Available Updates page, verify STEM is selected, and click Next
-
- Verify the list of items to be installed is correct and click Next
- Review the the licenses of the software being installed to verify you still accept
- If you accept the terms, select I Accept the terms of the license agreements and click Finish
- If you do not accept the terms, click Cancel
- Wait while STEM downloads and installs the updates
- If prompted with a security warning about installing unsigned software, click OK
- When prompted to apply changes, verify all open files are saved and click Restart Now
- STEM should automatically restart. If not, relaunch it manually


Checking the Version of STEM Installed
After updating STEM, the version displayed on the splash screen at startup may not change to reflect the new version. To verify STEM updated successfully, check the STEM Installation Details.
- Open the Help menu and select About STEM
- Click Installation Details
- In the STEM Installation Details dialog, verify the installed version for STEM
-

Updating to Latest Integration or Milestone Build
By default, the STEM update feature only checks for the latest, official release approved by the Eclipse Foundation. However, users will often want to take advantage of new features published in weekly integration and/or periodic milestone and release candidate builds. You can easily configure STEM to download and install these updates.
- Launch STEM
- Open the Window menu and select Preferences
- On Mac OS X, Preferences is under the STEM menu
- In the Preferences window, expand Install/Update and select Available Software Sites
- Under Available Software Sites, click Add
- In the Add Site dialog, enter the appropriate Name and Location
- For weekly integration builds:
- Name: STEM Integration Builds
- Location: http://download.eclipse.org/stem/update-site/integration/
- For periodic milestone and release candidate builds:
- Name: STEM Stable Builds
- Location: http://download.eclipse.org/stem/update-site/stable/
- For weekly integration builds:
- Click OK to add the site
- Click OK to save Preferences and return to STEM
- Follow the steps in the previous section to update STEM
- To disable checking for non-release versions, disable or remove the sites added to the Available Software Sites list
Setting up the STEM Development Environment in Eclipse
If you might contribute to STEM development or if you want to always have the most recent code, then you will need to install Eclipse.
- Go to tutorial on Setting up a STEM Development Environment