Notice: this Wiki will be going read only early in 2024 and edits will no longer be possible. Please see: https://gitlab.eclipse.org/eclipsefdn/helpdesk/-/wikis/Wiki-shutdown-plan for the plan.
Difference between revisions of "SMILA/Documentation/HowTo/Howto set up dev environment"
(→Preconditions) |
(→Doing it manually) |
||
| Line 53: | Line 53: | ||
Instead of using the target definition file you can manually set your own target platform like so: | Instead of using the target definition file you can manually set your own target platform like so: | ||
| + | |||
| + | Install a plain eclipse SDK and a matching delta pack into a directory. This directory will be referenced as "target" in the following lines. | ||
::*Click Window --> Preferences --> Plug-in Development --> Target Platform | ::*Click Window --> Preferences --> Plug-in Development --> Target Platform | ||
| − | ::*Click Add... --> Select " | + | ::*Click Add... --> Select "Nothing: Start with an empty target definition" for target initialization and click "Next" |
| + | ::*Click on "browse..." and browse to your "target" directory (SDK + delta pack) --> Click Finish | ||
::Rename the new target, e.g. to "Running target + SMILA.Extension" | ::Rename the new target, e.g. to "Running target + SMILA.Extension" | ||
::Click "Add..." --> Select "Directory" --> Click Next --> Select <tt>SMILA.extension/eclipse/plugins</tt> folder under local trunk as the location --> Click Finish | ::Click "Add..." --> Select "Directory" --> Click Next --> Select <tt>SMILA.extension/eclipse/plugins</tt> folder under local trunk as the location --> Click Finish | ||
Revision as of 04:28, 5 January 2012
This how-to describes the necessary steps for setting up SMILA development environment. Normally this setup is only interesting for SMILA committers and contributors. SMILA integrators should work with another setup described at How to set up the integration environment.
Contents
Preconditions
Here is the list of things that you will definitely need for developing SMILA components:
- JDK 1.6
- current Eclipse SDK - This how-to was tested with Eclipse Classic SDK 3.7.1 (Indigo SR1)
Getting the source code
Doing it manually
This is a little more involved than the Project Set File but the recommended practice, especially if you want to update often.
Use your favorite SVN client to check out SMILA's source code from repository located at:
http://dev.eclipse.org/svnroot/rt/org.eclipse.smila/trunk/core
Hint: We recommend you to check out the trunk/core as opposed to importing the projects through IDE SVN integrations. By doing so you can easily get new projects just by updating your working copy and reimporting the sources.
After you have checked out the source code you need to import it in your IDE:
Click File --> Import --> General --> Existing Projects into Workspace --> Next --> Select root folder of local trunk --> Finish
Project Set File
This uses a .psf file to import all projects:
- Download SMILA-core.psf file
- File --> Import --> Team Project Set
- Enter the .psf location
- Finish
Define target platform
The target platform defines the set of bundles and features that you are developing against.
The easy way
SMILA ships a target definition file at http://dev.eclipse.org/svnroot/rt/org.eclipse.smila/trunk/releng/devenv/SMILA.target that you can open in your IDE (after downloading it or even importing the releng project). This file contains all the references needed for developing SMILA. After opening it, eclipse starts to download the referenced bundles/features which it tells you by stating "resolving target platform" in the status bar. This takes a good while. After it is done you can hit the link "Set as Target Platform" on the top left of the editor. Doing so will cause eclipse to start re-compiling the sources and all error markers should be gone.
Doing it manually
Instead of using the target definition file you can manually set your own target platform like so:
Install a plain eclipse SDK and a matching delta pack into a directory. This directory will be referenced as "target" in the following lines.
- Click Window --> Preferences --> Plug-in Development --> Target Platform
- Click Add... --> Select "Nothing: Start with an empty target definition" for target initialization and click "Next"
- Click on "browse..." and browse to your "target" directory (SDK + delta pack) --> Click Finish
- Rename the new target, e.g. to "Running target + SMILA.Extension"
- Click "Add..." --> Select "Directory" --> Click Next --> Select SMILA.extension/eclipse/plugins folder under local trunk as the location --> Click Finish
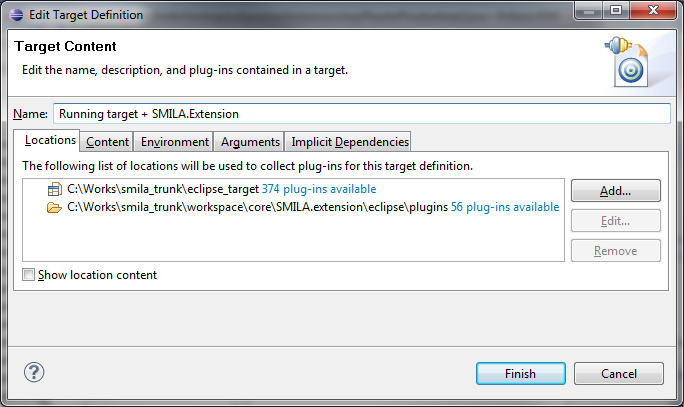
- The target definition dialog should now look like this:
- Change to page "Environment" and select "JavaSE-1.6" as Execution Environment
- Click "Finish" and activate the new target platform.
Launch SMILA in Eclipse IDE
If you've checked out SMILA's trunk correctly, than you should have a project called SMILA.launch in your workspace. This project contains the SMILA's launch configuration for Eclipse IDE. To start SMILA directly in your Eclipse IDE just follow the steps below:
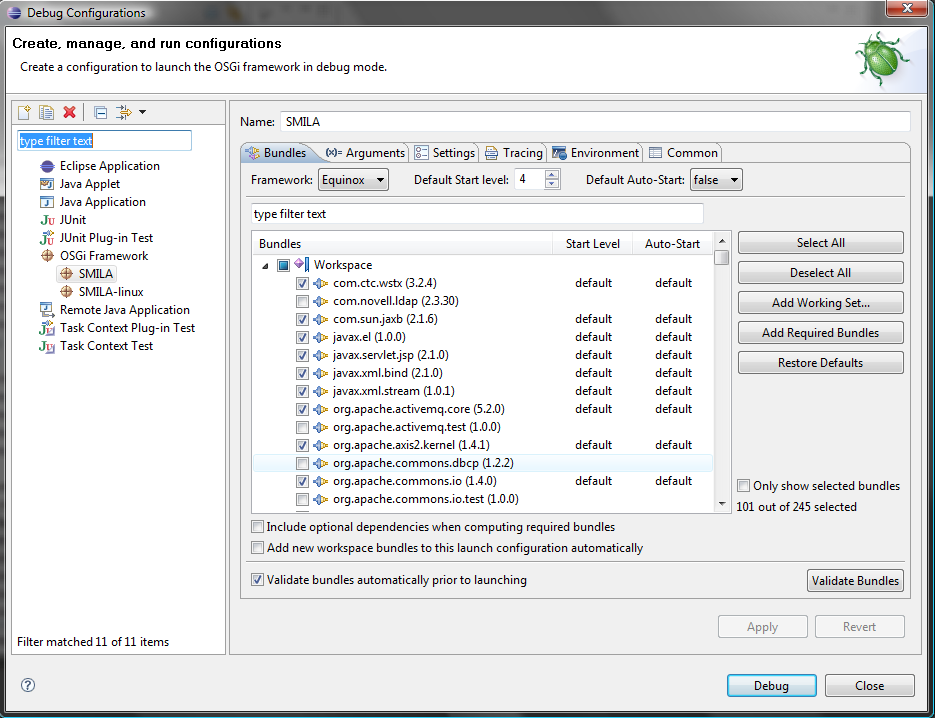
- Click Debug --> Debug Configurations and expand OSGI Framework
- Select launch file for your environment and press Debug
-
- If everything is started correctly, you will get an output in the Console view like below:
-


