Notice: this Wiki will be going read only early in 2024 and edits will no longer be possible. Please see: https://gitlab.eclipse.org/eclipsefdn/helpdesk/-/wikis/Wiki-shutdown-plan for the plan.
Difference between revisions of "SMILA/Documentation/HowTo/How to integrate test bundle into build process"
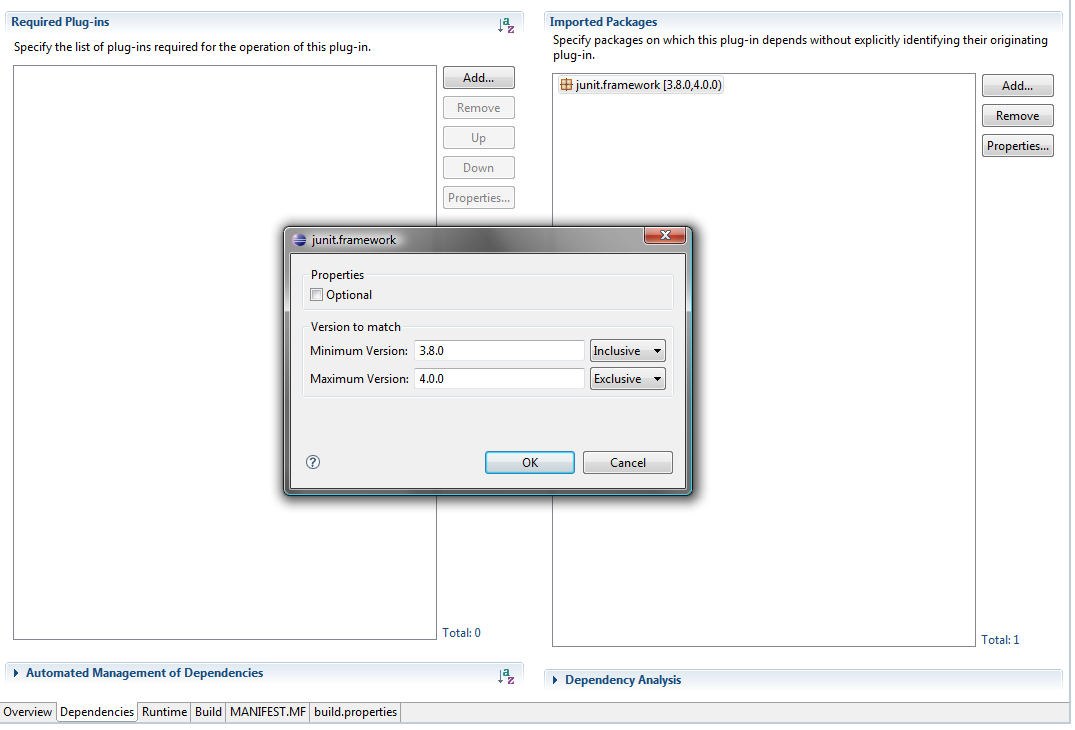
m (New page: {|width="100%" style="background-color:#ffcccc; padding-left:30px" | At the moment it is necessary to use junit.framework [ 3.8.0, 4.0.0 ) as import-package in test bundle. [[Image:Dep...) |
(→1. Create test.xml in test bundle) |
||
| Line 55: | Line 55: | ||
<delete dir="${eit-folder}" quiet="true"/> | <delete dir="${eit-folder}" quiet="true"/> | ||
<ant target="core-test" antfile="${library-file}" dir="${eclipse-home}"> | <ant target="core-test" antfile="${library-file}" dir="${eclipse-home}"> | ||
| + | <property name="java.home" value="${test.java.home}"/> | ||
<property name="data-dir" value="${eit-folder}"/> | <property name="data-dir" value="${eit-folder}"/> | ||
<property name="plugin-name" value="${plugin-name}"/> | <property name="plugin-name" value="${plugin-name}"/> | ||
| Line 95: | Line 96: | ||
|} | |} | ||
| − | |||
| − | |||
=== 2. Include test plug-in into org.eclipse.eilf.test.feature === | === 2. Include test plug-in into org.eclipse.eilf.test.feature === | ||
Revision as of 06:07, 21 October 2008
|
|
The following steps must be performed to integrate test bundles (plug-in) into build process (Bamboo):
1. Create test.xml in test bundle
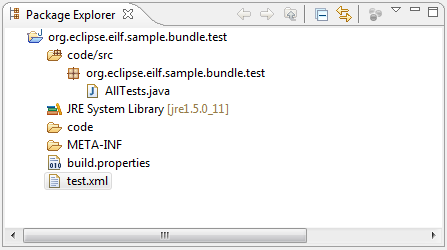
Package-Explorer
The test.xml file must exist for every test plug-in you want to run. Because every test run starts up a new eclipse instance, it is convenient to have a plug-in which bundles all the tests into a single AllTests suite. Then there is only one test run and there must only be one test.xml file maintained. Following example shows important targets of the test.xml containing the AllTests suite. The entry point is the run target, which is called from test.xml. Its prerequisites are init, suite and cleanup. The suite target calls core-test in library.xml with the necessary properties to start up the test host and run AllTests.
|
After downloading template (Download template:File:Test-bundle-template.zip) and integration of template into your test bundle, you have only to change the value of the attribute value of the property with the attribute name="plugin-name" (line 8) to your bundle name. |
<?xml version="1.0"?>
<project name="testsuite" default="run" basedir=".">
  <!-- The property ${eclipse-home} should be passed into this script -->
  <!-- Set a meaningful default value for when it is not. -->
  <property name="eclipse-home" value="${basedir}\..\.."/>

  <!-- sets the properties plugin-name, and library-file -->
  <!-- value of attribute value has to be changed to your test bundle name -->
  <property name="plugin-name" value="org.eclipse.eilf.sample.bundle.test"/>
  <property name="library-file" value="${eclipse-home}/plugins/org.eclipse.test/library.xml"/>

  <!-- This target holds all initialization code that needs to be done for -->
  <!-- all tests that are to be run. Initialization for individual tests -->
  <!-- should be done within the body of the suite target. -->
  <target name="init">
    <tstamp/>
    <delete>
      <fileset dir="${eclipse-home}" includes="${plugin-name}*.xml"/>
    </delete>
  </target>

  <!-- This target defines the tests that need to be run. -->
  <target name="suite">
    <property name="eit-folder" value="${eclipse-home}/eit_folder"/>
    <delete dir="${eit-folder}" quiet="true"/>
    <ant target="core-test" antfile="${library-file}" dir="${eclipse-home}">
      <property name="java.home" value="${test.java.home}"/>
      <property name="data-dir" value="${eit-folder}"/>
      <property name="plugin-name" value="${plugin-name}"/>
      <property name="classname" value="${plugin-name}.AllTests"/>
      <property name="vmargs" value="-Dorg.apache.commons.logging.Log=org.apache.commons.logging.impl.Log4JLogger"/>
      <property name="vmargs" value="-Dlog4j.configuration=file:${eclipse-home}/configuration/log4j.properties"/>
    </ant>
  </target>

  <!-- This target holds code to cleanup the testing environment after -->
  <!-- after all of the tests have been run. You can use this target to -->
  <!-- delete temporary files that have been created. -->
  <target name="cleanup">
  </target>

  <!-- This target runs the test suite. Any actions that need to happen -->
  <!-- after all the tests have been run should go here. -->
  <target name="run" depends="init,suite,cleanup">
    <ant target="collect" antfile="${library-file}" dir="${eclipse-home}">
      <property name="includes" value="${plugin-name}*.xml"/>
      <property name="output-file" value="${plugin-name}.xml"/>
    </ant>
  </target>
</project>
Include test.xml in build.properties
|
Useful information From today (build process depends on make.xml) you don´t have to modify the build file (make.xml) anymore. The make.xml file includes all bundles (core and test), those are located under the local trunk folder (e.g. EILF). If you don´t want to include your new bundle into the build process, the bundle has to excluded explicit in the make.xml. You also don´t have to modify the build file to include your test bundle to checkstyle, pmd and emma. The tests inside your test bundle will be automatically executed. If you don´t want to run a test, the bundle has to exclude explicit in the make.xml. For further information see: Introduction to make.xml.
|
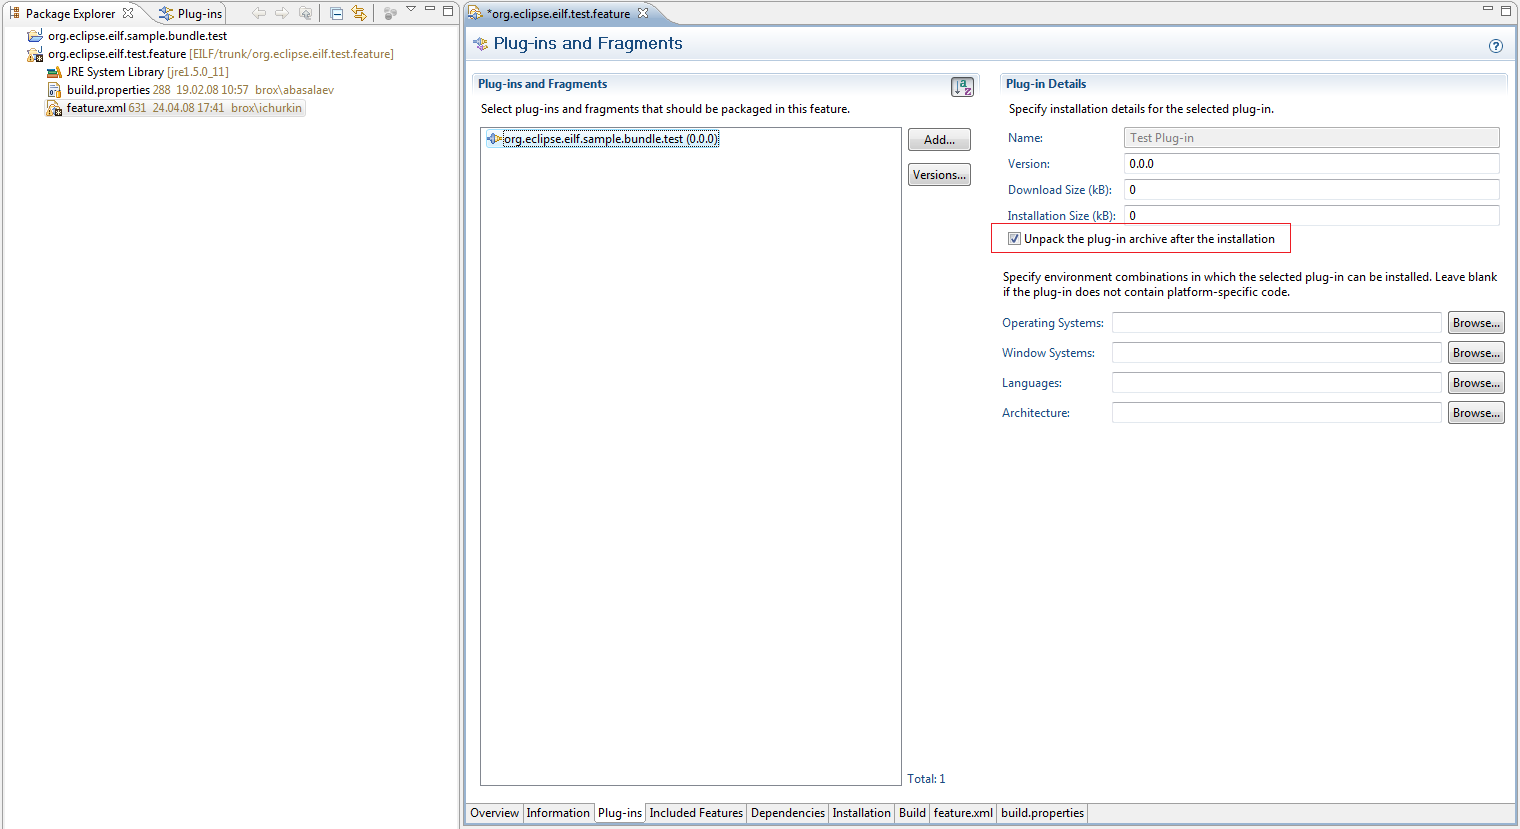
2. Include test plug-in into org.eclipse.eilf.test.feature
|
It is important to check the box "Unpack the plug-in archive after the installation". If you don´t check this box, the test.xml file of the bundle won´t be found and the build process will fail. |
For further information see: Build and Test Eclipse Product


