Notice: this Wiki will be going read only early in 2024 and edits will no longer be possible. Please see: https://gitlab.eclipse.org/eclipsefdn/helpdesk/-/wikis/Wiki-shutdown-plan for the plan.
Difference between revisions of "RapUITesting"
(completed page) |
(→Running the Selenium RC server) |
||
| Line 159: | Line 159: | ||
Now we are ready to take off and write the first testcase... | Now we are ready to take off and write the first testcase... | ||
| − | == | + | ==Running the Selenium RC server== |
| − | + | The Selenium RC server is a little server written in Java which cares about the interaction between your JUnit tests and the browser instances. As it offers some webservices for us, we need to start it before running our tests. | |
| − | <pre> | + | Just call this on our favorite shell/commandline: |
| − | + | <pre><nowiki> | |
| + | $ cd <path-to-selenium-rc>/server | ||
| + | $ java -jar selenium-server.jar -userExtensions <path-to-qooxdoo-user-extension.js> | ||
| + | ... | ||
| + | ... | ||
| + | INFO: Started SocketListener on 0.0.0.0:4444 | ||
| + | May 29, 2007 5:42:01 PM org.mortbay.util.Container start | ||
| + | INFO: Started org.mortbay.jetty.Server@a62fc3 | ||
| + | </nowiki></pre> | ||
| + | If you don't get an output like this in the last lines, be sure you have access to the port 4444 or change it with the commandline paramter of the selenium server. See [http://openqa.org/selenium-rc/options.html Command Line Options] | ||
| − | + | ==Test it!== | |
| + | Now it's really getting interesting... | ||
| − | + | The selenium server is running, the applications is running (check that, this isn't covered by this tutorial) and the test cases are ready. | |
| − | + | So go on and run the test case as you would do with any other JUnit test case. | |
| − | + | If your setup is ok, there should be opened a browser window, some magic will happen and then you hopefully get back to your eclipse with a [http://www.eclipse.org/ajdt/EclipseCon2006/shots/junitTestsPassing.png green bar]. | |
| − | + | ||
| − | + | ||
| − | + | ||
| − | + | If you have problems or great ideas how to improve the whole UI Testing story, share your thoughts with us on the [news://news.eclipse.org/eclipse.technology.rap RAP newsgroup]. | |
| − | + | ||
| − | + | ||
| − | + | ||
| − | + | ||
| − | + | ||
| − | + | ||
| − | + | ||
| − | + | ||
| − | + | ||
| − | + | ||
| − | + | ||
| − | + | ||
| − | + | ||
| − | + | ||
| − | + | ||
| − | + | ||
| − | + | ||
| − | + | ||
| − | + | ||
| − | + | ||
| − | + | ||
| − | + | ||
| − | + | ||
| − | + | ||
| − | + | ||
| − | + | ||
| − | + | ||
| − | + | ||
| − | + | ||
| − | + | ||
| − | + | ||
| − | + | ||
| − | + | ||
| − | + | ||
| − | + | ||
| − | + | ||
| − | + | ||
| − | + | ||
| − | + | ||
| − | + | ||
| − | + | ||
| − | + | ||
| − | + | ||
| − | + | ||
| − | + | ||
| − | + | ||
| − | + | ||
| − | + | ||
| − | + | ||
| − | + | ||
| − | + | ||
| − | + | ||
| − | + | ||
| − | + | ||
| − | + | ||
| − | + | ||
==Running the Selenium RC server== | ==Running the Selenium RC server== | ||
Revision as of 12:59, 29 May 2007
| RAP wiki home | RAP project home |
Contents
Writing UI Tests for RAP applications
This document will describe one way how to do UI tests for you RAP applications. For this way, we use the combination of JUnit, Selenium and Selenium RC to have automatic UI tests which can be integrated into your JUnit testsuite.
We will provide a simple example application to demonstrate the usage of the several tools.
Requirements
If you don't have it, you need at least these files in order to follow the tutorial:
Extract these files in a directory of your choice.
Creating the sample application
First we need something to test. Therefor I put together a little example application to demonstrate the UI testing approach.
Just create a new plugin project, add org.eclipse.rap.ui.workbench as a dependency and create the following class:
package org.eclipse.rap.demo.ui.tests;

import org.eclipse.jface.dialogs.MessageDialog;
import org.eclipse.swt.SWT;
import org.eclipse.swt.events.SelectionAdapter;
import org.eclipse.swt.events.SelectionEvent;
import org.eclipse.swt.layout.GridLayout;
import org.eclipse.swt.lifecycle.IEntryPoint;
import org.eclipse.swt.widgets.Button;
import org.eclipse.swt.widgets.Display;
import org.eclipse.swt.widgets.Shell;

public class TestApp implements IEntryPoint {

	public Display createUI() {
		Display d = new Display();
		final Shell s = new Shell(d, SWT.SHELL_TRIM);
		s.setLayout(new GridLayout());
		s.setText("App Title");
		final Button b1 = new Button(s, SWT.PUSH);
		b1.setText("Before");
		b1.addSelectionListener(new SelectionAdapter() {
			public void widgetSelected(SelectionEvent e) {
				MessageDialog.openInformation(s, "MessageBox",
						"Changing the button text now...", null);
				b1.setText("After");
			}
		});
		s.pack();
		s.open();
		return d;
	}

}
As you can see, this is a really tiny RAP example - but big enough to be worth to test it.
Preparing the tests
Now create a new java project and add the JUnit library. Additionally, you need to add the selenium-java-client-driver.jar to your project in order to use the Selenium Remote Control.
As RAP applications have a little bit other nature than normal web applications, we need to work around some techniques of selenium. First, you can use commands like click against a target element on your page. The target defined as in id element of your (x)html source. As Qooxdoo doesn't provide ids for their widgets, we need the mentioned Selenium User Extension for Qooxdoo. With this, all targets prefixed with "qx=" will now use another "find-the-target" algorithm based on UserData provided by Qooxdoo widgets.
As we have an internal identifier for each widget in RAP which is known by the server and the client side, we can use this to put it into the UserData field. Apply the following patch to the org.eclipse.rap.rwt component in order to have the UserData:
### Eclipse Workspace Patch 1.0
#P org.eclipse.rap.rwt
Index: src/org/eclipse/swt/lifecycle/ControlLCAUtil.java
===================================================================
RCS file: /cvsroot/technology/org.eclipse.rap/org.eclipse.rap.rwt/src/org/eclipse/swt/lifecycle/ControlLCAUtil.java,v
retrieving revision 1.1
diff -u -r1.1 ControlLCAUtil.java
--- src/org/eclipse/swt/lifecycle/ControlLCAUtil.java	26 Apr 2007 06:46:37 -0000	1.1
+++ src/org/eclipse/swt/lifecycle/ControlLCAUtil.java	29 May 2007 16:21:01 -0000
@@ -94,6 +94,12 @@
     }
   }

+  public static void writeUserData(final Control control) throws IOException {
+		JSWriter writer = JSWriter.getWriterFor(control);
+		String newValue = WidgetUtil.getId( control );
+		writer.set("UserData", new String[] {newValue, "selenium"});
+	}
+
   // TODO [rh] there seems to be a qooxdoo problem when trying to change the
   //      visibility of a newly created widget (no flushGlobalQueues was called)
   //      MSG: Modification of property "visibility" failed with exception:
@@ -126,6 +132,7 @@
     writeFont( control );
     writeToolTip( control );
     writeMenu( control );
+    writeUserData( control );
     writeActivateListener( control );
     writeFocusListener( control );
   }
At the moment, all widget ids are looking like "w1", "w2", "w3". As these ids are generated in the order the widgets are created, it isn't a very good way to handle it. Imagine: You wrote hundred of testcases and then you see: Ah, my application needs an additional label somewhere, all the widgets created after this label have another ID. We are thinking about reinventing the IDs in order to provide more meaningful values which can be used in the tests. But as this is the first attemp, let's go on with what we have.
To not prefix all your IDs with the "qx=" special locator, copy this class to your test project to use it as your Selenium connector:
package org.eclipse.rap.demo.ui.tests;

import com.thoughtworks.selenium.CommandProcessor;
import com.thoughtworks.selenium.DefaultSelenium;


public class RAPSelenium extends DefaultSelenium {

	public RAPSelenium(CommandProcessor processor) {
		super(processor);
	}

	public RAPSelenium(String serverHost, int serverPort,
			String browserStartCommand, String browserURL) {
		super(serverHost, serverPort, browserStartCommand, browserURL);
	}

	public void click(String locator) {
		commandProcessor.doCommand("qxClickAt", new String[] { "qx=" + locator});
	}

	public String getText(String locator) {
		return super.getText("qx=" + locator);
	}

	public void waitForElementPresent(String locator) {
		for (int second = 0;; second++) {
			if (second >= 60) System.out.println("timeout");
			try { if (isElementPresent("qx=" + locator)) break; } catch (Exception e) {}
			try {
				Thread.sleep(1000);
			} catch (InterruptedException e) {
				e.printStackTrace();
			}
		}
	}

	public void clickAndWait(String locator) {
		click(locator);
		try {
			Thread.sleep(1*1000);
		} catch (InterruptedException e) {
			e.printStackTrace();
		}
	}

	public String getShellText(String locator) {
		String text = getText(locator);
		return text.split("\n")[0];

	}
}
This class is a simple wrapper around the existing Selenium class which helps you with some sort of problems.
Be careful: As it's extends the base Selenium class, you'r able to use other methods of the original class which are not overridden by the RAPSelenium class. If you forget to add the "qx=" locator yourself, you'll not get any useful return result.
Now we are ready to take off and write the first testcase...
Running the Selenium RC server
The Selenium RC server is a little server written in Java which cares about the interaction between your JUnit tests and the browser instances. As it offers some webservices for us, we need to start it before running our tests.
Just call this on our favorite shell/commandline:
 $ cd <path-to-selenium-rc>/server
 $ java -jar selenium-server.jar -userExtensions <path-to-qooxdoo-user-extension.js>
...
...
INFO: Started SocketListener on 0.0.0.0:4444
May 29, 2007 5:42:01 PM org.mortbay.util.Container start
INFO: Started org.mortbay.jetty.Server@a62fc3
If you don't get an output like this in the last lines, be sure you have access to the port 4444 or change it with the commandline paramter of the selenium server. See Command Line Options
Test it!
Now it's really getting interesting...
The selenium server is running, the applications is running (check that, this isn't covered by this tutorial) and the test cases are ready.
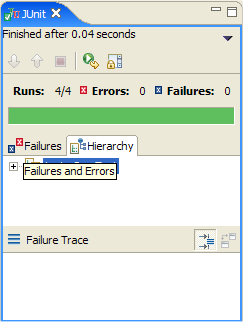
So go on and run the test case as you would do with any other JUnit test case. If your setup is ok, there should be opened a browser window, some magic will happen and then you hopefully get back to your eclipse with a green bar.
If you have problems or great ideas how to improve the whole UI Testing story, share your thoughts with us on the RAP newsgroup.
Running the Selenium RC server
The Selenium RC server is a little server written in Java which cares about the interaction between your JUnit tests and the browser instances. As it offers some webservices for us, we need to start it before running our tests.
Just call this on our favorite shell/commandline:
<nowiki>
 $ cd <path-to-selenium-rc>/server
 $ java -jar selenium-server.jar -userExtensions <path-to-qooxdoo-user-extension.js>
...
...
INFO: Started SocketListener on 0.0.0.0:4444
May 29, 2007 5:42:01 PM org.mortbay.util.Container start
INFO: Started org.mortbay.jetty.Server@a62fc3
<pre><nowiki>
If you don't get an output like this in the last lines, be sure you have access to the port 4444 or change it with the commandline paramter of the selenium server. See [http://openqa.org/selenium-rc/options.html Command Line Options]

==Test it!==
Now it's really getting interesting...

The selenium server is running, the applications is running (check that, this isn't covered by this tutorial) and the test cases are ready.

So go on and run the test case as you would do with any other JUnit test case.
If your setup is ok, there should be opened a browser window, some magic will happen and then you hopefully get back to your eclipse with a [http://www.eclipse.org/ajdt/EclipseCon2006/shots/junitTestsPassing.png green bar].