Notice: this Wiki will be going read only early in 2024 and edits will no longer be possible. Please see: https://gitlab.eclipse.org/eclipsefdn/helpdesk/-/wikis/Wiki-shutdown-plan for the plan.
Papyrus/Codegen/Adding a New Code Generator
Papyrus has already have code generation support for C++ and Java programming languages. Besides, support for Ada and C programming languages are also on the way. However, it is possible to develop and integrate new code generators for other programming languages to Papyrus. In this article you will find how add a new code generator to Papyrus from scratch.
Contents
Preparing the Development Environment (Prerequisites)
This section provides a step-by-step guide to set up your development environment in order to be able to add a new code generator for Papyrus.
Assuming that you have already installed Papyrus, here are the steps you need to follow:
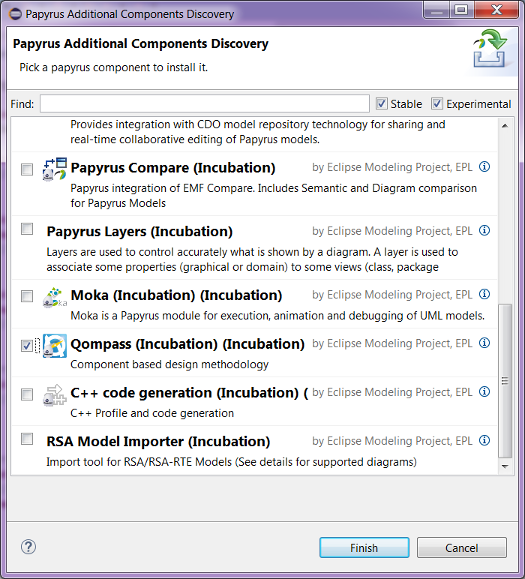
- Install the "Qompass (Incubation)" modeler extension from the "Help > Install Papyrus Additional Components" menu.
- Clone the Eclipse/Papyrus git repository to your local computer.
Preparing the Required Projects
To be able to develop a new code generator for a programming language (let's say the X programming language), three different (but interrelated) projects need to be created.
- A main eclipse plug-in project for developing the code generator, which should be named as org.eclipse.papyrus.x.codegen
- An eclipse plug-in project for connecting the code generator to the user interface of Qompass, which should be named as org.eclipse.papyrus.x.codegen.ui
- Another eclipse plug-in project for developing the tests of the code generator, which should be name as org.eclipse.papyrus.x.codegen.tests
Now, let's create and prepare all these projects one by one.
The Main Code Generation Project for the Hypothetical X Programming Language ("org.eclipse.papyrus.x.codegen")
Here are the steps for creating and setting the "org.eclipse.papyrus.x.codegen" project:
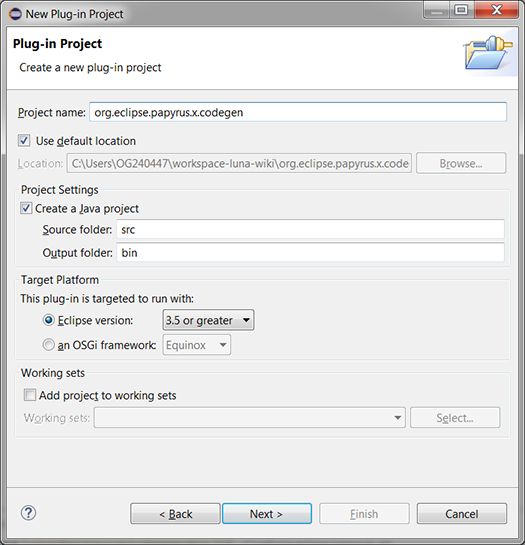
- Create an eclipse plug-in project. name it as "org.eclipse.papyrus.x.codegen" (as shown) and then click "Next >".
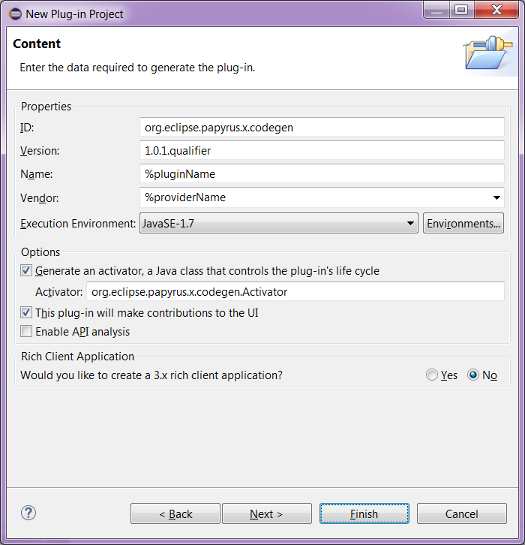
- Do not make any changes on the default property values and click "Finish".
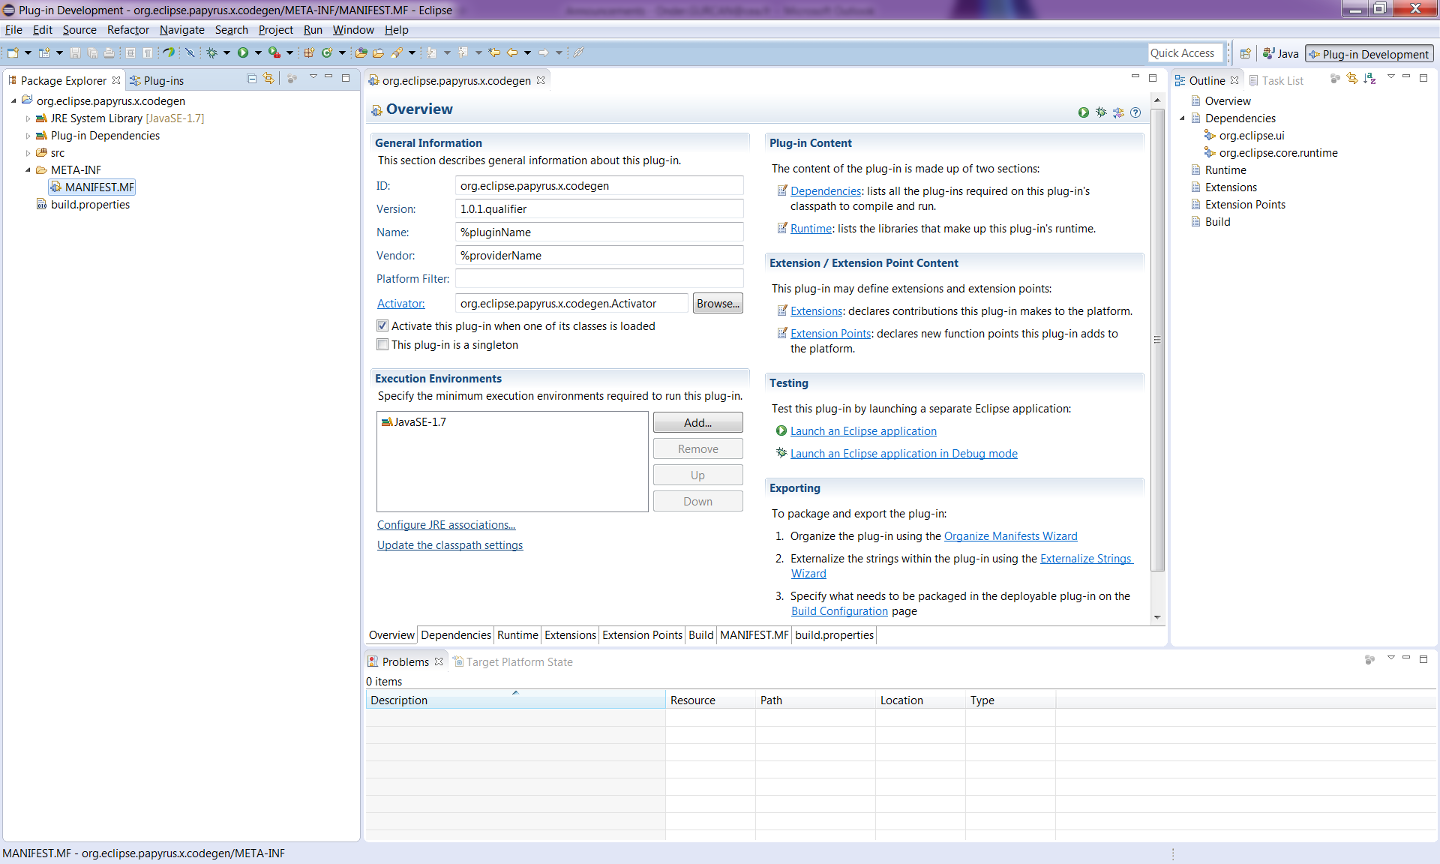
- Upon a successful project creation, you will switch to the Plug-in Development perspective and see a window like below.
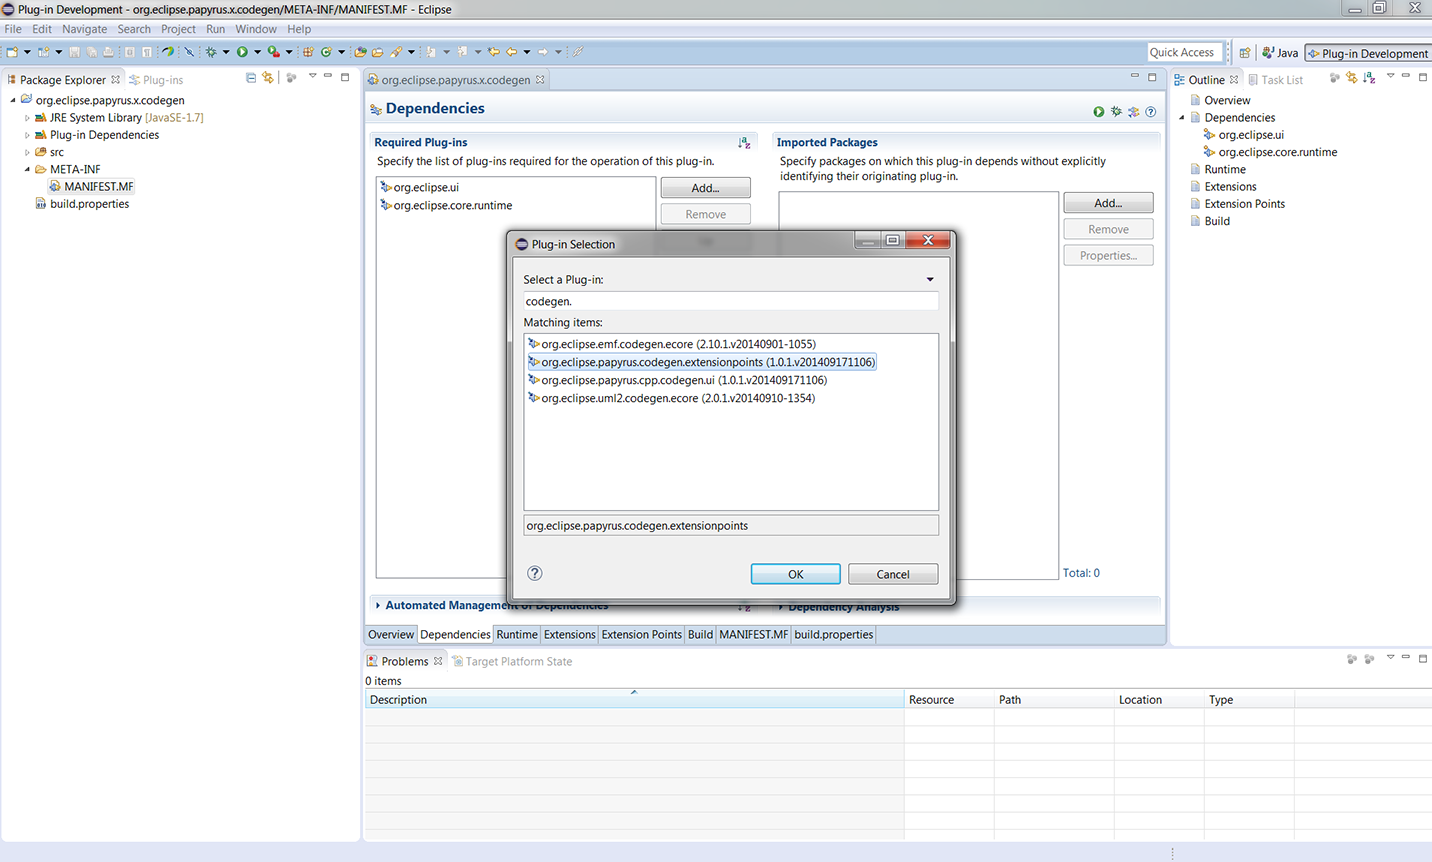
- The project is created. Now, we need to do the required settings for integrating our project to Papyrus. Firstly, we need to add a dependency to the "org.eclipse.papyrus.codegen.extensionpoints" extension point.
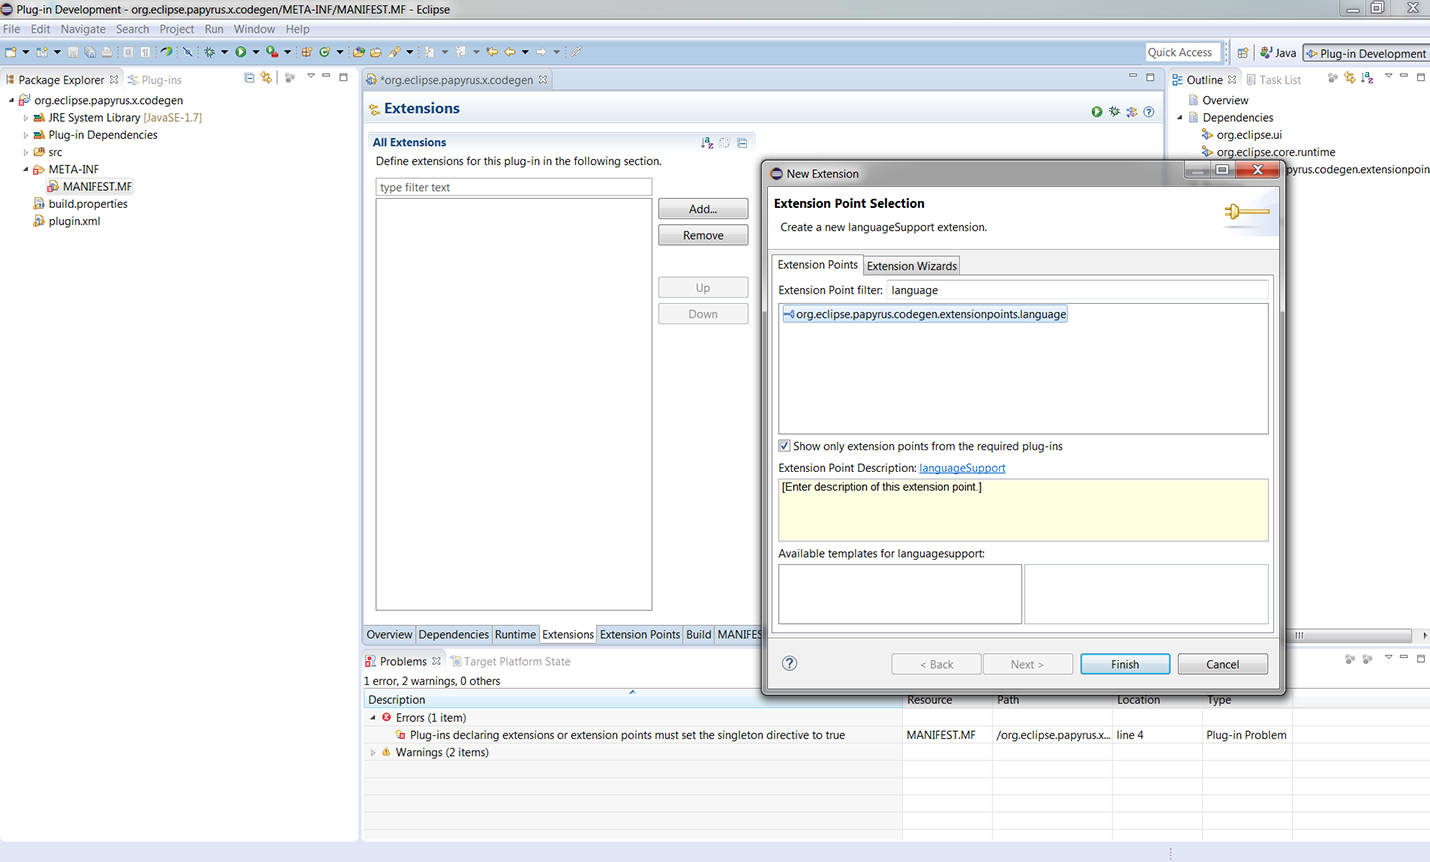
- Then we need to add a new language support extension called "org.eclipse.papyrus.codegen.extensionpoints.language".
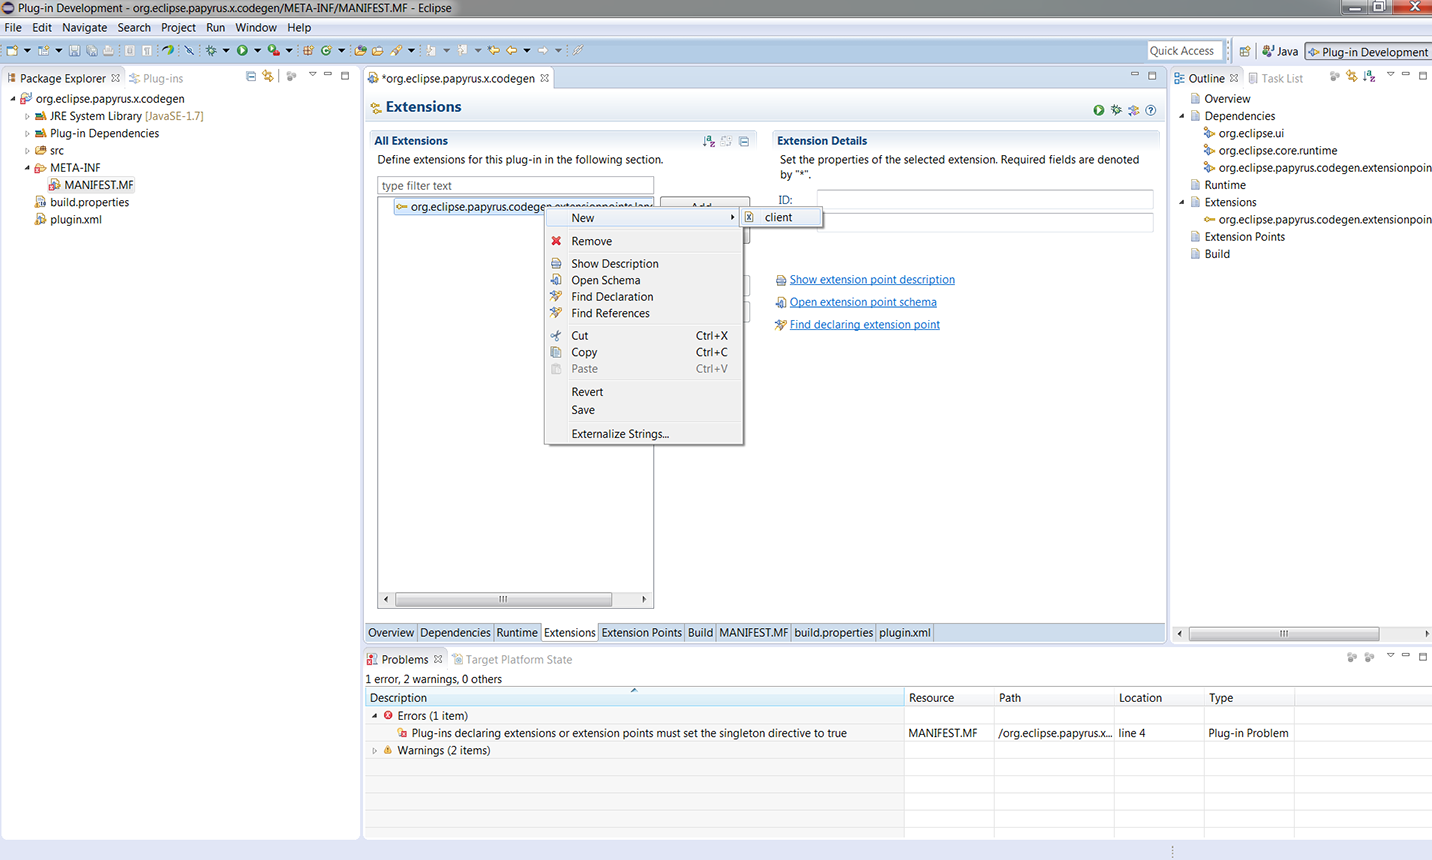
- After, create a client for this extension as shown.
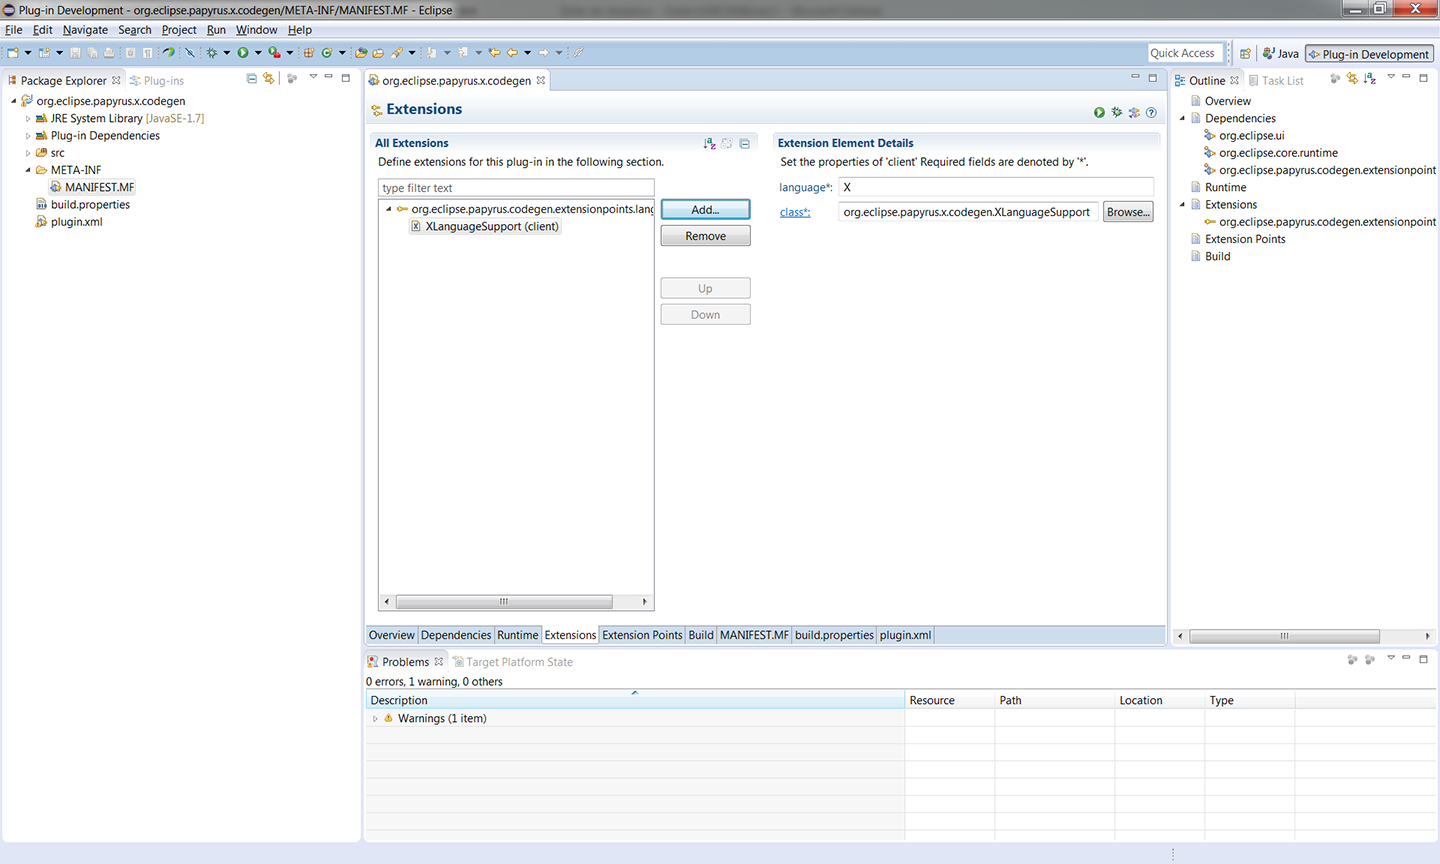
- And name this client's language property as as "X", and name its class as "org.eclipse.papyrus.x.codegen.XLanguageSupport".
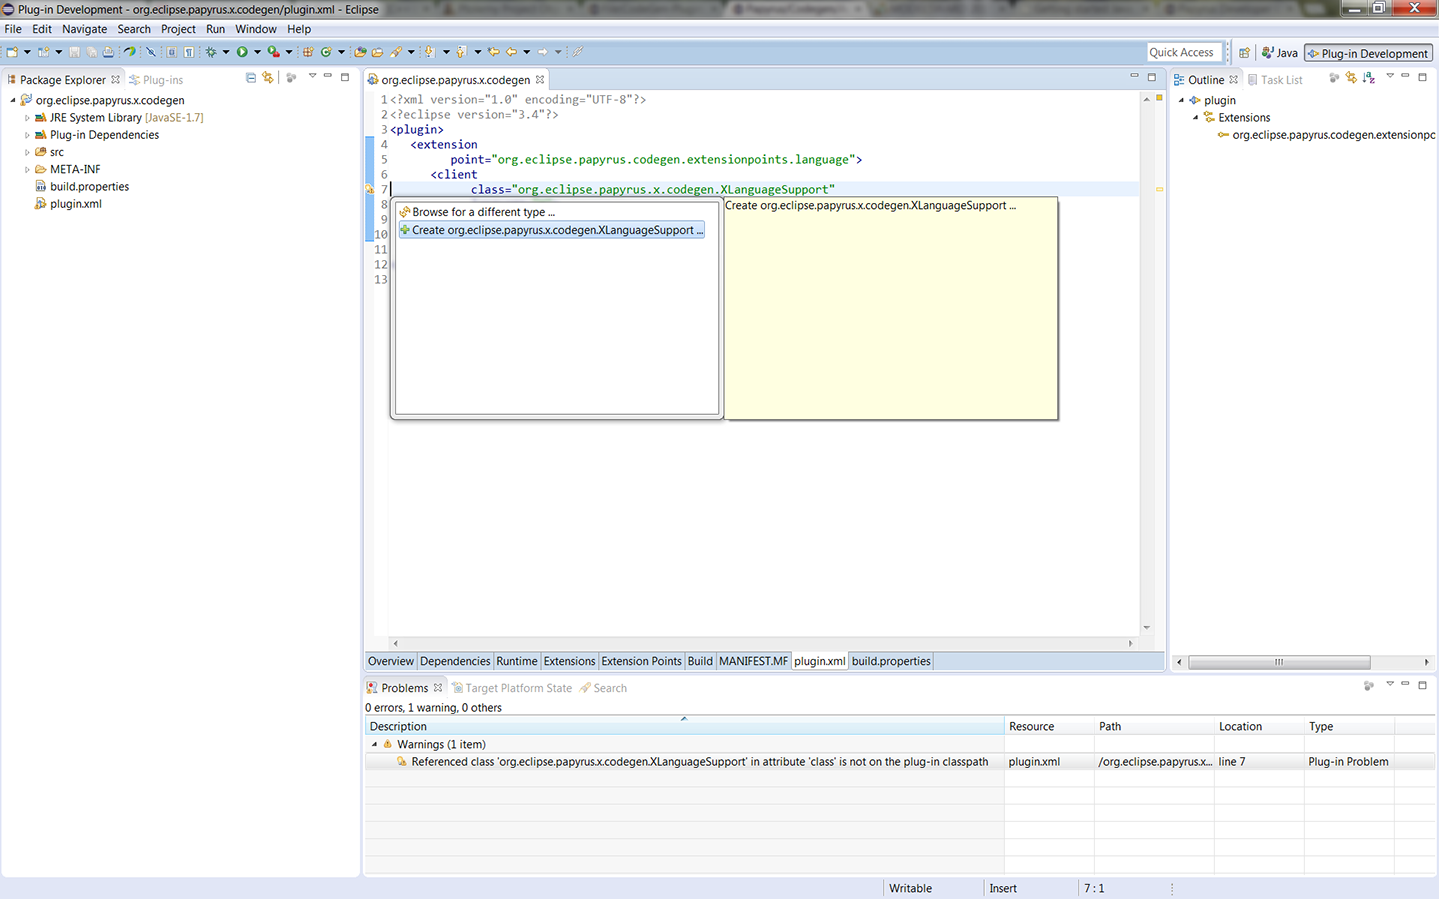
- Since we do not have such a class yet, we will see a warning like below.
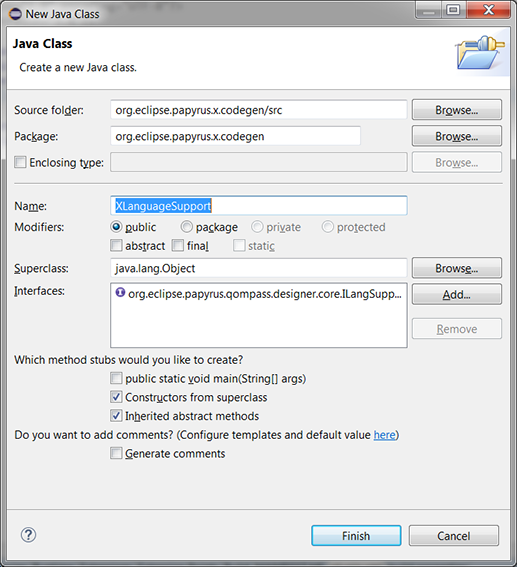
- Just double click on this warning. go to the warning icon on the opened editor and choose create the "org.eclipse.papyrus.x.codegen.XLanguageSupport" class.
- On the upcoming dialog box, do not change anything and click "Finish".
The User Interface Project ("org.eclipse.papyrus.x.codegen.ui")
Here are the steps for creating and setting the "org.eclipse.papyrus.x.codegen.ui" project:
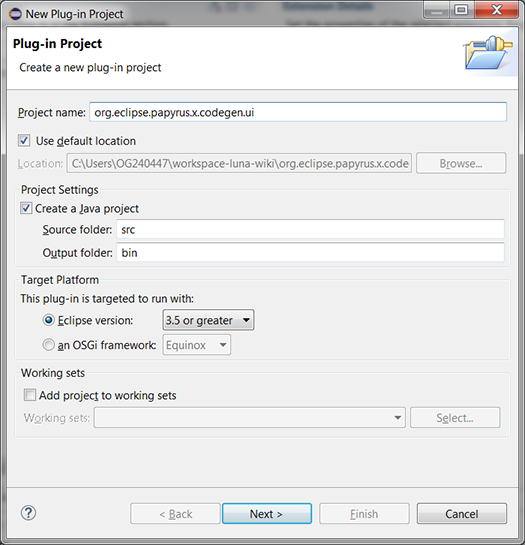
- Create an eclipse plug-in project. name it as "org.eclipse.papyrus.x.codegen.ui" (as shown) and then click "Next >".
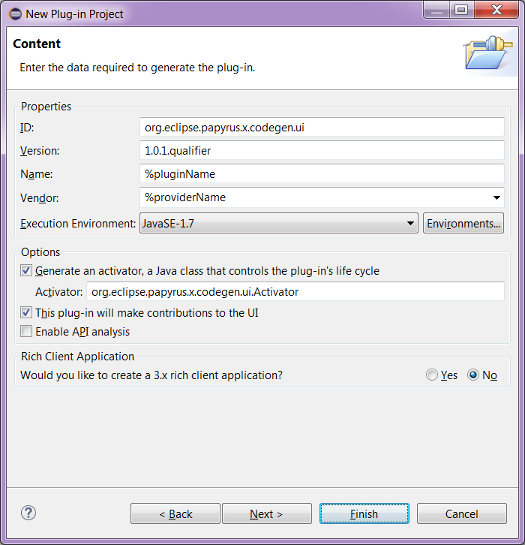
- Do not make any changes on the default property values and click "Finish".
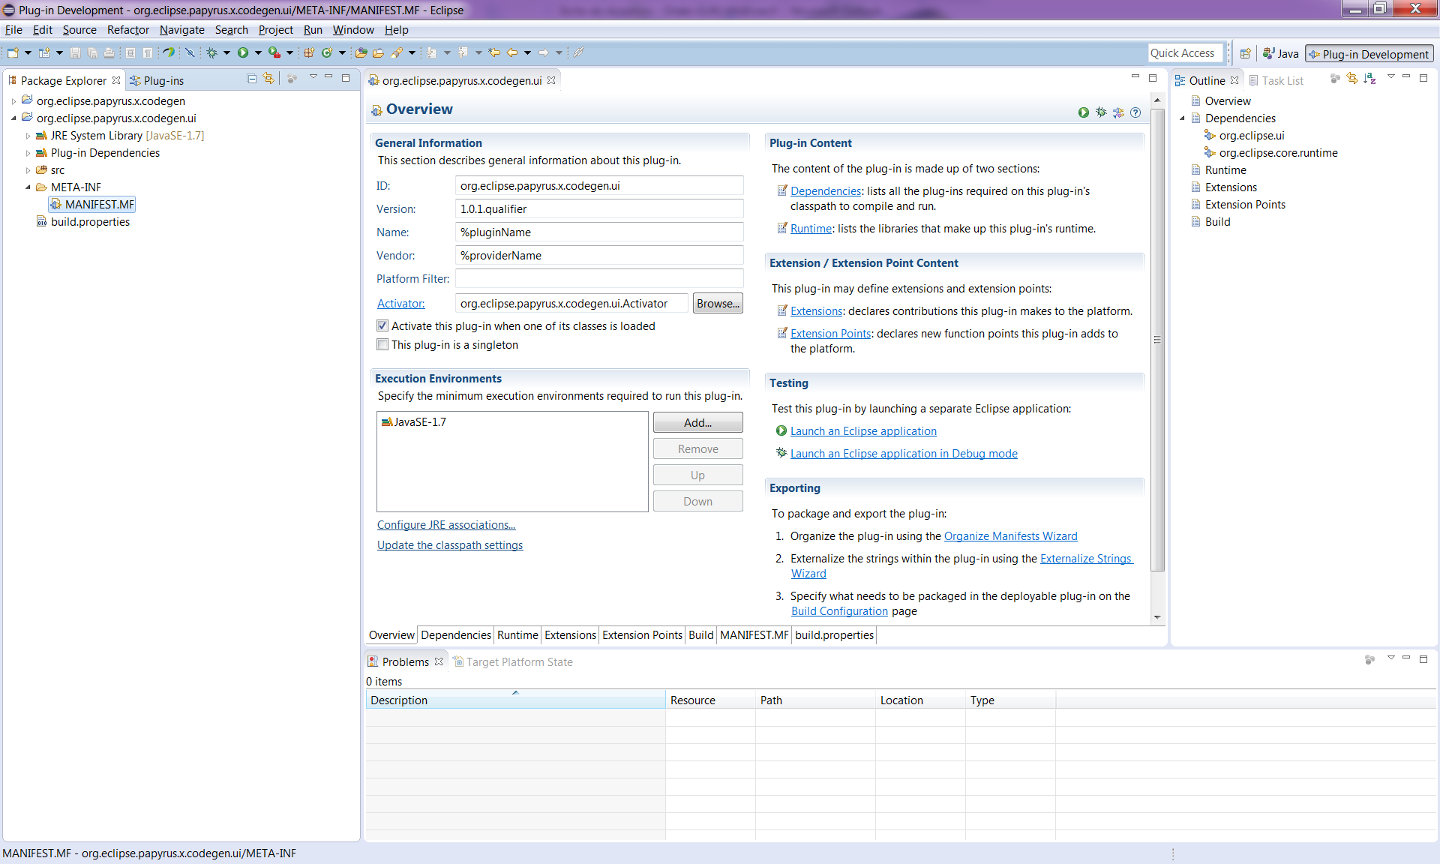
- Upon a successful project creation, you will switch to the Plug-in Development perspective and see a window like below.
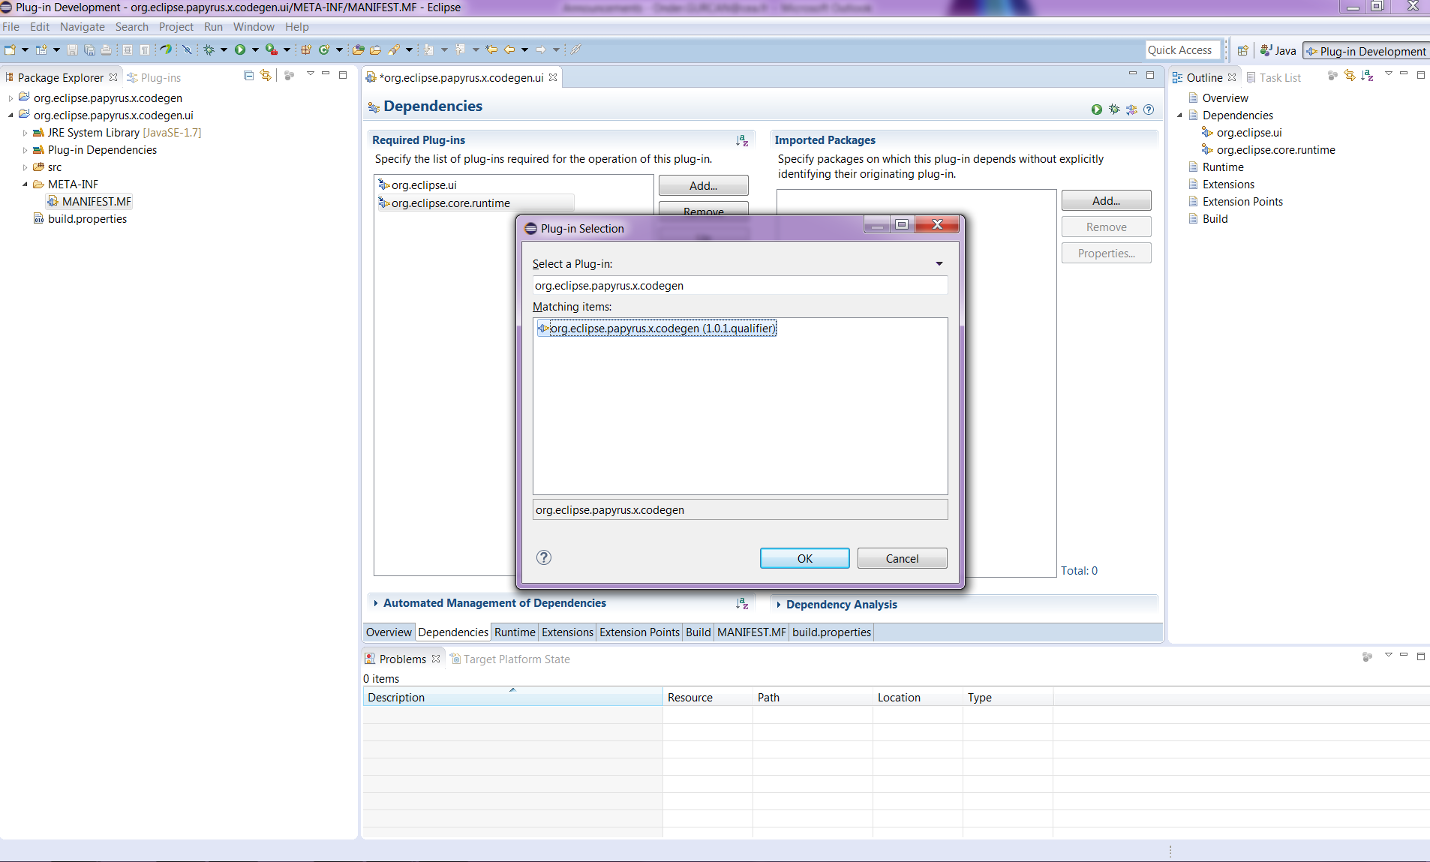
- The project is created. Now, we need to do the required settings for integrating this user interface project to the main code generation project. Firstly, we need to add a dependency to the "org.eclipse.papyrus.x.codegen" plug-in, in which we prepared in the previous step.
The Test Project ("org.eclipse.papyrus.x.codegen.tests")
Here are the steps for creating and setting the "org.eclipse.papyrus.x.codegen.tests" project:

