Notice: this Wiki will be going read only early in 2024 and edits will no longer be possible. Please see: https://gitlab.eclipse.org/eclipsefdn/helpdesk/-/wikis/Wiki-shutdown-plan for the plan.
Difference between revisions of "Orion/JS Unit Test"
< Orion
(→Running from daily build automatically) |
(→Running locally from Eclipse plugin) |
||
| Line 35: | Line 35: | ||
[[Image:Orion-jstest-pluginresult.png]] | [[Image:Orion-jstest-pluginresult.png]] | ||
| − | Refer | + | Refer [http://code.google.com/p/js-test-driver/wiki/UsingTheEclipsePlugin here] for details on the plugin installation and usage. Here are some points you want to pay attention after you install the plugin. |
*Put options properly in the Eclipse preferences ,especially telling the jsTestDriver server where your browser is. | *Put options properly in the Eclipse preferences ,especially telling the jsTestDriver server where your browser is. | ||
*Run server locally. | *Run server locally. | ||
Revision as of 01:46, 21 January 2011
Contents
Writing Javascript unit test cases
We are using JS Test Driver for Javascript unit testing. Here are steps to write your own test cases.
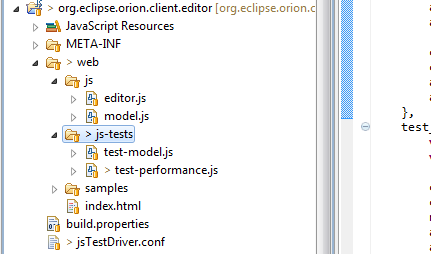
- Test cases can be declared in .js files under your project. We're still working on best practices on where to put your tests but for now a simple approach is to create a folder co-located with your regular code under your project like this:
- A .js file can declare as many test cases as you want but declaring one test case per file will be the best practice.
- The test case declaration is as below. You will declare all the tests as functions. For more details refer to the JsTestDriver wiki here.
MyTestCase = TestCase("MyTestCase");
MyTestCase.prototype.testA = function(){};
- There is a list of default assertions for JsTestDriver. Refer here to use them in your testcases.
Test configuration
In order for JsTestDriver to run the test cases, you should:
- Create a file called jsTestDriver.conf directly under your project root folder.
- The content of the conf file is something like below. Refer here for details.
server: http://localhost:8082
load:
- web/js/*.js
- web/js-tests/*.js
Running test cases
There are currently two options and there will be one more in the future, to run the test cases you've written.
Running from daily build automatically
- Once you've done the steps on test case and configuraion, Orion Build will do a search for all jsTestDriver.conf files in all client projects and run js unit test on each .conf file.
- The result will be reported as an HTML table on the daily build page as below. Also refer here as a sample.
Running locally from Eclipse plugin
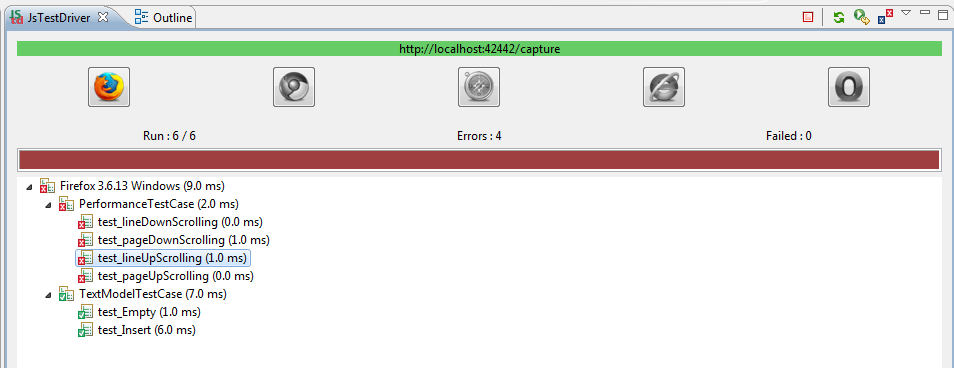
You can also run your test cases from the JsTestDriver Eclipse plugin.
Refer here for details on the plugin installation and usage. Here are some points you want to pay attention after you install the plugin.
- Put options properly in the Eclipse preferences ,especially telling the jsTestDriver server where your browser is.
- Run server locally.
- Capture browser before run test.
- Run test from run configuration on your project.
Running from Orion (future, under development)
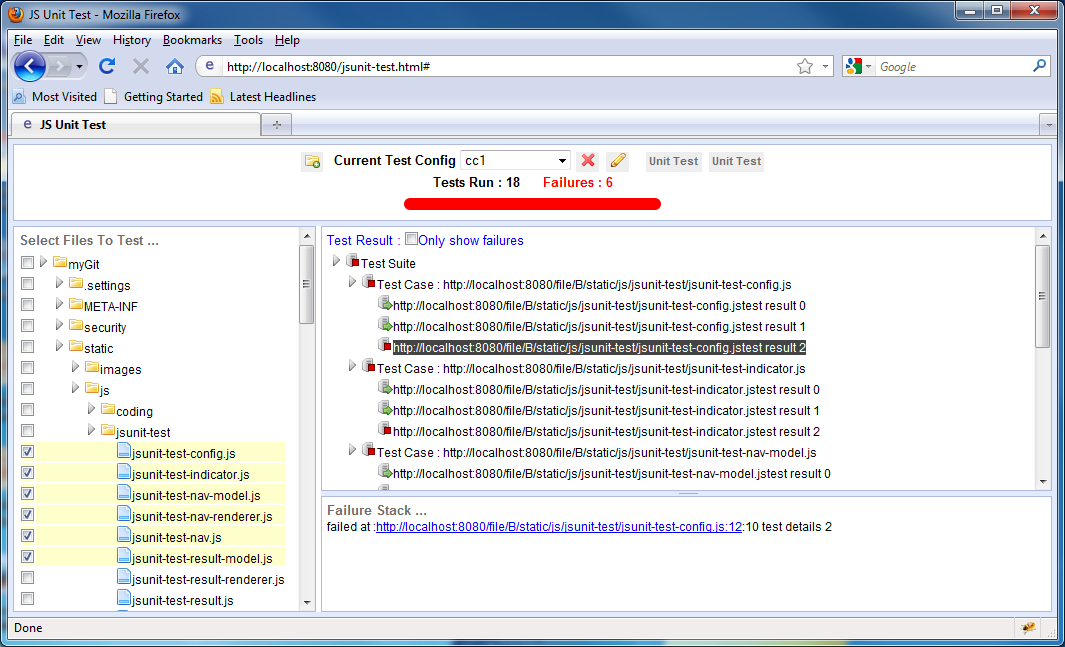
As planned, there will be capability from Orion to run the unit tests as part of the self hosting functionality. Although not finalized yet, here is an early UI prototype.


