Notice: this Wiki will be going read only early in 2024 and edits will no longer be possible. Please see: https://gitlab.eclipse.org/eclipsefdn/helpdesk/-/wikis/Wiki-shutdown-plan for the plan.
Difference between revisions of "Orion/How Tos/Install Orion on Localhost"
m (→Downloading and Running Orion on Localhost) |
(Rearrange some stuff, link to Getting Staretd) |
||
| Line 1: | Line 1: | ||
| − | + | This page explains how to download, install, and run Orion on your local machine. | |
| + | |||
| + | == Downloading Orion == | ||
# Download Orion for your platform from the [http://download.eclipse.org/e4/orion/ download page]. Choose the most recent Stable Build. | # Download Orion for your platform from the [http://download.eclipse.org/e4/orion/ download page]. Choose the most recent Stable Build. | ||
# Unzip the zip file to a folder on your computer.<br/>'''Note:''' Be sure to choose a folder that you have write access to. | # Unzip the zip file to a folder on your computer.<br/>'''Note:''' Be sure to choose a folder that you have write access to. | ||
| + | |||
| + | == Starting the server == | ||
# Make sure you have Java installed - the server is implemented in Java. (Does 'java -version' print something like: java version "1.6.0_22"?) | # Make sure you have Java installed - the server is implemented in Java. (Does 'java -version' print something like: java version "1.6.0_22"?) | ||
# Launch the Orion server: | # Launch the Orion server: | ||
#* '''Linux:''' Run <code>eclipse\eclipse</code>. | #* '''Linux:''' Run <code>eclipse\eclipse</code>. | ||
#* '''Mac OS X:''' Double-click <code>eclipse/eclipse</code>. | #* '''Mac OS X:''' Double-click <code>eclipse/eclipse</code>. | ||
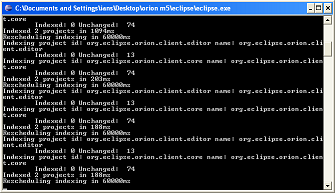
| − | #* '''Windows:''' Double-click <code>eclipse\eclipse.exe</code>.< | + | #* '''Windows:''' Double-click <code>eclipse\eclipse.exe</code>.<p>Once you launch the Orion server, the server console should start.</p>[[Image:Orion_Console.png]] |
# Now the server is running on port 8080. (If you want it to use a different port, change the setting in the eclipse.ini file. On Mac OS X, you will have to right-click on eclipse/eclipse and select "Show Package Contents", then navigate into Contents/MacOS.) | # Now the server is running on port 8080. (If you want it to use a different port, change the setting in the eclipse.ini file. On Mac OS X, you will have to right-click on eclipse/eclipse and select "Show Package Contents", then navigate into Contents/MacOS.) | ||
# Point your web browser to [http://localhost:8080/ http://localhost:8080/]. | # Point your web browser to [http://localhost:8080/ http://localhost:8080/]. | ||
# You'll be directed to the Orion login screen:<br/>[[Image:Orion_Create_Account.png]]<br/>From here you can create a new account for yourself on your local Orion server, or connect Orion to an existing Google, Yahoo, AOL or myOpenID account instead. | # You'll be directed to the Orion login screen:<br/>[[Image:Orion_Create_Account.png]]<br/>From here you can create a new account for yourself on your local Orion server, or connect Orion to an existing Google, Yahoo, AOL or myOpenID account instead. | ||
| + | |||
| + | == Stopping the server == | ||
| + | # Go to the server console window that opened when you launched the server. | ||
| + | # Type <code>close</code> and press Enter. | ||
| + | |||
= Using Orion = | = Using Orion = | ||
| + | == Getting started == | ||
| + | Now that you've got Orion installed, read [[Orion/Getting_Started_with_Orion | Getting started with Orion]] for a brief tour of the | ||
| + | |||
| + | |||
== Linking to existing content == | == Linking to existing content == | ||
You can try out Orion's text editing features by editing existing files on your computer. Here's how: | You can try out Orion's text editing features by editing existing files on your computer. Here's how: | ||
# Open the <code>eclipse\eclipse.ini</code> file in a text editor. | # Open the <code>eclipse\eclipse.ini</code> file in a text editor. | ||
# In the <code>-vmargs</code> section, add a line similar to this: | # In the <code>-vmargs</code> section, add a line similar to this: | ||
| − | #* <code>-Dorg.eclipse.orion.server.core.allowedPathPrefixes=C:\Users\myusername\Documents\Code,C:\Myprojects\OrionFiles</code>< | + | #* <code>-Dorg.eclipse.orion.server.core.allowedPathPrefixes=C:\Users\myusername\Documents\Code,C:\Myprojects\OrionFiles</code><p>This sets the JVM system property <code>org.eclipse.orion.server.core.allowedPathPrefixes</code>, which tells the Orion server what local paths may be accessed by web users. Its value is a comma-separated list of absolute paths. (Remember that any Orion user who logs into your server will have this access, so don't point it to something sensitive.)</p><p>''Note that this property was named differently in Orion M4.'' If you are running M4, you'll need to use -Dorg.eclipse.'''e4.webide.server'''.allowedPathPrefixes=some_path instead.</p> |
| − | + | ||
# Log in and click the "Link Folder" or "Link Project" button on the toolbar. | # Log in and click the "Link Folder" or "Link Project" button on the toolbar. | ||
| − | # Type in a name for the link, and in the '''Server path:''' field, enter the path to the folder you want to link to (it must be a subdirectory of one of the paths you supplied in Step 2). | + | # Type in a name for the link, and in the '''Server path:''' field, enter the path to the folder you want to link to (it must be a subdirectory of one of the paths you supplied in Step 2). |
| + | # Click OK. | ||
# You should now be able to browse and edit the contents of the folder from the Orion UI. | # You should now be able to browse and edit the contents of the folder from the Orion UI. | ||
| − | |||
| − | |||
| − | |||
| − | |||
<!-- | <!-- | ||
| Line 46: | Line 55: | ||
| − | [[Category:Orion/How To|Running | + | [[Category:Orion/How To|Running]][[Category:Orion|Running]] |
Revision as of 14:36, 17 March 2011
This page explains how to download, install, and run Orion on your local machine.
Contents
Downloading Orion
- Download Orion for your platform from the download page. Choose the most recent Stable Build.
- Unzip the zip file to a folder on your computer.
Note: Be sure to choose a folder that you have write access to.
Starting the server
- Make sure you have Java installed - the server is implemented in Java. (Does 'java -version' print something like: java version "1.6.0_22"?)
- Launch the Orion server:
- Linux: Run
eclipse\eclipse. - Mac OS X: Double-click
eclipse/eclipse. - Windows: Double-click
eclipse\eclipse.exe.Once you launch the Orion server, the server console should start.
- Linux: Run
- Now the server is running on port 8080. (If you want it to use a different port, change the setting in the eclipse.ini file. On Mac OS X, you will have to right-click on eclipse/eclipse and select "Show Package Contents", then navigate into Contents/MacOS.)
- Point your web browser to http://localhost:8080/.
- You'll be directed to the Orion login screen:
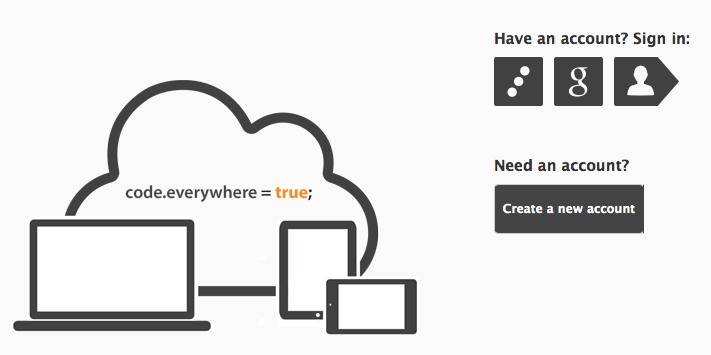
From here you can create a new account for yourself on your local Orion server, or connect Orion to an existing Google, Yahoo, AOL or myOpenID account instead.


Stopping the server
- Go to the server console window that opened when you launched the server.
- Type
closeand press Enter.
Using Orion
Getting started
Now that you've got Orion installed, read Getting started with Orion for a brief tour of the
Linking to existing content
You can try out Orion's text editing features by editing existing files on your computer. Here's how:
- Open the
eclipse\eclipse.inifile in a text editor. - In the
-vmargssection, add a line similar to this:-
-Dorg.eclipse.orion.server.core.allowedPathPrefixes=C:\Users\myusername\Documents\Code,C:\Myprojects\OrionFilesThis sets the JVM system property
org.eclipse.orion.server.core.allowedPathPrefixes, which tells the Orion server what local paths may be accessed by web users. Its value is a comma-separated list of absolute paths. (Remember that any Orion user who logs into your server will have this access, so don't point it to something sensitive.)Note that this property was named differently in Orion M4. If you are running M4, you'll need to use -Dorg.eclipse.e4.webide.server.allowedPathPrefixes=some_path instead.
-
- Log in and click the "Link Folder" or "Link Project" button on the toolbar.
- Type in a name for the link, and in the Server path: field, enter the path to the folder you want to link to (it must be a subdirectory of one of the paths you supplied in Step 2).
- Click OK.
- You should now be able to browse and edit the contents of the folder from the Orion UI.