Notice: This Wiki is now read only and edits are no longer possible. Please see: https://gitlab.eclipse.org/eclipsefdn/helpdesk/-/wikis/Wiki-shutdown-plan for the plan.
Nebula WindowBuilder
Introduction
This tutorial explains how to integrate a widget into WindowBuilder.
This is work in progress version that will be continued and completed.
Contents
Setup
First of all, get the source code on github : [1].
Then create a projet in Eclipse and import all plugins into your workspace (if you use Egit, go to the EGit perspective, expand the node Working Tree, select all projects, right-click then choose Import projects).
Java part
Create the class
Open the plugin org.eclipse.wb.rcp.nebula and go to the directory src, package org.eclipse.wb.internal.rcp.nebula
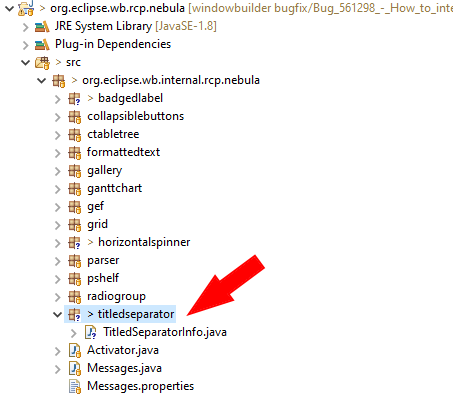
Create a new package org.eclipse.wb.internal.rcp.nebula.XXX where XXX is you widget name :
In this package create a Java Class called XXXInfo where XXX is you widget name. This class is very simple, it extends CompositeInfo and contains a constructor.
public class TitledSeparatorInfo extends CompositeInfo {
 public TitledSeparatorInfo(AstEditor editor,
       ComponentDescription description,
       CreationSupport creationSupport) throws Exception {
   super(editor, description, creationSupport);
   // listener for setting property to default
   InstanceObjectPropertyEditor.installListenerForProperty(this);
 }
}
Add a new extension in your plugin.xml file
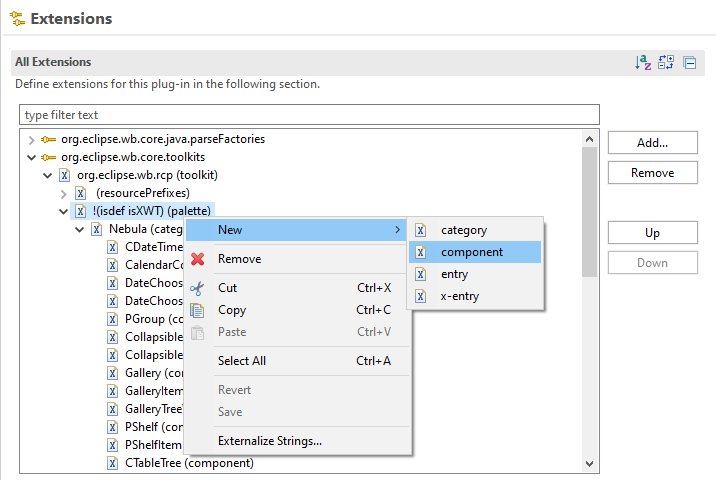
Open file plugin.xml of this plugin, , go to the Extensions tab and add a new entry under Nebula (category). The type of this entry is Component :
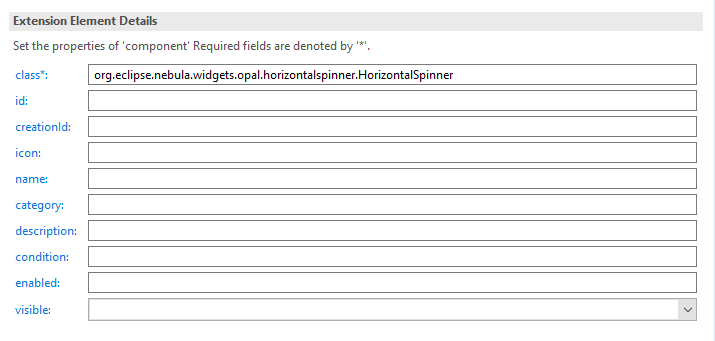
Just fill the class attribute with the qualified name of your Nebula widget (org.eclipse.nebula.widget.yyy).
Update Manifest.mf file
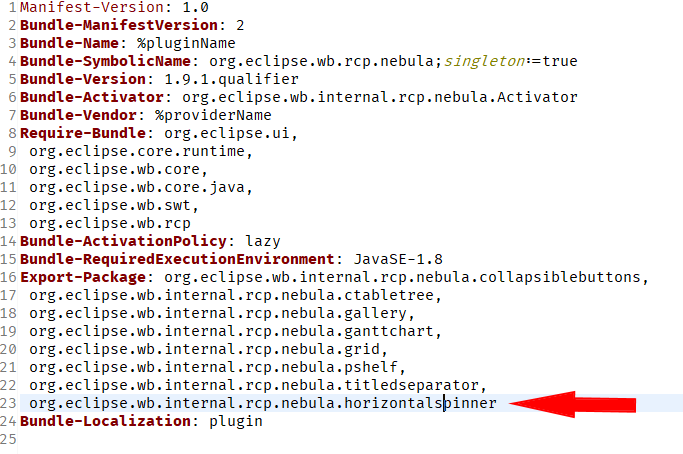
Open the manifest.mf file and in the Export-Package part add the package of you XXXXInfo class :
Icon
Create an icon that will be displayed in the palette. It is a PNG or GIF file, 16x16 pixels.
XML Configuration part
Create the folder
Go to the directory /wbp-meta/org/eclipse/nebula/widgets and create a folder XXX where XXX is the name of your widget (for example /wbp-meta/org/eclipse/nebula/widgets/pgroup).
Paste the icon
In this directory, paste the icon you have created.
XML File
XML is very verbose, so it is easier to copy an existing file (for example RadioGroup.wbp-component.xml) and paste it in the folder you have created.
The filename is WidgetName.wbp-component.xml
Now you have to complete/modify tags.
Tag model
Fill the class attribute. The value is the qualified name of the "xxxInfo" class you created
<model class="org.eclipse.wb.internal.rcp.nebula.titledseparator.TitledSeparatorInfo"/>
Tag description
Enter a description for your widget. The description will be displayed as a tooltip in the palette.
<description>An enhanced separator, with a title and/or an image.</description>
Tag creation
You need to add a <source> tag. The value is a CDATA element.
This tag describes how to instantiate a widget.
<source><![CDATA[new org.eclipse.nebula.widgets.opal.titledseparator.TitledSeparator(%parent%, org.eclipse.swt.SWT.NONE)]]></source>
The important information are the following :
- Use the qualified name of the constructeur (org.eclipse.nebula.widget...)
- %parent% represents the parent composite
- The second argument is the qualified name of the default SWT attribute
If you want to initialize the widget just after its creation, use the invocation tag
- The attribute signature is the signature of the called method
- The value is a CDATA value
<invocation signature="setText(java.lang.String)"><![CDATA["New TitledSeparator"]]></invocation>
Tag constructors
To be continued
Tag exposing-rules
To be continued
Tag properties
To be continued
Testing
Right-click on a plugin (for example org.eclipse.wb.rcp.nebula), choose Run as then Eclipse Application. In your Eclipse application create a new project.
Very import: do not forget to include the jar files that contain your widget in your project. You can retrieve the latest stable version here: [2]
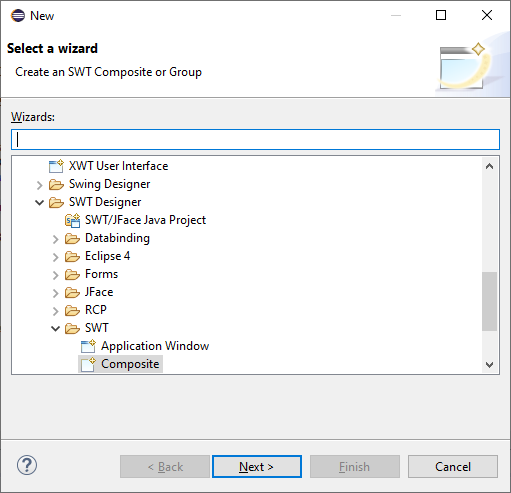
Right-click on the src folder, choose New > Others..., then choose SWT Designer > SWT > Composite
You'll find your widget in the "Nebula" part of the palette.
Documentation
Open the project org.eclipse.wb.rcp.doc.user.
Go to the folder html/palettes and edit the file swt_palette.html
Add you widget and a short description.

