Notice: this Wiki will be going read only early in 2024 and edits will no longer be possible. Please see: https://gitlab.eclipse.org/eclipsefdn/helpdesk/-/wikis/Wiki-shutdown-plan for the plan.
Lyo/BuildRIO
Contents
Building and Running Lyo reference implementations (RIOs) in Eclipse
OSLC4J-based RIOs
NOTE: The instructions below are for the "old" RIOs. There are newer RIOs that leverage OSLC4J.
The Projects for the OSLC4J-based RIOs are in the same git repository as the "old" ones, namely:
git://git.eclipse.org/gitroot/lyo/org.eclipse.lyo.rio.git
and have names such as:
org.eclipse.lyo.oslc4j.changemanagement.
Instructions for running the OSLC4J-based RIOs are on the Lyo/BuildingOSLC4J wiki page, e.g.: instructions for running the Change Management provider.
Prerequisites
- Eclipse 3.6 or higher IDE
- EGit team provider for git (recommended) or git command line package.
- m2e for Maven support in the Eclipse IDE
Clone the Lyo RIO git repository
This example assumes EGit is being used
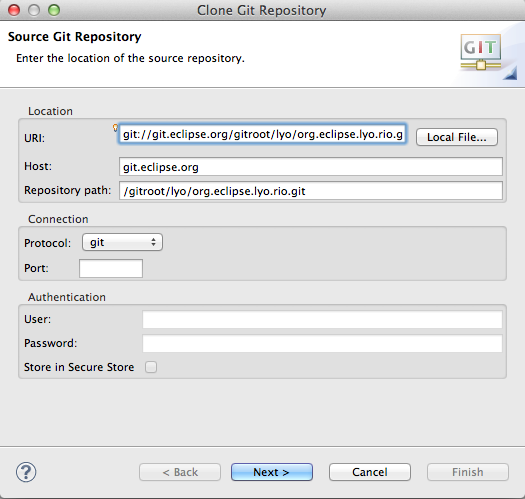
- Open the Git Repositories view in Eclipse and click the Clone Git Repository icon
- Use git://git.eclipse.org/gitroot/lyo/org.eclipse.lyo.rio.git as the URI. User/Password are not required.
- On the Branch Selection page, select the master branch
- On the Local Destination page, specify a location or accept the default and click Finish
The repository should now show up in your Git Repositories view
Import Eclipse projects from the git repository
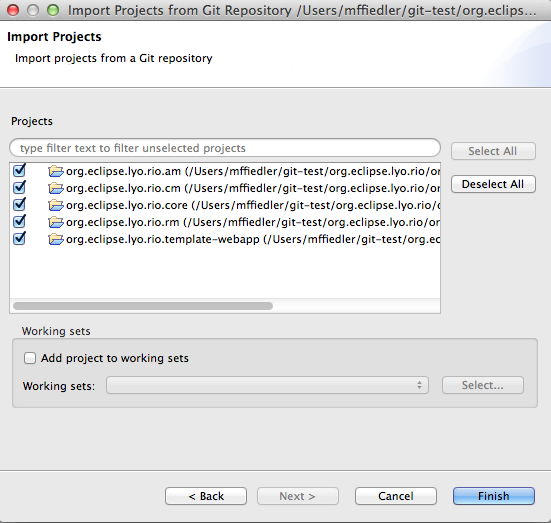
- In the Git Repositories view, right click org.eclipse.lyo.rio and select Import Projects
- Select the Import Existing Projects wizard and click next
- Select all components of RIO
Build the projects
- In the Eclipse Package Explorer view, select all RIO projects, right click and select Maven->Update Project Configuration and click OK
- Build each project (in the order described below) as follows:
- Expand the project
- Right click pom.xml and select Run As->Maven install. (Depending on what plugins are in your Eclipse install, Maven might have to download dependencies.)
- Build order for RIO projects:
- org.eclipse.lyo.rio.core
- org.eclipse.lyo.rio.template-webapp
- the others (e.g. AM, CM, RM), in any order
- If org.eclipse.lyo.rio.core still shows an error, right click the project and select Maven->Update Project Configuration again.
- IBM JVM/JRE Users: There is an issue with m2eclipse and the the IBM JRE. If you have see the error java.lang.NoClassDefFoundError: org.slf4j.impl.StaticLoggerBinder when running a Maven install, you need to copy a newer slf4j api jar into your JRE directory to work around the issue until it is fixed:
- Download slf4j-1.6.2.zip and extract the zip.
- copy slf4j-api-1.6.2.jar from the slf4j distribution to the JAVA_HOME\jre\lib\ext directory
- See https://bugs.eclipse.org/bugs/show_bug.cgi?id=338252 if you are interested in the details
- If there is still a workspace error at this point, add target/generated-sources/antlr3 to the project build path. This will be fixed by https://bugs.eclipse.org/bugs/show_bug.cgi?id=362524
Run a reference implementation web application
This example is for the CM provider.
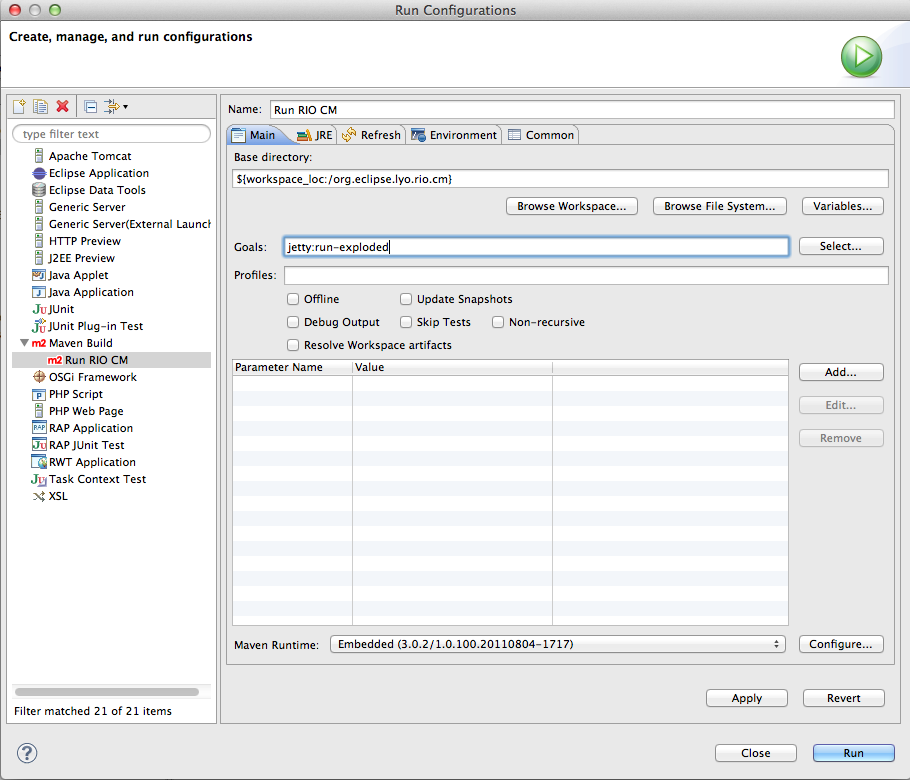
- Select Run->Run Configurations and double click Maven Build
- Give the configuration a name
- Specify a base directory of ${workspace_loc:/org.eclipse.lyo.rio.cm} and a goal of jetty:run-exploded and Click Run
You should now be able to point a local web browser at http://localhost:8080/rio-cm and start working with the reference implementation.
Building and Running the Lyo RIO project using Git and Maven
Prerequistes
Clone the RIO git repository
- git clone -b master git://git.eclipse.org/gitroot/lyo/org.eclipse.lyo.rio.git
Build the projects
- Build Core
- cd to org.eclipse.lyo.rio.core in git repository
- mvn install
- cd to org.eclipse.lyo.rio.template-webapp in git repository
- mvn install
- Build CM RIO (for example)
- cd to org.eclipse.lyo.rio.cm
- mvn install
Run a reference implementation web application
- cd to the desired RIO directory (am/cm/rm)
- mvn jetty:run-exploded
You should now be able to point a local web browser at http://localhost:8080/rio-cm and start working with the reference implementation.
Ctrl-C will stop it.


