Notice: this Wiki will be going read only early in 2024 and edits will no longer be possible. Please see: https://gitlab.eclipse.org/eclipsefdn/helpdesk/-/wikis/Wiki-shutdown-plan for the plan.
Linux Tools Project/SpecfileEditor/User Guide
Overview
Basic introduction
This editor provides a great number of features to make your *.spec files editing better. One of the most valued parts is the rpmlint which assist in finding the most common mistakes made in RPM spec files and also a quick way to fix some of this warnings. It also tries to provide all the nice features you have seen in JDT. Just to name a few:
   * Outline view and quick outline in the editor
   * Various auto-completions
   * Highlighting
   * Hyperlinks - both inside the file and to external resouces
   * Folding and etc.
Start editing
Starting editing should be as simple as double click on any of the spec files in your projects or going through the File/Open File procedure and select your spec file.
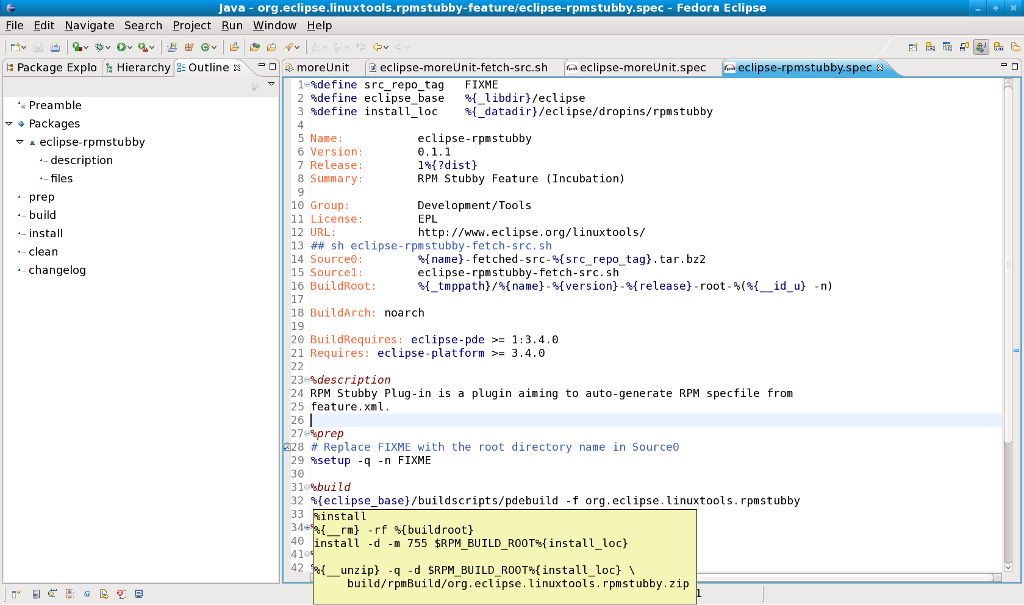
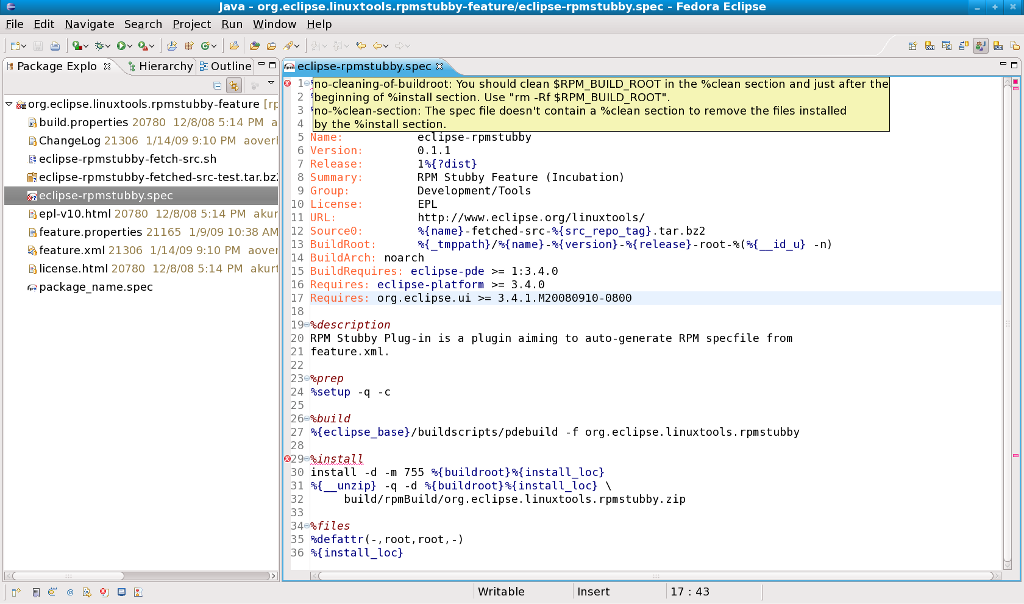
Note: It is strongly recommended that you always have your spec file in a project inside Eclipse workspace to take the most of the editor. Rpmlint integration, some auto-completion and hyperlink are not available when you are editing external (for the workspace) file. At this stage you should see something nice looking like this:
Create new spec file
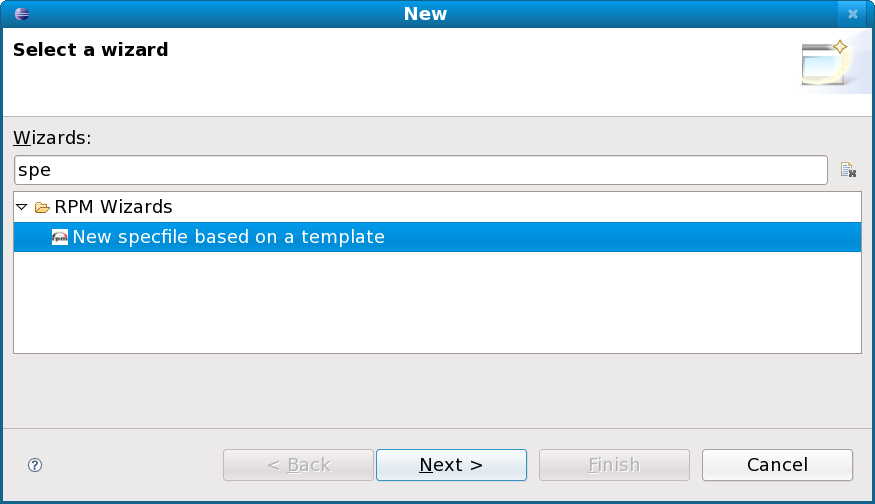
Part of the plugin is a wizard for creating new specfile. It can be invoked from the menu File/New/Other which should bring the following dialog where you can select "New specfile based on a template".
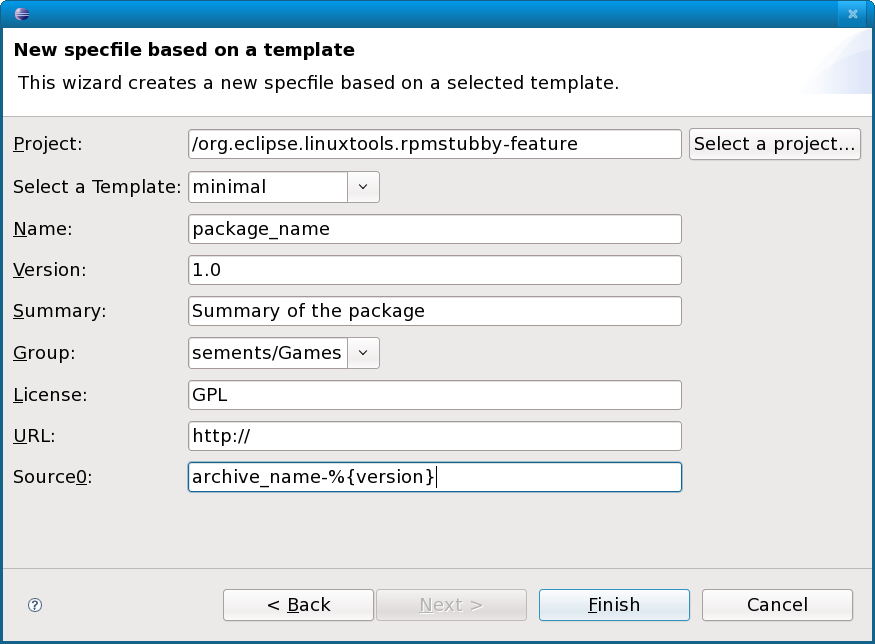
Dialog providing options and interface for filling the data in the spec file should appear at this stage.
Description of the fields:
   * Project: This is simply the place where generated spec file will be stored and this should be a project in this workspace. For convenience it is auto-filled with the active project when you started the wizard.
   * Select a template: Template functionality is based on the templates provided by rpmdevtools. Check its home page or just try the provided templates to see whether they suits you. The names are clear enough to not need further explanations - perl, ruby, python, etc.
   * Version: The version of the software the spec file is for.
   * Summary: One line description of the packaged software.
   * Group: Drop down menu for selecting the RPM Group this package belongs to. The values in this drop down are filled from the GROUPS file which is part of the RPM documentation package. This file usually resist in a place like /usr/share/doc/rpm-*/GROUPS.
   * License: The license of the packaged software.
   * URL: The URL pointing to the home page of the packaged software.
   * Source0: The name of the source archive the package is builded from.
Rpmlint
Enable rpmlint warnings
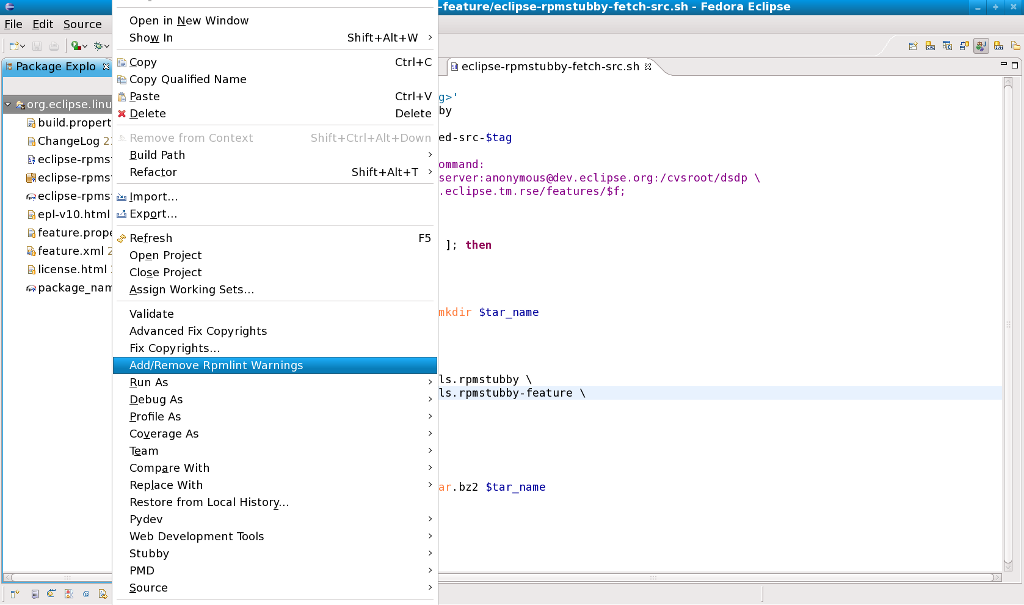
Enabling rpmlint warnings is as easy as right clicking on the project containing the spec file to be checked by rpmlint and select "Add/Remove rpmlint warnings" from the context menu.
To disable rpmlint warnings just execute the same steps again.
Benefits from rpmlint integrations
Warnings for common mistakes
After rpmlint warnings are enabled new Rpmlint project builder is added to the project builders and the reported warnings/errors are showed as markers in the editor view.
For better integration with the Eclipse platform these warnings are also added to the Problems view.
Fix the warnings
Part of the rpmlint integration is the ability to provide quick fixes for some of the reported warnings. While not providing quick fixes for all the fixes available in rpmlint, the number of fixes is constantly improving. If you want to see a quick fix for the most disturbing for you warning please report it here against the RPM component.
To execute some quick fix right click on the warning/error in the Problems view and select "Quick fix" or just use the shortcut Ctrl+1 with a selected warning. In the dialog that appears
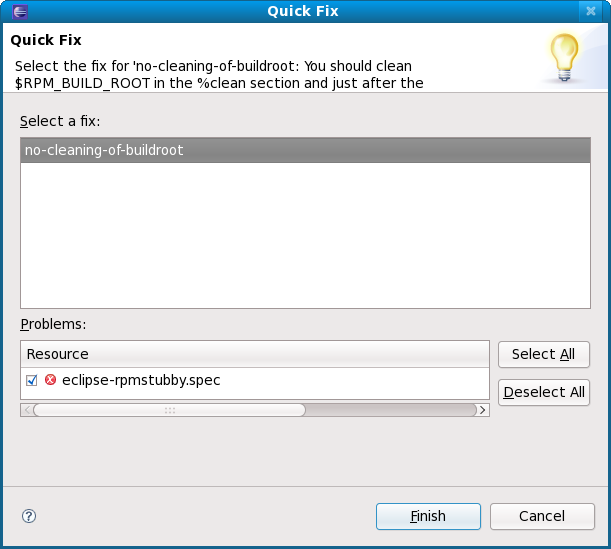
select the provided fix and click Finish. The changes will auto appear in the specfile editor. For comparison look at the following screenshots - Before and After.


Customizing Editor Settings
Spec file editor should be completely working without any tweaking of the settings but doing it you should be able to save even more time.
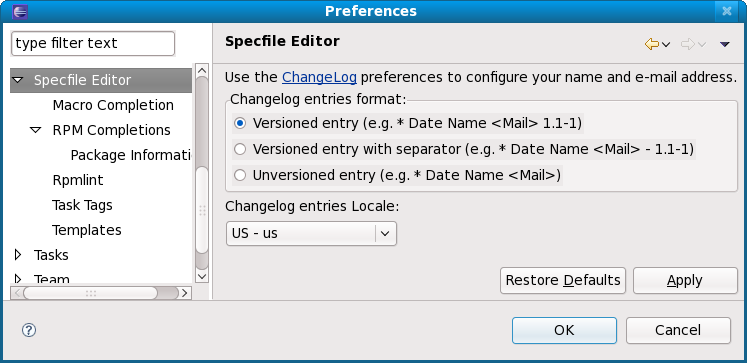
Changelog settings
Simple properties allowing customizing the generated ChangeLog entries (Ctrl+Alt+C).
Note: Be sure to set the Author name and Author email in ChangeLog plugin preferences so they get properly generated.
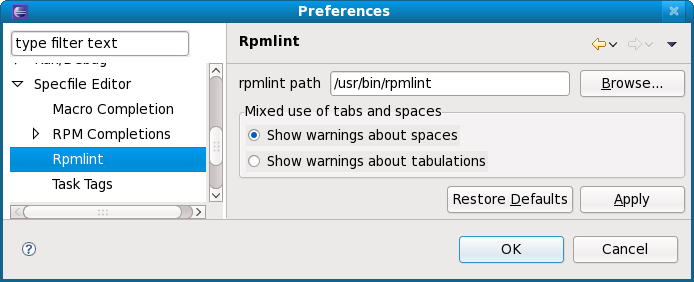
Rpmlint settings
This page is really useful when you have rpmlint installed in place different from the default (/usr/bin). The ability to set custom rpmlint is especially useful during development of quick-fixes or rpmlint itself. Another option on this page is whether warnings should be shown for space usage or for tabs usage, when they are used in a mixed mode in the spec file.
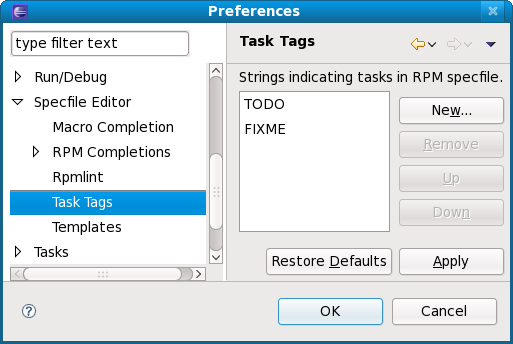
Tasks settings
This page provides the ability to select the task tags to be used when searching for tasks. Task tags are looked only in comments. When a task tag is found it is added to the Tasks view and a marker in the editor is created. Task tags used by default are TODO and FIXME. Users have the power to define their own Task tags by just pressing the New button and entering the new tag (e.g. REMOVE).
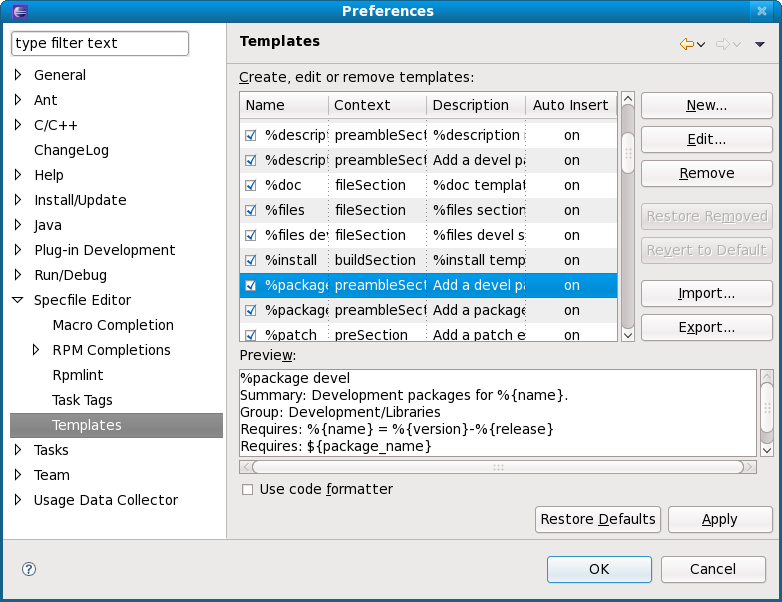
Templates settings
A list of predefined/generic templates to speed up creation various fragments of the specfile in the editor. Provided features match the templates functionality provided by Java editor.
The user can manipulate the list by:
   * Adding new template
   * Editing existing template
   * Deleting existing template
   * Import a list of templates
   * Export the list of templates for future usage on another machine or for providing default templates for your team
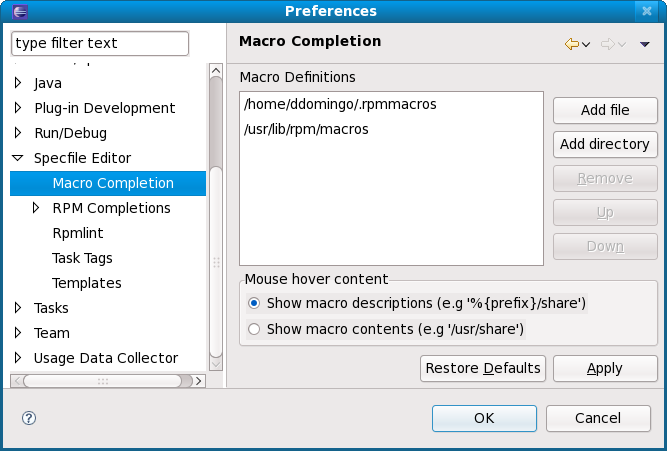
Macros settings
Properly setting up macros locations is a crucial part for the editor to work properly. Having all the macros path configures enables the editor to properly highlight, autocomplete and showing hover for all the available macros.
Macros location
The path used for looking for macros can be formed by either single files or a directory. When a directory is added to the path all files in it are read and macros from them added to the list of available macros.
Macros preview
This setting controls how to present macros value in hovers in case they contain another macros in their value. To distinguish the options look at the following hovers:
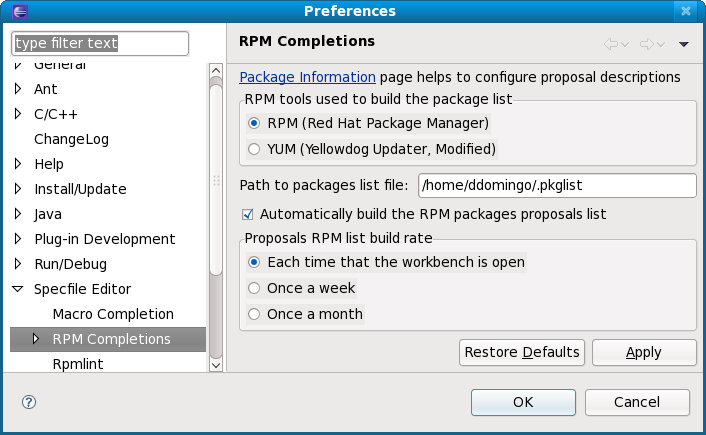
Packages settings
Generic Packages Settings
Using distribution specific tools enhances auto-completion for packages with not only installed rpm files but also with the packages available in the online repositories. Support is there for YUM and URPMI tools. Users of other tools should contact us to find a way for adding support for them. If none of the distribution tools is selected packages auto completion will contains only the installed packages.
Additional settings are the frequency of refreshing packages list and the file to store the package list.
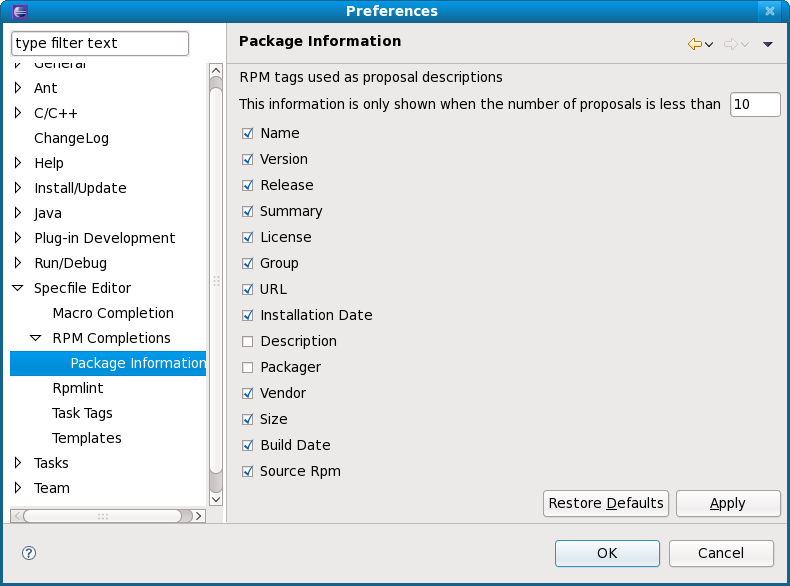
Package details
These are just visualization tweaking options like the number of packages to show details for and what RPM tags should the hover contains.

