Notice: this Wiki will be going read only early in 2024 and edits will no longer be possible. Please see: https://gitlab.eclipse.org/eclipsefdn/helpdesk/-/wikis/Wiki-shutdown-plan for the plan.
Difference between revisions of "JPA Diagram Editor Project Tutorial"
m (→Add new Attribute) |
m (→Add new Attribute) |
||
| Line 37: | Line 37: | ||
[[Image:CreateAttribute.jpg]] | [[Image:CreateAttribute.jpg]] | ||
| + | |||
| + | A new attribute named ''Attribute1'' should be added under section '''''Other Attributes''''': | ||
| + | |||
| + | [[Image:AddAttribute.jpg]] | ||
Revision as of 02:19, 17 August 2010
Contents
Overview
This tutorial provides a step by step walk-through of the Java Diagram Editor.
Prerequisites
This tutorial is based on the Eclipse Helios.
To install JPA Diagram Editor project follow the steps described in How to Install section of the JPA Diagram Editor wiki main page.
Open JPA Diagram Editor
In the Eclipse IDE create new JPA 1.0 project.
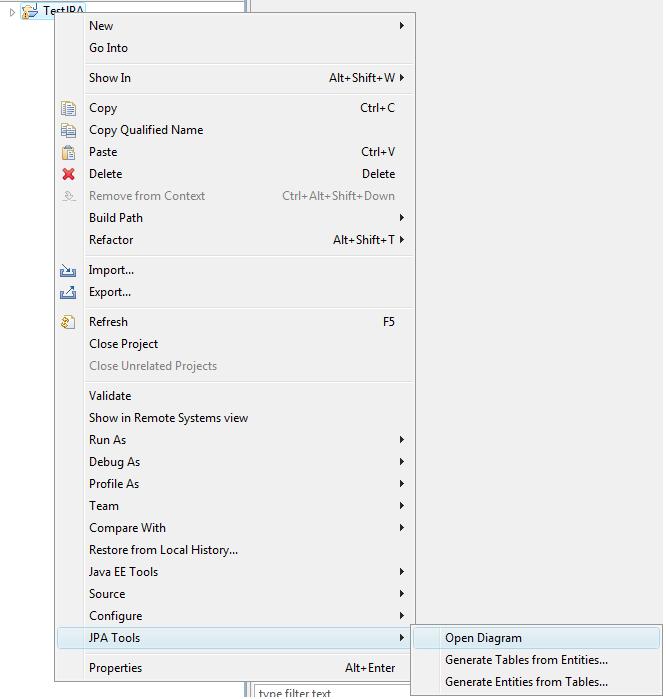
The Open Diagram action is available on two levels:
- On project level: Select the newly created JPA project and from its context menu select JPA Tools -> Open Diagram
- On JPA node level: Expand the newly created JPA project and from the context menu of its JPA node, select Open Diagram
Create new Entity
In the Eclipse IDE create new JPA 1.0 project. Download the persistence provider library and add it into the JPA project's classpath.
Open the JPA Diagram Editor. For more information how to do this, follow the steps described in the previous section Open JPA Diagram Editor.
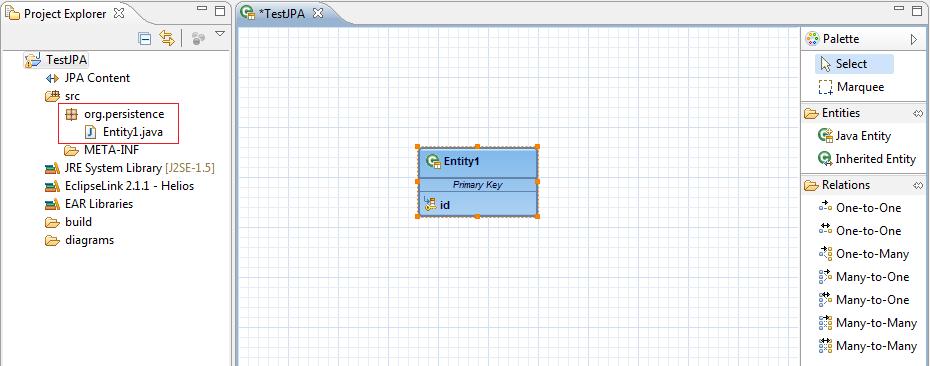
From the right site of the editor, the so called Palette section, select Java Entity and drag&drop it to the diagram. A new entity class org.persistence.Entity1 with default primary key attribute should be created and shown in the diagram:
Add new Attribute
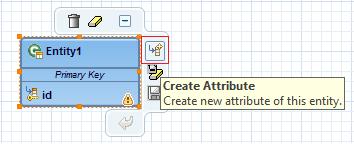
In the Eclipse IDE create new JPA 1.0 project. Open its diagram editor and create new entity. For more information how to create new entity follow the steps described in the previous section Create new Entity. Select the newly created entity or just place the mouse over it and select from its context buttons Create Attribute:
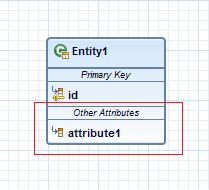
A new attribute named Attribute1 should be added under section Other Attributes:


