Notice: this Wiki will be going read only early in 2024 and edits will no longer be possible. Please see: https://gitlab.eclipse.org/eclipsefdn/helpdesk/-/wikis/Wiki-shutdown-plan for the plan.
Difference between revisions of "Forking Eclipse ICE"
(→Pulling from the Master Branch) |
|||
| Line 12: | Line 12: | ||
== Pulling from the Master Branch == | == Pulling from the Master Branch == | ||
| − | Now you have ICE and a local repository on Github. Unfortunatly, your new forked repository will not automatically synchronize with the master ICE repository. Git needs to be set up to fetch the changes from master so that your repository stays up to date. First, open Terminal if using Mac or the command prompt. Navigate to the directory where ice is stored locally (you should have made a local clone somewhere in the previous step). Enter <br>git remote add upstream <nowiki>https://github.com/Eclipse/ice</nowiki><br>This will set up git to fetch any changes to the Eclipse/ice main repository. Now to synchronize your forked repository with main, enter <br>git fetch upstream<br>git checkout master<br>git merge upstream/master<br> Now your copy of the repository will stay up to date without losing any of your unique changes. | + | Now you have ICE and a local repository on Github. Unfortunatly, your new forked repository will not automatically synchronize with the master ICE repository. Git needs to be set up to fetch the changes from master so that your repository stays up to date. First, open Terminal if using Mac or the command prompt. Navigate to the directory where ice is stored locally (you should have made a local clone somewhere in the previous step). Enter <br><code>git remote add upstream <nowiki>https://github.com/Eclipse/ice</nowiki></code><br>This will set up git to fetch any changes to the Eclipse/ice main repository. Now to synchronize your forked repository with main, enter <br><code>git fetch upstream</nocode><br><code>git checkout master</code><br><code>git merge upstream/master</code><br> Now your copy of the repository will stay up to date without losing any of your unique changes. |
== Issuing Pull Requests == | == Issuing Pull Requests == | ||
Revision as of 11:52, 4 June 2015
This page describes the process for creating a fork of the ICE project. This assumes basic simmilarity with Git and that you have a Github account. For working with ICE, the fork will be a copy of the entire repository that you can edit and make changes to. Then, if you propose new content or bug fixes, you can submit a pull request that could be added back to the main ICE prodject.
Contents
Creating the Fork
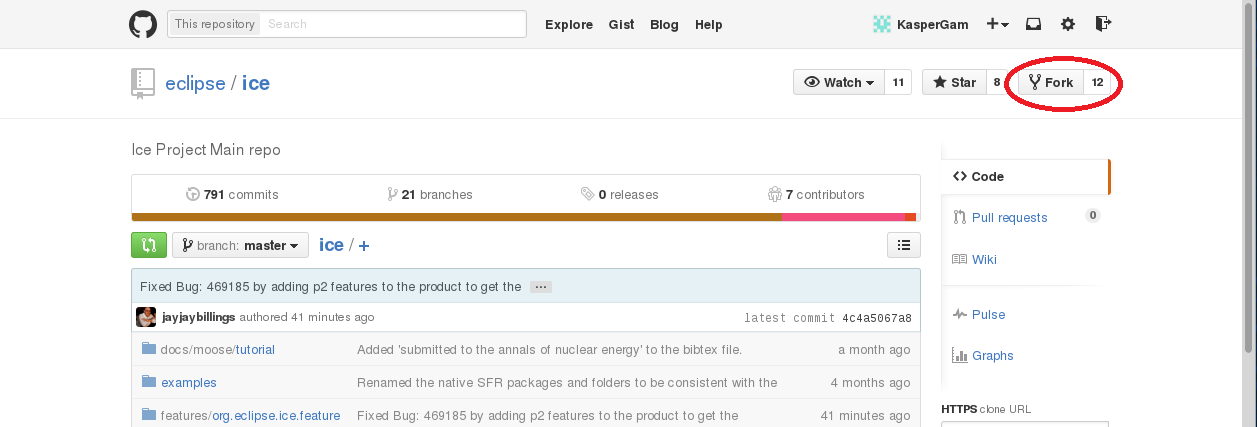
Go to the GitHub ICE repository and log in to GitHub. Press the "Fork" button in the upper right hand corner of the page, as shown above.
Cloning the Fork Repository
Follow the instructions for cloning the Git repository, but instead of https://github.com/eclipse/ice.git, use https://github/[your username]/ice.git as the URI. Now you will be able to make commits and push your changes to your own fork repository on Github.
Pulling from the Master Branch
Now you have ICE and a local repository on Github. Unfortunatly, your new forked repository will not automatically synchronize with the master ICE repository. Git needs to be set up to fetch the changes from master so that your repository stays up to date. First, open Terminal if using Mac or the command prompt. Navigate to the directory where ice is stored locally (you should have made a local clone somewhere in the previous step). Enter git remote add upstream https://github.com/Eclipse/ice
This will set up git to fetch any changes to the Eclipse/ice main repository. Now to synchronize your forked repository with main, enter git fetch upstream</nocode>
<code>git checkout mastergit merge upstream/master
Now your copy of the repository will stay up to date without losing any of your unique changes.
Issuing Pull Requests
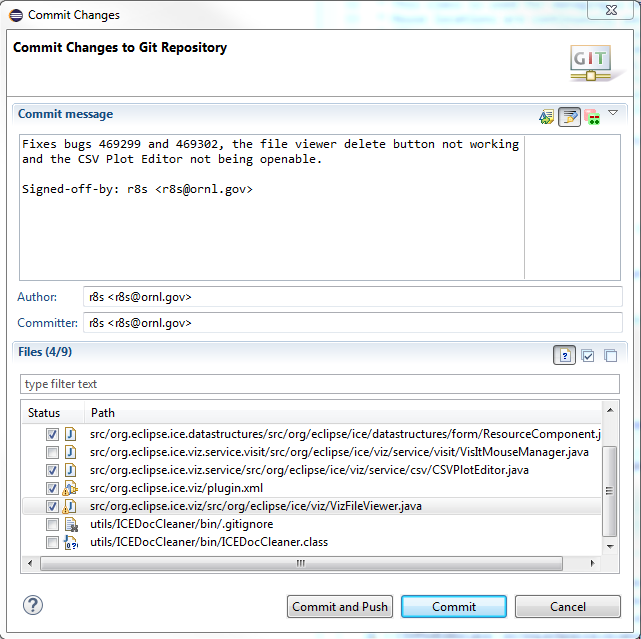
First, commit your changes to your branch by right clicking your repository in the Git Perspective and selecting Commit, or by right clicking your project in the Package Explorer and selecting Team -> Commit. Write a message describing your changes and press the Add Signed Off by button to sign the message. Then select all the files whose changes you wish to commit and press the Commit and Push button.
In order to contribute to Eclipse, you must sign a Contributor Licence Agreement. If you have not already done so, go to the Projects Forge, create an account, and click on the Eclipse CLA link in the upper right. The email address used in this account must match the email used for the commit.
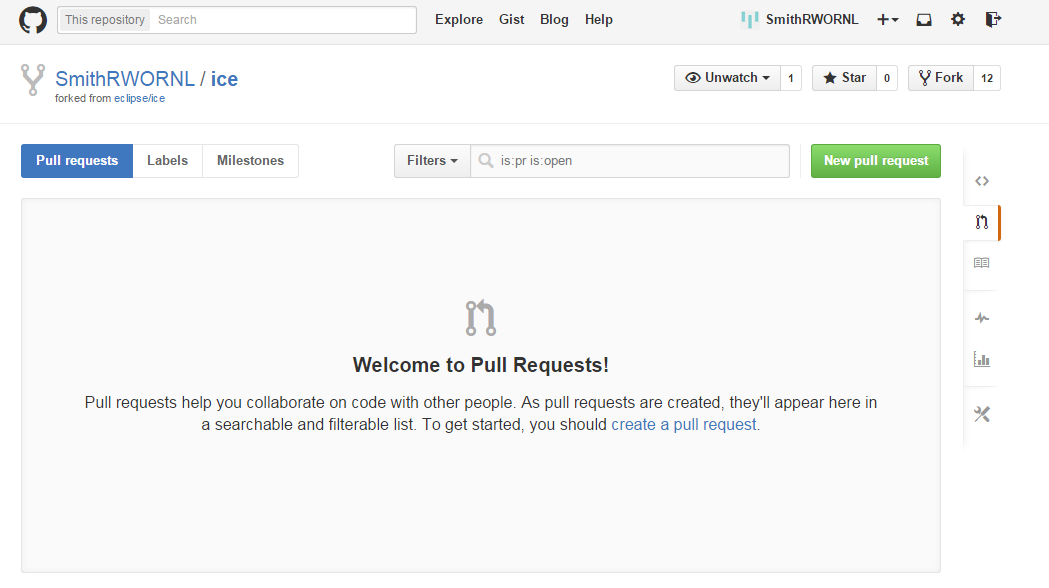
Once you are ready to submit the pull request, return to GitHub. From your repository page, http//github.com/[your username]/ice, go to the pull requests link on the right, and click the New Pull Request button.
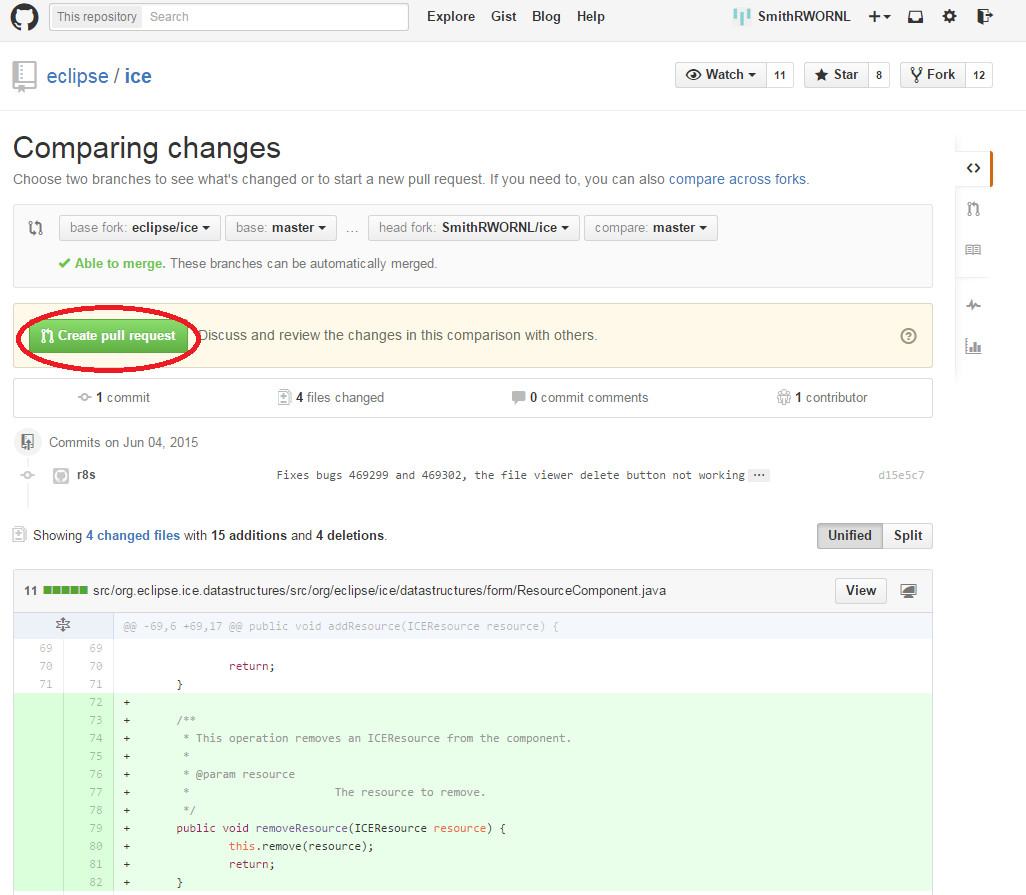
This will bring you to a page listing all the changes you have made, compared to the code in the up to date master branch.
Press the Create pull request button to open a dialogue box with the commit message you wrote when committing to your branch. You may edit this message before submitting it to the master branch's owner for review. When done, press the Create pull request button again to submit your changes for consideration.


