Notice: this Wiki will be going read only early in 2024 and edits will no longer be possible. Please see: https://gitlab.eclipse.org/eclipsefdn/helpdesk/-/wikis/Wiki-shutdown-plan for the plan.
Difference between revisions of "FAQ How do I configure an Eclipse Java project to use SWT?"
(FAQ with detailed instructions for setting up stand-alone SWT project in Eclipse) |
m (added see also section) |
||
| Line 11: | Line 11: | ||
At this point, your project has access to all of the SWT packages and to the SWT source code. | At this point, your project has access to all of the SWT packages and to the SWT source code. | ||
| + | |||
| + | == See Also: == | ||
| + | *[[FAQ How do I create an executable JAR file for a stand-alone SWT program?]] | ||
Latest revision as of 21:00, 31 March 2008
The easiest way to configure a Java project in Eclipse to use SWT is as follows:
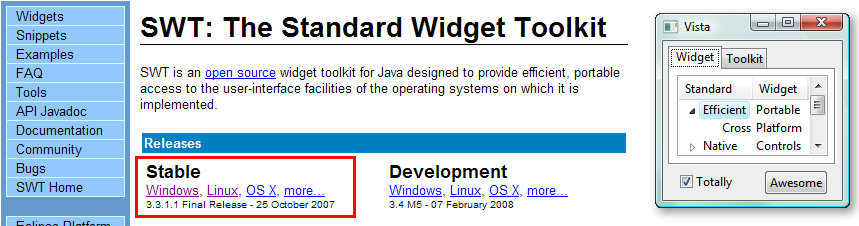
- Download the SWT stable release for your Eclipse version and your operating system from Eclipse SWT Project Page. For example, for Eclipse version 3.3 and Windows, select the Windows link under Releases / Stable, as shown in the screenshot below.
- This will download a zip file that contains our org.eclipes.swt project. (For example, for Eclipse 3.3 and Windows, the file is called swt-3.3.1.1-win32-win32-x86.zip.) Do not unzip this file. Just download it and note the directory where you saved it.
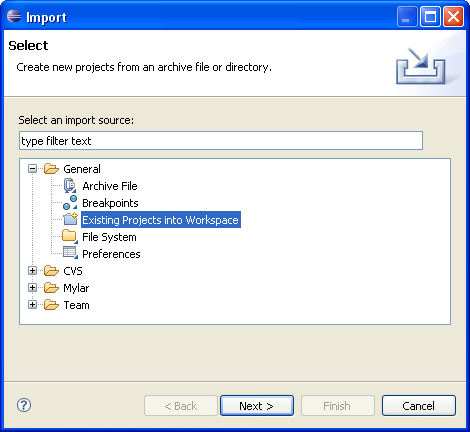
- Inside Eclipse, select Import / Existing Projects into Workspace, as shown below.
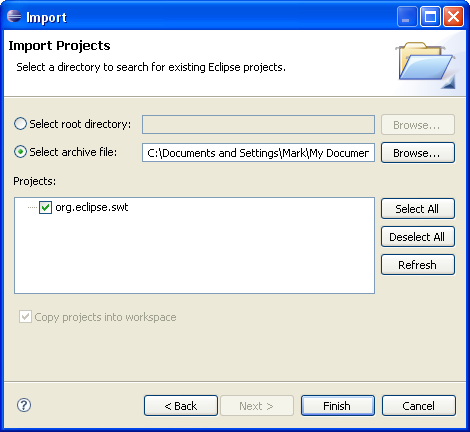
- Press Next and select the option Select archive file. Browse to the zip file you just downloaded. A project called org.eclipse.swt will display in the Projects list. Make sure it is checked, as shown below, and press Finish.
- Eclipse will create the project org.eclipse.swt in your workspace. This project already has the required SWT JAR file, including source code for the SWT classes.
- Select the project that will be used to develop SWT programs (for example, "MyProject) and select Project / Properties / Java Build Path.
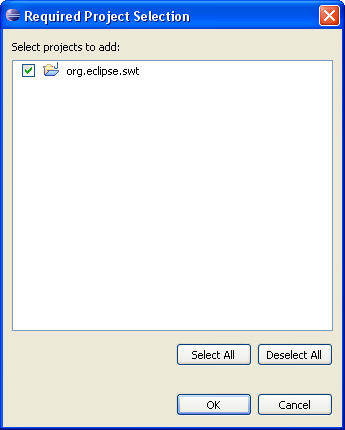
- Select the Projects tab. Press Add. The org.eclipse.swt project will display in the Select projects to add: list. Select this project by checking the box. The screen should display as shown below.
- Press OK to return to the Projects tab of the Java Build Path dialog. The screen should show the org.eclipse.swt project as shown below.
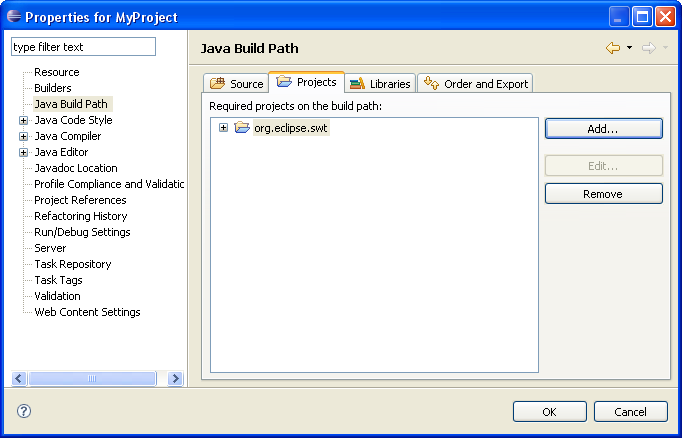


At this point, your project has access to all of the SWT packages and to the SWT source code.