Notice: this Wiki will be going read only early in 2024 and edits will no longer be possible. Please see: https://gitlab.eclipse.org/eclipsefdn/helpdesk/-/wikis/Wiki-shutdown-plan for the plan.
EclipseLink/Examples/JPA/GlassFishV2 Web Tutorial
Contents
EclipseLink JPA Deployed on GlassFish 2.1 using Eclipse WTP
Note: This tutorial' is under construction for the next week as of 20080915.
If you want to get a small web application running quickly on GlassFish - the services provided by the Web Tools Project pluggin in the Eclipse IDE can take care of the deployment details and set the server into debug mode for you.
This basic example details how to use Eclipse to run/debug a minimum J2EE web application servlet using EclipseLink JPA as the persistence provider. The goal of this example is to detail the minimum steps needed to run EclipseLink inside SUN GlassFish using the Eclipse IDE - at this point no presentation/controller layer such as JSF, Spring or Struts will be used beyond a basic HttpServlet so we can concentrate on the the integration layer JPA setup.
The DALI project was used to generate Entities from a schema with sequences already populated.
The details described here are valid for both GlassFish V2 and the SUN Java System Application Server 9
Development Environment
Software: Eclipse IDE for Java EE 3.4 Ganymede (June 2008 +) with all 5 packages (DTP 1.6, EMF 2.4, GEF 3.4, WTP 3.0, XSD 2.4), Oracle 11g DB 11.1.0.6.0, Java JDK 1.6.0_04, GlassFish V2.1 build 50
This example will run fine with any Database that EclipseLink supports.
Prerequisites
Install Eclipse EE
- I installed a clean version of Eclipse Ganymede (June 2008) with all of WTP 3.0
Install a Database
- In this example I am using Oracle 11g, the table schemas have already been created manually and all entity java classes have been generated using the Eclipse DALI tool.
Install GlassFish
I installed the latest GlassFish V2.1 build and followed the instructions on that page.
- C:\opt>java -Xmx256m -jar glassfish-installer-v2.1-b50-_20080915_windows.jar
- C:\opt\glassfish>cd glassfish
- C:\opt\glassfish>ant -f setup.xml
Install GlassFish Eclipse 3.4 Server Plugin
The GlassFish server plugin is not shipped by default with Eclipse - you will need to update your Eclipse IDE to pick up the plugin.
- Goto the Servers tab in a Java EE view and right-click New | Server
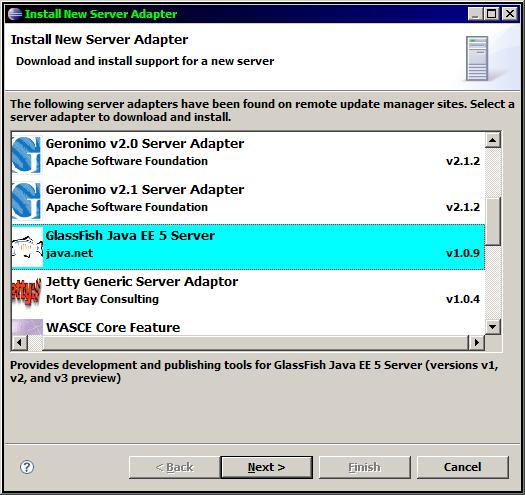
- Select the link "Download additional Server adapters"
- Select the GlassFish Java EE 5 Server from java.net - make sure it is version 1.0.9+
Validating the GlassFish/Eclipse configuration
- Use the V2 plugin when creating a server
- Start the server to test the plugin
- You should see the following message when running http://127.0.0.1:8080
Sun Java System Application Server 9.1.1 (build b50-fcs)
- Create an empty EAR application using the Eclipse JEE application wizard
- Create an EJB and Web subproject - do not add any facets for other servers - as GlassFish does not appear in the "Target Runtime" dropodown yet
- Switch the EAR version to 5.0 from 1.4
- Add a test.jsp page to the Web project
- Create an EJB and Web subproject - do not add any facets for other servers - as GlassFish does not appear in the "Target Runtime" dropodown yet
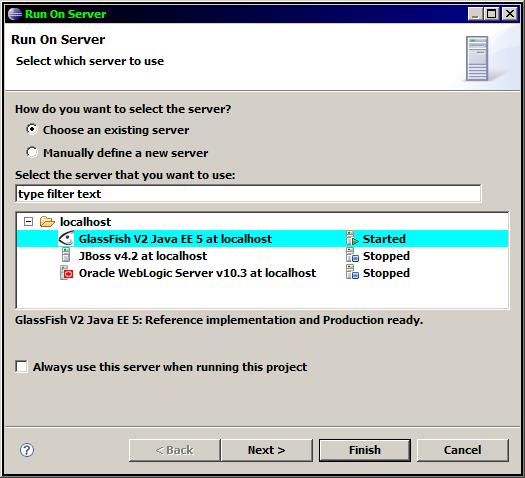
- Select the EAR project, right-click and "Run on Server"
- You should see an empty jsp page when running http://127.0.0.1:8080/glassFishTestWeb/test.jsp
GlassFish Configuration Changes
The following configuration changes will need to be done within the GlassFish [http:/127.0.0.1"4848 admin] console.
JNDI Datasource Setup
Global Scoped Datasource Setup
After logging into the admin console navigate to the following 2 sections to setup the JDBC connection pool and DataSource.
Setup GlassFish JDBC Connection Pool
Resource | JDBC | Connection Pools | New Connection Pool
All of persistence.xml configuration, jpql query example - in progress ......
References
Originated on build 20080915 - Michael O'Brien


