|
|
| (36 intermediate revisions by 3 users not shown) |
| Line 1: |
Line 1: |
| − | = Prepare Eclipse and build eTrice = | + | = Oomph eTrice Setup = |
| − | # get the sources ([[ETrice/Development/Repository |see how]])
| + | |
| − | # download the latest version of Eclipse Modeling Tools (e.g. http://eclipse.org/downloads/packages/eclipse-modeling-tools-includes-incubating-components/indigom7)
| + | |
| − | # start eclipse
| + | |
| − | # Install additional Plugins (if not already installed)
| + | |
| − | ## Help -> Install New Software -> Indigo - http://download.eclipse.org/releases/indigo
| + | |
| − | ## select Collaboration -> Eclipse EGit
| + | |
| − | ## select
| + | |
| − | ### Modeling -> EMF
| + | |
| − | ### all Graphiti
| + | |
| − | ### XPand
| + | |
| − | ### XText
| + | |
| − | # import all projects from your local GIT clone to your Workspace (with EGit plugin)
| + | |
| − | ## Perspective -> Git Repository
| + | |
| − | ## Add Repository (local GIT clone)
| + | |
| − | ## Context Menu of Working Directory -> Import Projects
| + | |
| − | ## Import all Projects
| + | |
| − | # make sure you are using a JDK (in Eclipse: Window->Preferences->Java->Installed JREs->e.g. jdk1.6.0_24), attention: do not use jdk1.6.0_18 or jdk1.6.0_22!
| + | |
| − | # build eTrice with our target platform ([[ETrice/Development/TargetPlatform |see how]])
| + | |
| | | | |
| − | = Getting Started with eTrice=
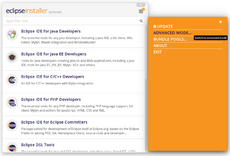
| + | 1. Download and run [https://wiki.eclipse.org/Eclipse_Installer Oomph installer] in ''Advanced Mode'' |
| − | == Setting up Runtime Workspace ==
| + | [[File:eTrice_oomph_advancedMode.png|thumbnail|upright|center]] |
| − | * start the runtime workspace: org.eclipse.etrice.core.room.ui -> eTrice-rt.launch (contextmenu -> Run As)
| + | |
| − | * check out the runtime projects from your local GIT clone
| + | |
| − | ** org.eclipse.etrice.tutorials
| + | |
| − | ** org.eclipse.etrice.modellib
| + | |
| − | ** org.eclipse.etrice.runtime.java
| + | |
| | | | |
| − | == Editing the Model ==
| |
| − | * the first model you find in org.eclipse.etrice.doc.tutorials/model/scratch/PingPong.room (doubleclick for editor)
| |
| − | * if the room editor has the focus, you can see all your model elements in the outline view
| |
| − | * with a right click on an actor (e.g. MrPingActor) you can
| |
| − | ** Edit Structure
| |
| − | ** Edit Behavior
| |
| − | * Important: You have to save every "dirty" editor before opening another editor
| |
| | | | |
| − | == Code Generator ==
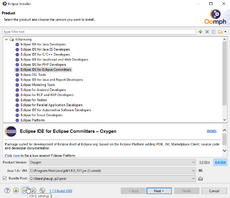
| + | 2. Select desired Eclipse product + version, e.g. product ''Eclipse IDE for Eclipse Committer'' and version from build config in git: [http://git.eclipse.org/c/etrice/org.eclipse.etrice.git/tree/releng/org.eclipse.etrice.parent/pom.xml Tycho/Maven pom.xml] |
| − | * org.eclipse.etrice.doc.tutorials -> genAllTutorials.mwe2.launch -> (contextmenu)Run As -> genAllModels.mwe2
| + | |
| − | * you will find the generated code in org.eclipse.etrice.doc.tutorials/src-gen
| + | |
| − | * you can see the generated instance tree of your actor org.eclipse.etrice.doc.tutorials/src-gen/PingPong/SubSystem_PingPong.jpg
| + | |
| − | ** Precondition: install the current version of graphviz and add the path to dot.exe to you system or user PATH variable
| + | |
| | | | |
| − | == Run ==
| + | 3. Optional for commiters: set your git ssh key |
| − | * start generated application: org.eclipse.etrice.doc.tutorials/src-gen/PingPong/SubSystem_PingPongRunner.java -> Run As -> Java Application
| + | [[File:eTrice_oomph_etrice_ssh.png|thumbnail|upright|center]] |
| − | * in the View Console you can see the debugging output of the running model
| + | |
| − | * enter "quit" and <enter> in the Console to stop the running application (you should see *** T H E E N D *** )
| + | |
| | | | |
| − | == Debug ==
| + | |
| − | * in org.eclipse.etrice.doc.tutorials/tmp/log you will find the generated Message Sequence Chart of your application: SubSystem_PingPong_Async.seq (MSC)
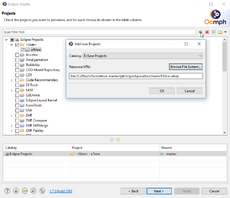
| + | 4. Download the eTrice setup file [http://git.eclipse.org/c/etrice/org.eclipse.etrice.git/plain/team/ETrice.setup ETrice.setup] and add & select it in the oomph catalog |
| − | ** You can view the MSC with the Open Source tool Trace2UML:
| + | [[File:eTrice_oomph_eTriceSetup.png|thumbnail|upright|center]] |
| − | *** Project home: http://trace2uml.tigris.org/
| + | |
| − | *** Download for Windows: http://trace2uml.tigris.org/files/documents/2995/47472/Trace2UML-setup-1.1.0.exe
| + | |
| − | *** Download for Linux: http://apt.astade.de
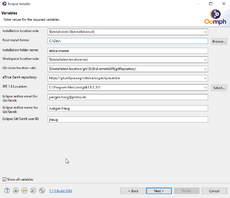
| + | 6. Configure your personal installation |
| − | * you can debug the generated code like any other Java Project. The main function is located in SubSystem_PingPongRunner.java
| + | [[File:eTrice_oomph_etriceConfig.png|thumbnail|upright|center]] |
| − | * be aware that all actors communication via message queue, so the regular sourcecode debugging is sometimes not sufficient
| + | |
| | + | |
| | + | TODO: add eTrice to official Eclipse catalog |
| | + | |
| | + | [[Category:eTrice]] |
3. Optional for commiters: set your git ssh key


