Notice: this Wiki will be going read only early in 2024 and edits will no longer be possible. Please see: https://gitlab.eclipse.org/eclipsefdn/helpdesk/-/wikis/Wiki-shutdown-plan for the plan.
Difference between revisions of "EPP/MPC/User Guide"
(New page: = Overview = This guide provides information on the Marketplace Client and how to use it.) |
|||
| (10 intermediate revisions by 2 users not shown) | |||
| Line 1: | Line 1: | ||
| − | = Overview = | + | == Overview == |
| − | This guide provides information on the Marketplace Client and how to use it. | + | This guide provides information on the Eclipse Marketplace Client and how to use it. The Eclipse Marketplace Client provides a means to find and install solutions from the [http://marketplace.eclipse.org Eclipse Marketplace] and other solution catalogs. |
| + | |||
| + | == Getting Started == | ||
| + | |||
| + | To launch the Eclipse Marketplace Client select '''Help -> Eclipse Marketplace...''' from the menu, or click on '''Eclipse Marketplace Client''' on the Welcome page. The Eclipse Marketplace Client appears as follows: | ||
| + | |||
| + | [[Image:MPC_Popular.png|Eclipse Marketplace Client]] | ||
| + | |||
| + | == Search == | ||
| + | |||
| + | Use the tabs at the top of the wizard to find popular solutions, recently added or updated solutions, installed solutions, or to search. | ||
| + | |||
| + | Searching by specifying the search query, market and category, then press '''Go''': | ||
| + | |||
| + | [[Image:MPC_SearchControls.png|Search Controls]] | ||
| + | |||
| + | === Browse For More Solutions === | ||
| + | |||
| + | The Eclipse Marketplace Client will provide links to '''browse for more solutions''' or '''Learn more'''. Clicking these links will cause the Eclipse Marketplace Client to close and the Marketplace to be opened in a web browser. Browse the marketplace website, and when ready press the '''Install''' button to reopen the Eclipse Marketplace Client. | ||
| + | |||
| + | You can also browse the Eclipse Marketplace website at [http://marketplace.eclipse.org http://marketplace.eclipse.org] using your favorite browser. Just drag & drop the '''Install''' button of any item into your Eclipse to install it with the Marketplace Client. | ||
| + | |||
| + | [[Image:MPC_WebsiteInstall.png|Browse And Install]] | ||
| + | |||
| + | == Installing and Managing Solutions == | ||
| + | |||
| + | Solutions will be displayed with corresponding buttons to install them or to change their installation details: | ||
| + | |||
| + | [[Image:MPC_Selection.png|Install Selection]] | ||
| + | |||
| + | To install one or more solutions, press the '''Install''' button. Your first selection will automatically bring you to the confirmation page. From there, you can either go back to find more solutions to install, or | ||
| + | confirm the selected features and press '''Next''' to proceed: | ||
| + | |||
| + | [[Image:MPC_ConfirmFeatures.png|Confirm Features]] | ||
| + | |||
| + | Solutions that are already installed show an '''Installed''' button and can be managed from the tab of the same name. Pressing the button will switch you to that tab. There you have different options to manage the installed features. The button will show you the default action, with more available in a drop-down depending on the solution's state: | ||
| + | |||
| + | [[Image:MPC_Installed.png|Manage Installed Solutions]] | ||
| + | |||
| + | Choosing the appropriate action, you can uninstall or update solutions, or change the installation of optional features: | ||
| + | |||
| + | [[Image:MPC_ChangeFeatures.png|Change Installed Features]] | ||
| + | |||
| + | === Resolving Errors === | ||
| + | |||
| + | Occasionally it's not possible to install solutions due to conflicting or unsatisfied dependencies. Resolve these errors by following the suggestions provided by the installer or by deselecting one or more features. Press '''Next''' to confirm the resolution. Installation may proceed once all errors have been resolved. | ||
| + | |||
| + | === Licenses === | ||
| + | |||
| + | If necessary you may be prompted to review and agree to license agreements prior to installation: | ||
| + | |||
| + | [[Image:MPC_Licenses.png|Review Licenses]] | ||
| + | |||
| + | If you agree, select '''I accept the terms of the license agreement'''. | ||
| + | |||
| + | === Completing Installation === | ||
| + | |||
| + | Proceed with installation by pressing '''Finish'''. Installation involves downloading selected components and may take a few minutes or more to complete. You will be able to continue using Eclipse while you wait for downloading and installation to complete. When prompted, either '''Apply changes''' or '''Restart Eclipse''' to start using the newly installed solutions. | ||
Latest revision as of 12:13, 3 June 2015
Contents
Overview
This guide provides information on the Eclipse Marketplace Client and how to use it. The Eclipse Marketplace Client provides a means to find and install solutions from the Eclipse Marketplace and other solution catalogs.
Getting Started
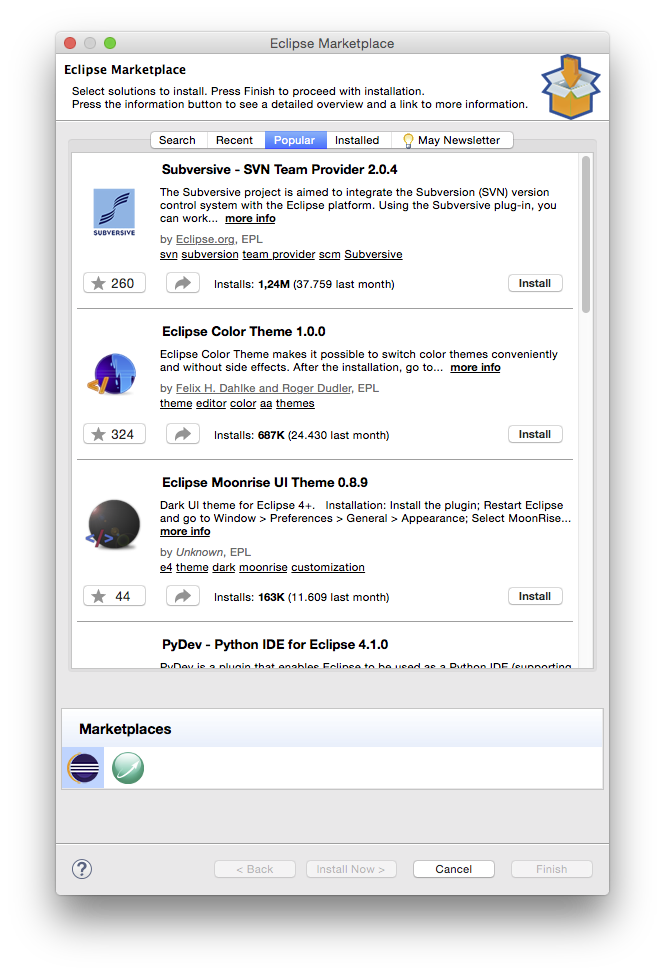
To launch the Eclipse Marketplace Client select Help -> Eclipse Marketplace... from the menu, or click on Eclipse Marketplace Client on the Welcome page. The Eclipse Marketplace Client appears as follows:
Search
Use the tabs at the top of the wizard to find popular solutions, recently added or updated solutions, installed solutions, or to search.
Searching by specifying the search query, market and category, then press Go:
Browse For More Solutions
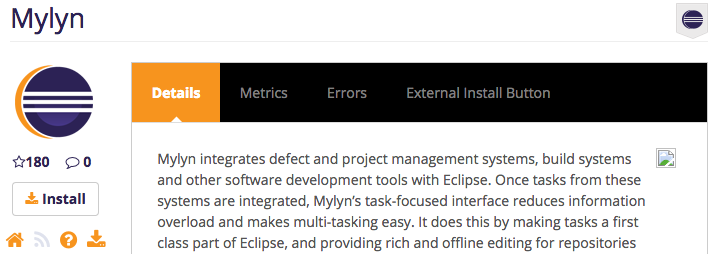
The Eclipse Marketplace Client will provide links to browse for more solutions or Learn more. Clicking these links will cause the Eclipse Marketplace Client to close and the Marketplace to be opened in a web browser. Browse the marketplace website, and when ready press the Install button to reopen the Eclipse Marketplace Client.
You can also browse the Eclipse Marketplace website at http://marketplace.eclipse.org using your favorite browser. Just drag & drop the Install button of any item into your Eclipse to install it with the Marketplace Client.
Installing and Managing Solutions
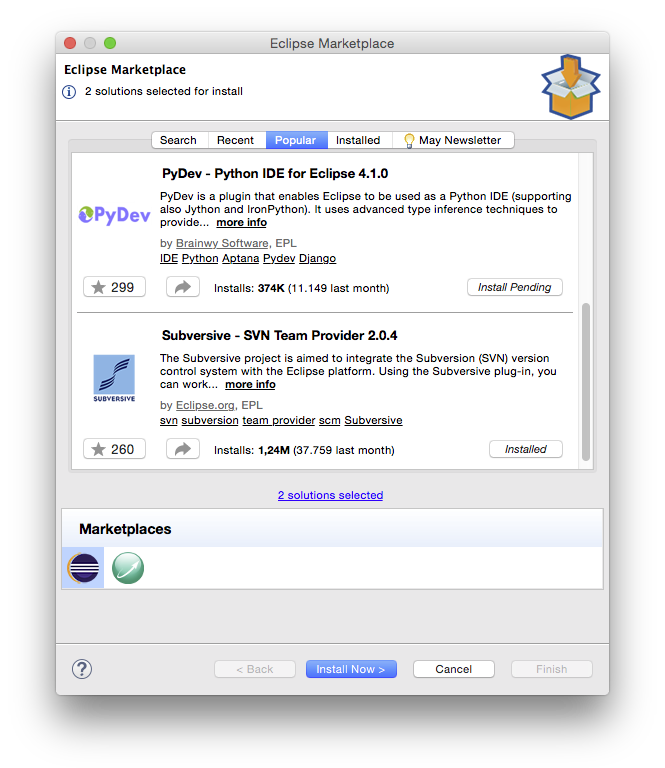
Solutions will be displayed with corresponding buttons to install them or to change their installation details:
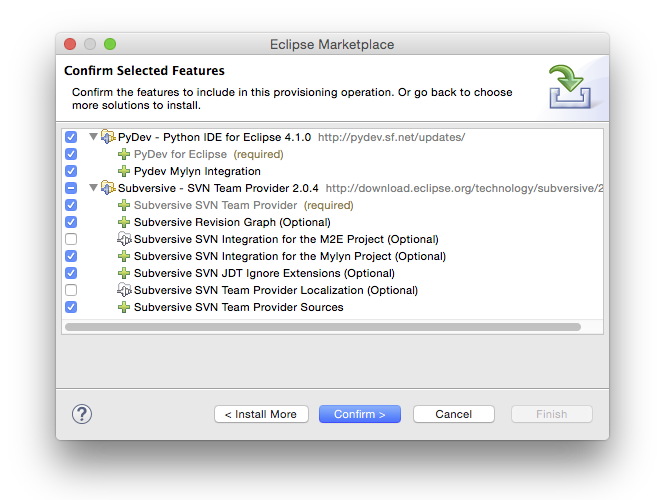
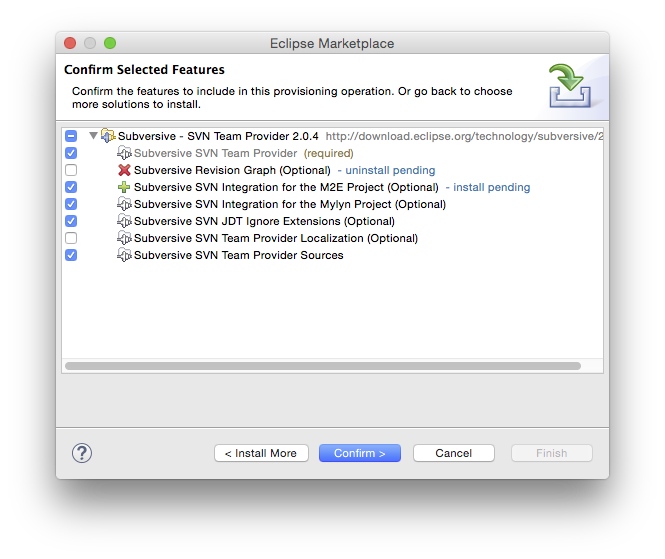
To install one or more solutions, press the Install button. Your first selection will automatically bring you to the confirmation page. From there, you can either go back to find more solutions to install, or confirm the selected features and press Next to proceed:
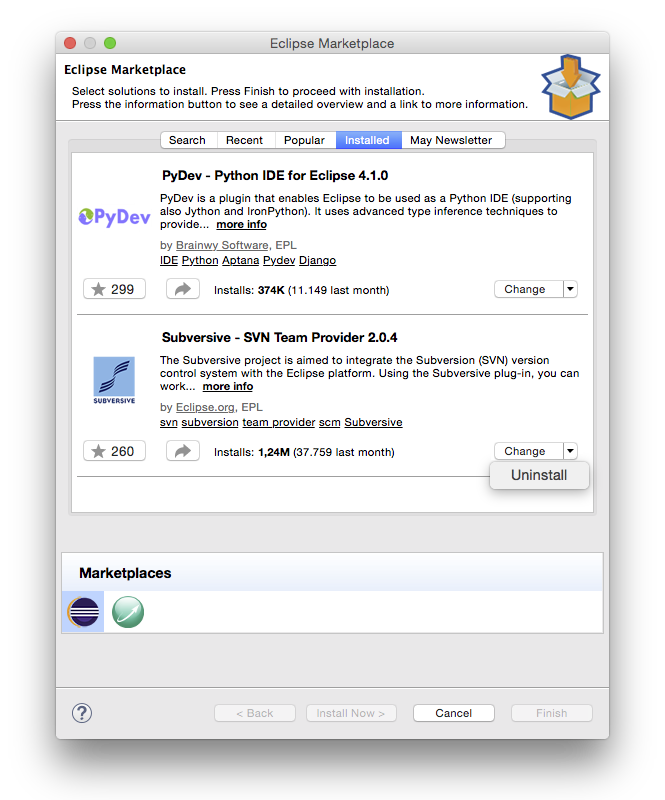
Solutions that are already installed show an Installed button and can be managed from the tab of the same name. Pressing the button will switch you to that tab. There you have different options to manage the installed features. The button will show you the default action, with more available in a drop-down depending on the solution's state:
Choosing the appropriate action, you can uninstall or update solutions, or change the installation of optional features:
Resolving Errors
Occasionally it's not possible to install solutions due to conflicting or unsatisfied dependencies. Resolve these errors by following the suggestions provided by the installer or by deselecting one or more features. Press Next to confirm the resolution. Installation may proceed once all errors have been resolved.
Licenses
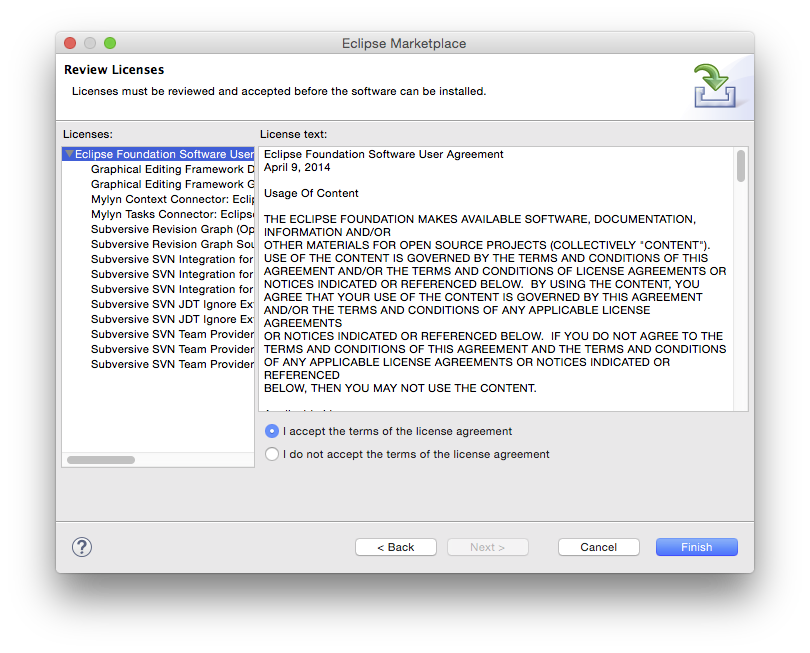
If necessary you may be prompted to review and agree to license agreements prior to installation:
If you agree, select I accept the terms of the license agreement.
Completing Installation
Proceed with installation by pressing Finish. Installation involves downloading selected components and may take a few minutes or more to complete. You will be able to continue using Eclipse while you wait for downloading and installation to complete. When prompted, either Apply changes or Restart Eclipse to start using the newly installed solutions.

