Notice: this Wiki will be going read only early in 2024 and edits will no longer be possible. Please see: https://gitlab.eclipse.org/eclipsefdn/helpdesk/-/wikis/Wiki-shutdown-plan for the plan.
Difference between revisions of "EDT:Visual Editor Introduction"
(→Other useful tools in Visual Editor) |
|||
| Line 19: | Line 19: | ||
=== Create RUI project & handlers === | === Create RUI project & handlers === | ||
| − | If you don’t have RUI project in the workspace, please create an EGL project by File > New > EGL Project, and select "Web 2.0 client application" in the second page to create an EGL RUI project. | + | If you don’t have RUI project in the workspace, please create an EGL project by File > New > EGL Project, and select "Web 2.0 client application" in the second page to create an EGL RUI project. (see more detail on [http://wiki.eclipse.org/EDT:New_Project_Wizard New Project Wizard]) |
[[Image:Snap7.jpg]] | [[Image:Snap7.jpg]] | ||
| Line 25: | Line 25: | ||
Right click the package to create the handler, and select New > Handler to create an RUI Handler, please refer to above screen-shot for creating an RUI handler named login in the client package of Sample project.<br>After created, the “login” Rich UI handler will be opened with Visual Editor by default. | Right click the package to create the handler, and select New > Handler to create an RUI Handler, please refer to above screen-shot for creating an RUI handler named login in the client package of Sample project.<br>After created, the “login” Rich UI handler will be opened with Visual Editor by default. | ||
| − | [[Image:VE2.JPG]] | + | [[Image:VE2.JPG]] |
=== Change the properties of GridLayout === | === Change the properties of GridLayout === | ||
Revision as of 23:27, 3 January 2012
Contents
- 1 Overview
- 2 Brief introduction
- 3 Step by step example
- 3.1 Create RUI project & handlers
- 3.2 Change the properties of GridLayout
- 3.3 Drag & Drop widgets from palette to Design tab
- 3.4 Update the login handler with EGL Data Wizard
- 3.5 Generate suitable widgets with Insert Data Wizard
- 3.6 New Event Handler in Properties View
- 3.7 Test the page in Preview Tab
- 3.8 Other useful tools in Visual Editor
- 4 The end
Overview
EGL Rich UI technology can make developers easy and fast to build up web 2.0 applications with the help of Rich UI Visual Editor. This blog will first brief introduce Visual Editor and related View, then give a step by step example to show how to make a login page with them.
Brief introduction
There are five parts of EDT you may need to use when build up web 2.0 applications with Rich UI technology.
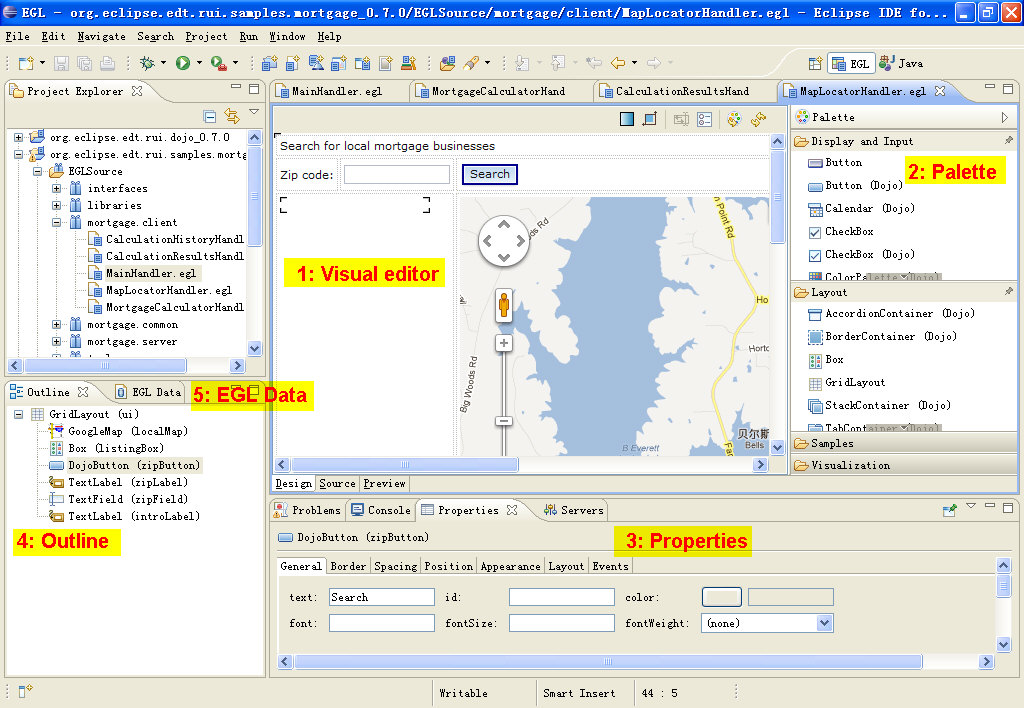
1. Visual Editor: Visual Editor provides the WYSIWYG capability to develop the Web 2.0 application, also named RUI application in EGL. it has three tabs:
- Design tab, you can drag and drop widgets from the Palette onto Visual Editor to design the page. It also allows developers to select widget to edit the properties etc.
- Source tab, it’s actually the EGL source code editor, and it allows developer to write the EGL code.
- Preview tab, developer can preview the page before deploy the web application to a web server.
2. Palette View: Palette View displays all of the widgets that can be resolved in the developer’s workspace. Developers can drag and drop the widgets from Palette onto Visual Editor to design a page. Developers can also extend their own widgets and will be automatically resolved and displayed in the Palette view.
3. Properties View: Developers can change the properties of a selected widget in this view, and also can attach event function to the selected widget by wizard.
4. Outline View: The widgets that the page contained will be listed with hierarchy in this view. Developer can also select the widget in this view instead of selecting in design page of visual editor.
5. EGL Data View: This view provides a wizard that allows developers to create variables for this page. Also, developers can use the wizard to automatically create the user interface by specifying the requirements.
Step by step example
Create RUI project & handlers
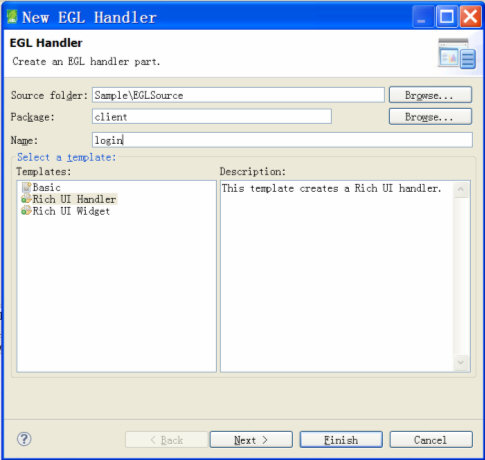
If you don’t have RUI project in the workspace, please create an EGL project by File > New > EGL Project, and select "Web 2.0 client application" in the second page to create an EGL RUI project. (see more detail on New Project Wizard)
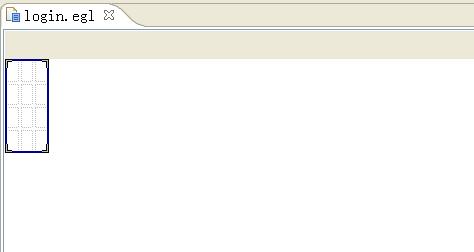
Right click the package to create the handler, and select New > Handler to create an RUI Handler, please refer to above screen-shot for creating an RUI handler named login in the client package of Sample project.
After created, the “login” Rich UI handler will be opened with Visual Editor by default.
Change the properties of GridLayout
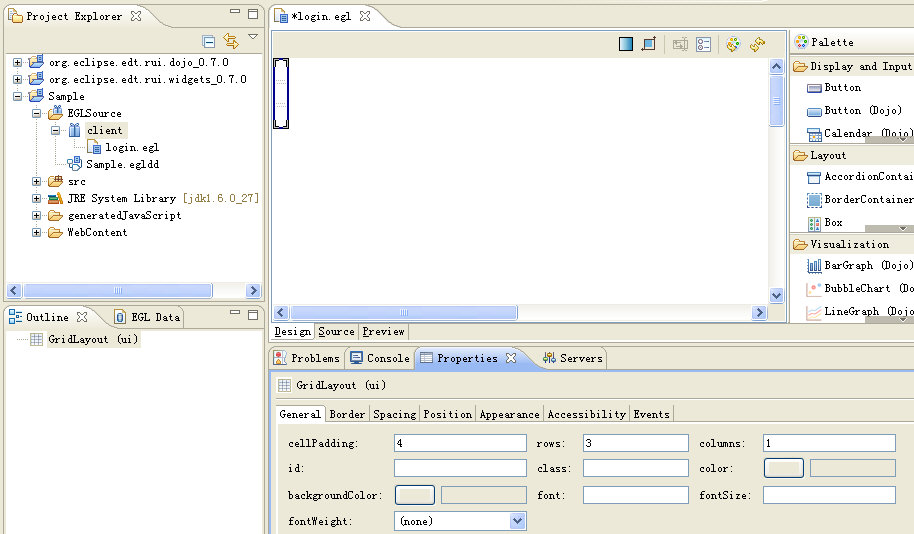
Now let’s right click the GridLayout (ui) widget in the Outline view, and then select Properties. Notice: Developer can also select widget by clicking in the design tab of VE. In the General tab of Properties view, change the rows to 3, and column to 1. Please refer to the below picture for the result after change.
Drag & Drop widgets from palette to Design tab
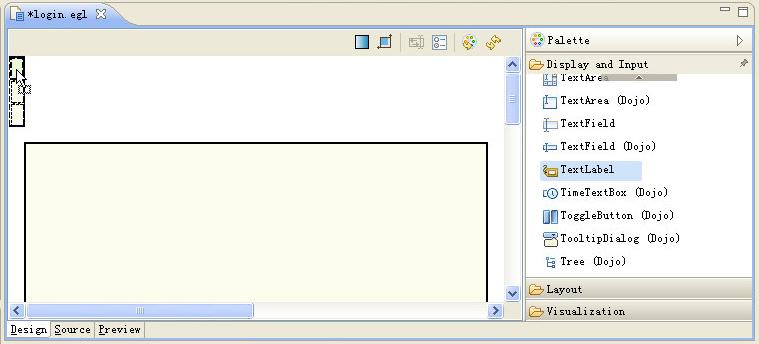
Click TextLabel in the palette view > keep the mouse, and move to the first row of the GridLayout. Please refer to below picture.
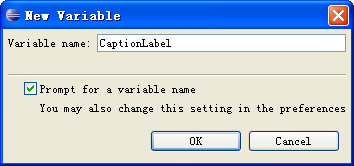
Release the mouse, and fill in ‘CaptionLabel’ in below dialog.
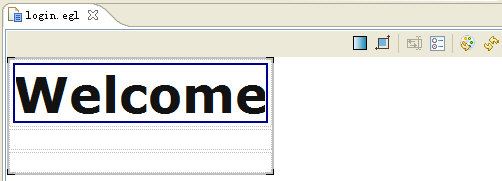
Select the CaptionLabel in the visual editor > Right click > Properties, and change the fontSize to 50, fontWeight to bold.
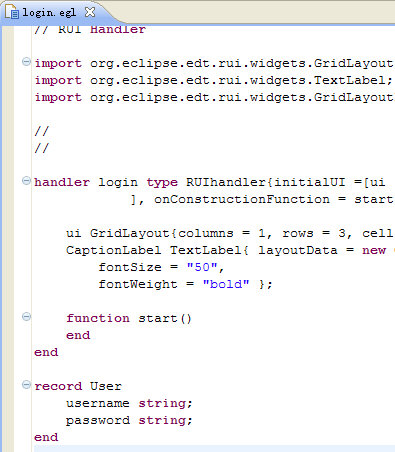
Press ctrl + s to save the RUI handler, your handler should be similar to below.
Update the login handler with EGL Data Wizard
EDT also provides another way to design the page, it supports to generate the widgets from variables defined in the Rich UI handler.
Let’s firstly go to Source tab to declare a simple record named as “user”.
Move the cursor to the end of handler, and add a record to the handler.
record User
   username string;
   password string;
end
So your source code should be looks like as following screen-shot.
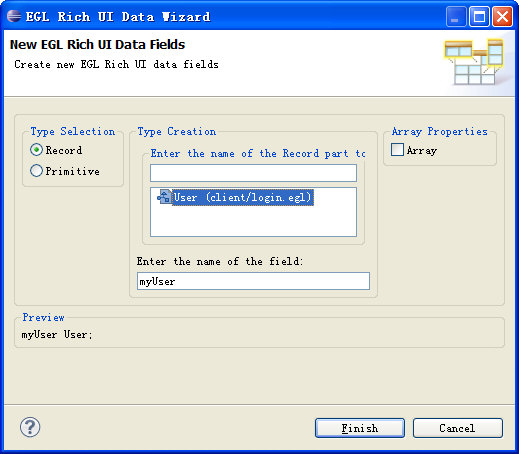
Then go back to Design Tab and click the EGL Data view. Select New > EGL Variable to open the EGL Rich UI Data Wizard.
Select the user record and click finish. The wizard will automatically generate a variable of user record type in the page.
Now you can find that the user record variable is listed in the EGL Data View and under the login Rich UI handler.
Generate suitable widgets with Insert Data Wizard
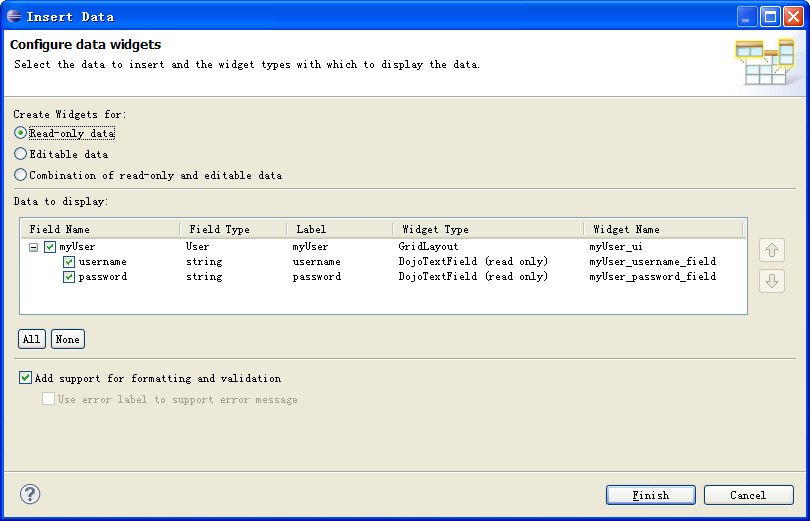
Select the ‘myUser’ variable in EGL Data view and drag and drop it on to Visual Editor to open the Insert Data Wizard.
The wizard can help developer to configure which kind of widgets will be generated and binding to the record fields. There are three purposes of create widgets for, select different can cause the record fields to map different group of widgets. In this case, we chose create widgets for editable data and change the widget type for password field to PasswordTextField, then click Finish button.
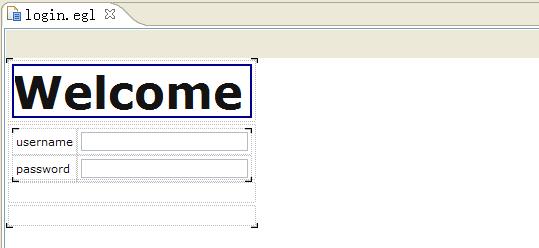
Press ctrl + s to save your handler. Now your page should be as following.
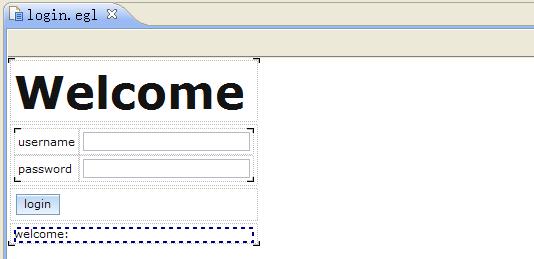
Now drag and drop a dojo Button to the second row of the GridLayout and change its text to “login” in the Properties View and drag and drop a Text Label to the third row and change its text to “welcome: ”.
New Event Handler in Properties View
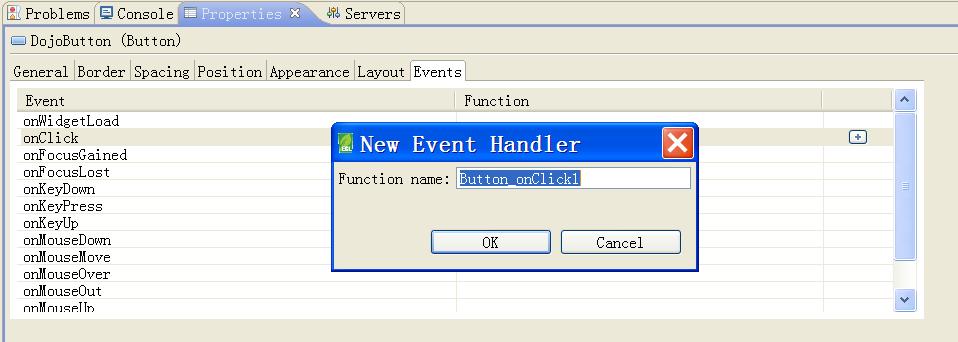
Select the login button and in the Event Tab of the Properties View, find and select the onClick event, then click the add function button to generate a onClick function stump.
Developer will be auto bring to the function stump after the function created. Now change the function code like below:
function Button_onClick(event Event in)
myUser_form_Submit(event);
if(myUser.username == "Forest" and myUser.password == "123")
TextLabel.setText("Hello Forest!");
else
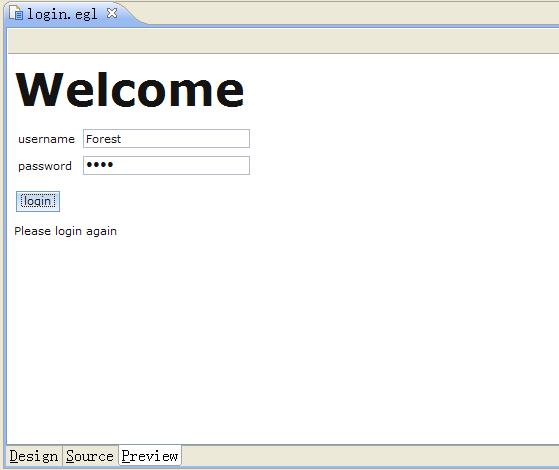
TextLabel.setText("Please login again");
end
end
Test the page in Preview Tab
Now the design work of the page is finished, you can go to Preview Tab to test the page.
Other useful tools in Visual Editor
There are also some useful tools in on the Visual Editor.
- Refrash Web Page : use to refrash the browser which Visual Editor use.
- Refrash Palette: when you add a new widget, it will not auto displayed in the Palette View, you need to use Refrash Palette to add it in the Palette.
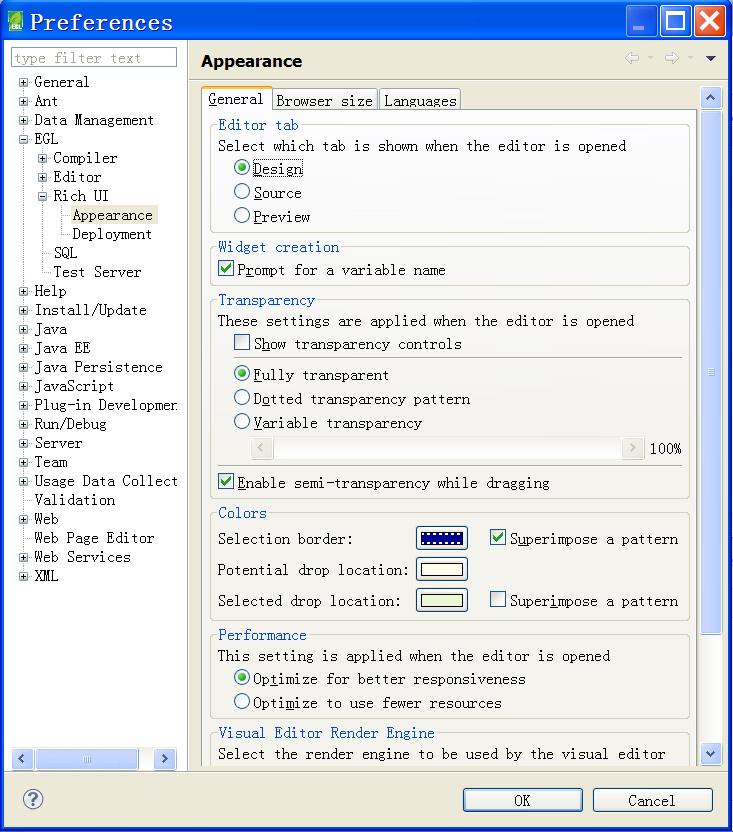
- Configure Preferences Tool: use to open the Rich UI Preferences. In the Appearance Preference Page, you can choose which browser Visual Editor will use.
Tip: use WebKit browser can give Visual Editor a better performance.
The end
We can see that, with the help of Visual Editor, developer can easy and fast to build up web 2.0 web applications. Enjoy it!

