Notice: this Wiki will be going read only early in 2024 and edits will no longer be possible. Please see: https://gitlab.eclipse.org/eclipsefdn/helpdesk/-/wikis/Wiki-shutdown-plan for the plan.
Difference between revisions of "EDT:Tutorial: RUI With Database Lesson 11"
(→Deploy the Rich UI application) |
(→Deploy the Rich UI application) |
||
| Line 97: | Line 97: | ||
many files and might take several minutes. | many files and might take several minutes. | ||
<li>If the Tomcat server shows a status of "Restart", consider | <li>If the Tomcat server shows a status of "Restart", consider | ||
| − | that statement a directive: restart the server by | + | that statement a directive: restart the server by right-clicking the server name and click '''Restart'''. When the server has restarted, the status is "Started, Synchronized". |
| − | + | ||
| − | + | ||
</ol> | </ol> | ||
Revision as of 16:47, 30 November 2011
Access a database with EGL Rich UI
| < Previous | Next > |
Contents
Lesson 11: Deploy and test the payment application
During the deployment process, EGL creates HTML files and server-specific code to match your target environment.
Deployment is a two stage process:Deployment is a two stage process:
- Internal deployment, when you deploy your handlers to a web project.
- External deployment, when you deploy the web project to an application server.
After you deploy the tutorial application internally, you can run it on an application server in the workbench.
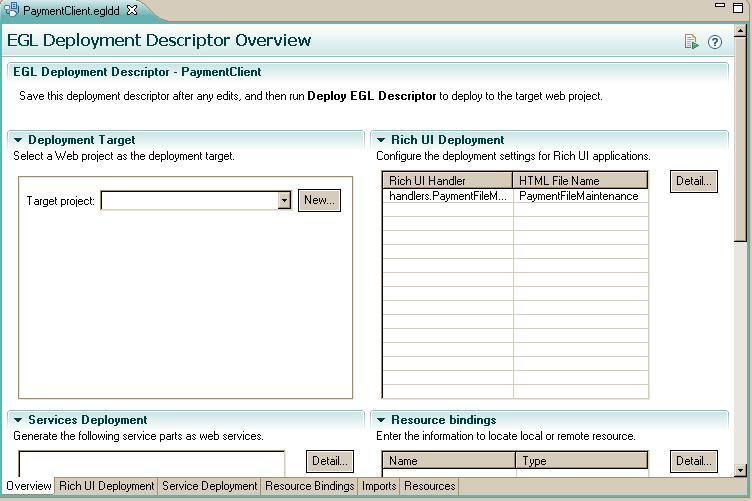
Edit the deployment descriptor
The EGL deployment descriptor manages the internal deployment and is created automatically in each EGLSource folder. The main handler is in the MortgageUIProject, and you use the EGL deployment descriptor in the PaymentClient/EGLSource folder.
To edit the EGL deployment descriptor:
- In the EGLSource folder, double-click the PaymentClient.egldd file. The EGL deployment descriptor opens in the Deployment Descriptor editor. EGL automatically added the embedded handlers to the list of Rich UI handlers to deploy.
- Because you are using a dedicated service, you do not need to add information to the Service Bindings Configuration section. The list is empty.
- Under Deployment Target, next to
the Target project field, click New.
 The Dynamic Web Project wizard
opens.
The Dynamic Web Project wizard
opens.
- In the Project Name field, enter the following name: PaymentWeb Any web project is acceptable. You are creating a simple one for the purposes of the tutorial.
- For Target runtime, select one of the following options
from the list:
- Apache Tomcat v6.0
- WebSphere Application Server vn.n
The value of the Configuration field changes automatically to match the new runtime environment.
- If you are deploying to a WebSphere Application Server runtime,
select Add project to an EAR, which is underneath EAR
membership. If you add the project to an EAR, accept the
default name that the wizard displays. For Apache Tomcat, ensure that
the Add project to an EAR check box is clear.
The New Dynamic Web Project wizard, configured for WebSphere Application Server - Click Finish. EGL creates the web project and re-displays the deployment descriptor.
- Save and close the deployment descriptor.

Set the data source for the new project
Before you can access the database from the new project, you must connect the project to the database.
- In the Project Explorer view, right-click the PaymentWeb project and click Properties > EGL Runtime Data Source.
- Click Load values from a data tools connection.
- Click the down arrow next to the Connection field
and select Derby Database Connection, which
is the connection profile that you created in Lesson 2.
The connection is available in the display. - Click OK.
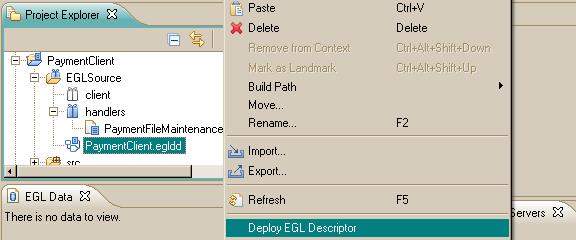
Deploy the Rich UI application
You can now launch the deployment process:
- In the EGLSource folder, right-click the PaymentClient.egldd file.
- Click Deploy EGL Descriptor.
 The deployment
process requires no further action on your part. The process copies
many files and might take several minutes.
The deployment
process requires no further action on your part. The process copies
many files and might take several minutes.
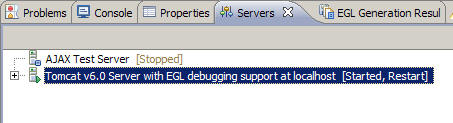
- If the Tomcat server shows a status of "Restart", consider that statement a directive: restart the server by right-clicking the server name and click Restart. When the server has restarted, the status is "Started, Synchronized".

Run the generated code
- To run the internally deployed code, focus your attention on the target project, PaymentWeb. In the PaymentWeb/WebContent folder, find PaymentFileMaintenance.html.
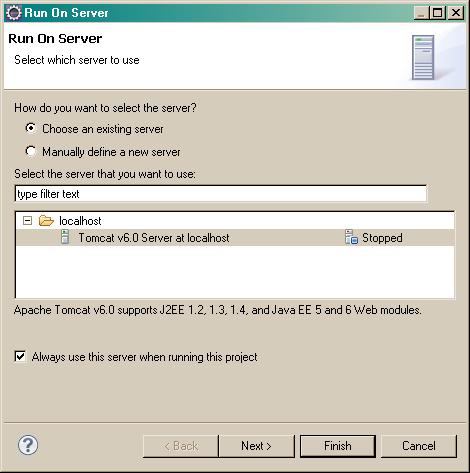
- Right-click the file name and click Run
As > Run on Server
 The Run
On Server window opens.
The Run
On Server window opens.
- In the Run On Server window, select
the appropriate server and click Always use this server
when running this project. Click Finish.
- If you are using Tomcat and see a page not found error
(404), check whether the server is showing a Restart status. If so,
restart the server and refresh the page.
The page opens. - Test the application by adding, deleting, and modifying payment records.


Related concepts
[../../com.ibm.egl.gg.doc/topics/gegl_core_overview.html Introduction to EGL generation and deployment]
Lesson checkpoint
You learned how to complete the following tasks:
- Edit a deployment descriptor to deploy a Rich UI handler.
- Run the application on an application server.
| < Previous | Next > |