Notice: this Wiki will be going read only early in 2024 and edits will no longer be possible. Please see: https://gitlab.eclipse.org/eclipsefdn/helpdesk/-/wikis/Wiki-shutdown-plan for the plan.
Difference between revisions of "EDT:Tutorial: RUI With DataBase Lesson 5"
(→Create a Service part) |
|||
| Line 1: | Line 1: | ||
| − | |||
[[EDT:Tutorial: Access a database with EGL Rich UI|Access a database with EGL Rich UI]] | [[EDT:Tutorial: Access a database with EGL Rich UI|Access a database with EGL Rich UI]] | ||
| Line 29: | Line 28: | ||
adds the .egl file extension automatically. | adds the .egl file extension automatically. | ||
<li>In the '''Package''' field, enter the | <li>In the '''Package''' field, enter the | ||
| − | name '''services'''. | + | name '''services'''. |
| − | + | ||
<li>Verify that | <li>Verify that | ||
| − | '''Create as web (REST) service''' | + | '''Create as web (EGL REST RPC) service''' is unchecked, and leave the '''Interfaces to Implement''' field empty.<br /> |
| − | Interfaces''' field empty.<br />[[Image:EDT_Tutorial_edt_richui_sql04_new_sql_service.jpg|The New EGL Service Part window shows the service name and package.]] | + | [[Image:EDT_Tutorial_edt_richui_sql04_new_sql_service.jpg|The New EGL Service Part window shows the service name and package.]] |
</ol> | </ol> | ||
| Line 47: | Line 45: | ||
end | end | ||
| + | |||
== Lesson checkpoint == | == Lesson checkpoint == | ||
Revision as of 11:43, 1 December 2011
Access a database with EGL Rich UI
| < Previous | Next > |
Lesson 5: Create the service
Create a dedicated service to access the database.
In this lesson, you create an EGL Service part, which is a generatable part. You must place each generatable part in a separate source file, and the name of the part must be the same as the name of the file.
Create a Service part
To create a Service part:
- In the Project Explorer window, right-click PaymentService, and then click New > Service.
- In the New EGL Service Part window,
enter the following information:
- In the EGL source file name field, enter name SQLService. EGL adds the .egl file extension automatically.
- In the Package field, enter the name services.
- Verify that
Create as web (EGL REST RPC) service is unchecked, and leave the Interfaces to Implement field empty.
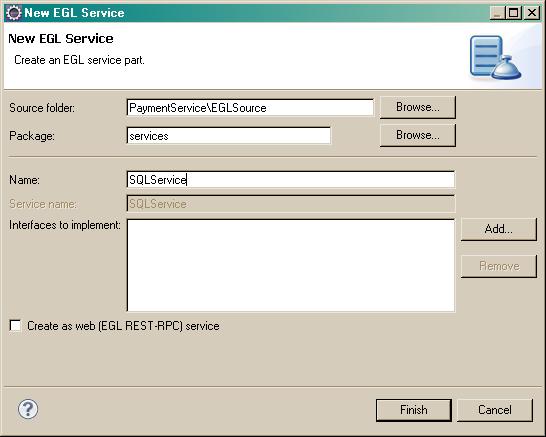
- Click Finish. EGL opens the new Service part in the editor.
- Remove the code from the file, leaving only the following lines, and save the file, but do not close it.

  package services;

  service SQLService

  end
Lesson checkpoint
You learned how to create an EGL Service part.
In the next lesson, you add code for the functions to SQLService.
Related reference
- Help topic: Services: a top-level overview
| < Previous | Next > |