Notice: this Wiki will be going read only early in 2024 and edits will no longer be possible. Please see: https://gitlab.eclipse.org/eclipsefdn/helpdesk/-/wikis/Wiki-shutdown-plan for the plan.
EATOP/environment
Contents
Setting up an Eclipse IDE
Download and install Eclipse IDE for Automotive Software Developers 32-bit Luna.
As the memory which is provided to Eclipse by default is much too less for the following steps, the eclipse.ini file (same location as the eclipse.exe) has to be adapted to the requirements.
The most important change is to increase the maximum heap-size (-Xmx parameter). The default of 512m is much too less, 1300 would be an acceptable value. Otherwise eclipse will hang up during the ‘resolve target’ process (step 4 of this guide).
Here an example for the eclipse.ini file:
-startup
plugins/org.eclipse.equinox.launcher_1.3.0.v20140415-2008.jar
--launcher.library
plugins/org.eclipse.equinox.launcher.win32.win32.x86_1.1.200.v20140603-1326
-product
org.eclipse.epp.package.automotive.product
--launcher.defaultAction
openFile
--launcher.XXMaxPermSize
512M
-showsplash
org.eclipse.platform
--launcher.XXMaxPermSize
512m
--launcher.defaultAction
openFile
--launcher.appendVmargs
-vmargs
-Dosgi.requiredJavaVersion=1.7
-Xms256m
-Xmx1300m
Install EGit in Eclipse
The recommended way to clone and import the source code of Sphinx and EATOP is to use EGit - the Eclipse Team provider for Git. If you just need read-only access you can check out the sources via http or git protocol. If you need commiter access you have to check out via ssh protocol and you have to own a committer account with the correspondant commit-rights to this project.
To install EGit:
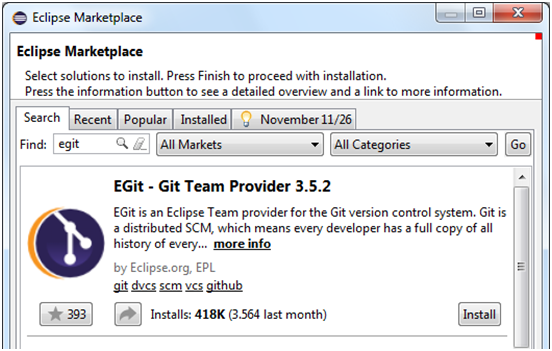
- Click Help > Eclipse Marketplace
- Search for EGit and install the plugin
- To open the Git view: Click Window > Show View > Other ... Git > Git Repositories
Installation of Sphinx
- Open the Git Repository Exploring perspective
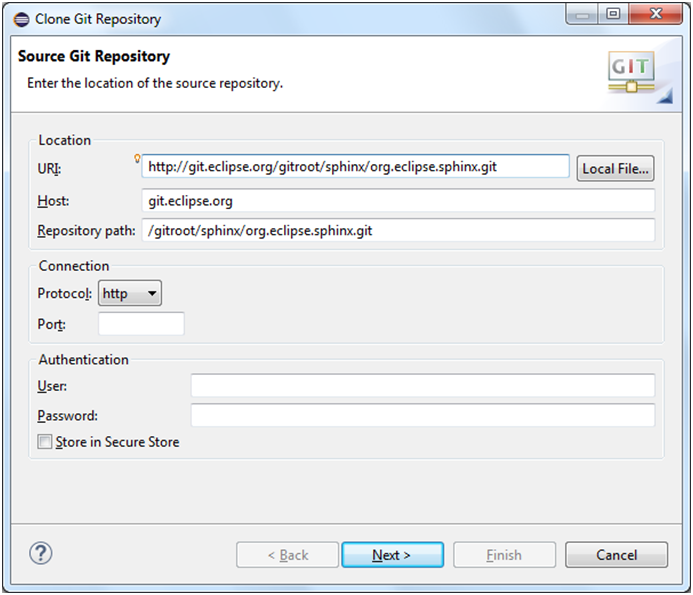
- Click on the Clone a Git Repository and add the clone to this view button
- Enter the URI for the Sphinx repository (http://git.eclipse.org/gitroot/sphinx/org.eclipse.sphinx.git)
- Click Next > Choose 'master' branch > Click Next
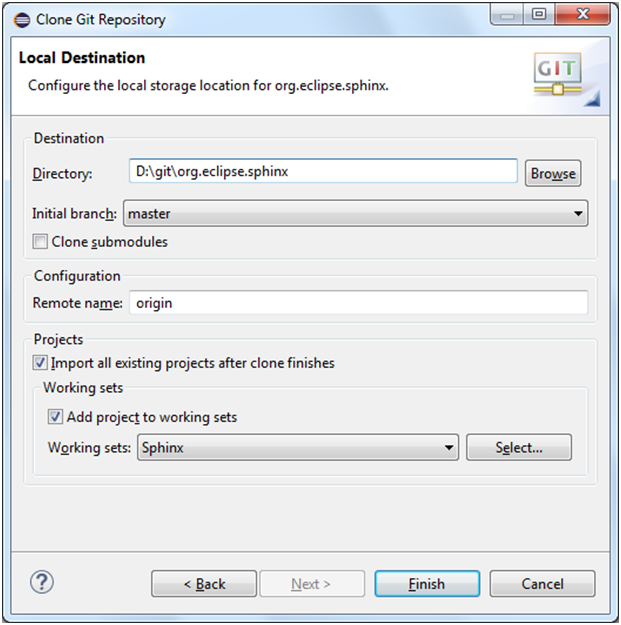
- Choose directory where the source should be stored and choose the option Import all existing projects after clone finishes'
- It is optional to choose the option Add project to working set but the option is recommended if you want to get a well-arranged view.
- Click Finish
After the sources are imported to Eclipse:
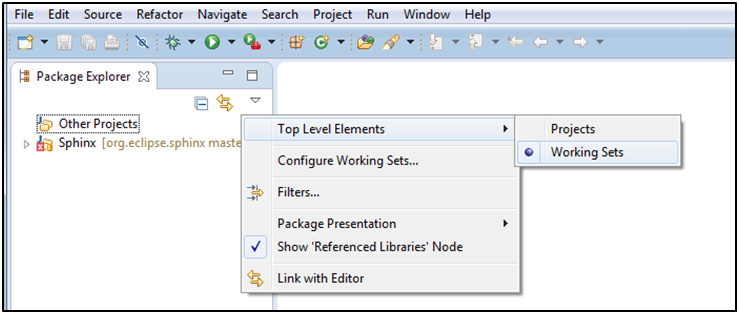
If you have chosen the option Add project to working sets (see screenshot above), you should change your Package Explorer view to Working Sets
- If there are errors in some projects, don’t worry. They will be resolved after the EATOP installation. You do not have to set the luna.target definition file to resolve them, because it is sufficient if this is done in EATOP
- Further Information to Sphinx can be found at https://wiki.eclipse.org/Sphinx/environment
Installation of EATOP and the graphical Editor
For the installation of EATOP and the graphical Editor, run through the same steps as for installation of Sphinx but use the EATOP-URL (http://git.eclipse.org/gitroot/eatop/org.eclipse.eatop.git).
Import these sources into a new working set.
Setting the target platform
EATOP provides target platform definitions for the two latest Eclipse releases. These target definitions are in the project org.eclipse.eatop.targets which is part of the Tools working set.
- Open the target definition file luna.target
- Wait for the completion of the Resolving Target Definition operation. This may take a while, in particular at the first time, because all directly and indirectly required target platform plug-ins and features are being downloaded or updated as necessary during that operation.
The resolving status is shown in the bottom right corner.
If one or more locations in the file list are erroneous, try to mark all locations and update them and try to close and reopen the target definition file so as to re-trigger the target platform resolution.
- Click on link Set as Target Platform (in the upper right corner of the target editor).
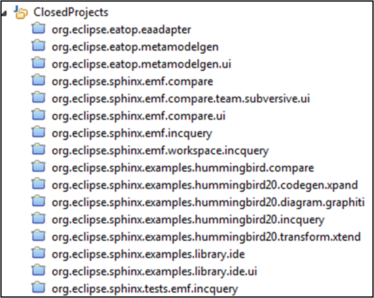
Projects that now still throw errors can be closed.
Start the Eatop Technology Demonstrator
The corresponding launch-file can be found in the Eclipse Run Configurations.
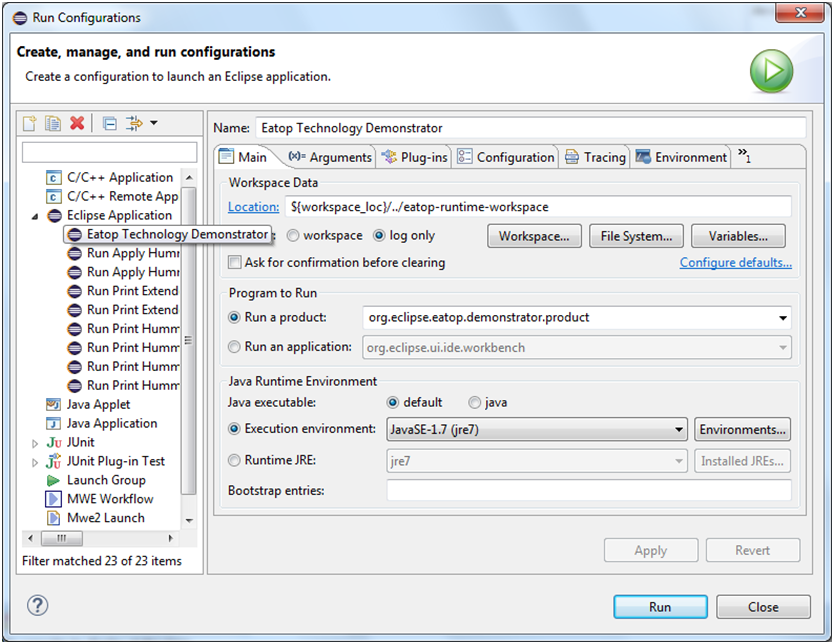
- Click Run and EATOP will start.

