Notice: this Wiki will be going read only early in 2024 and edits will no longer be possible. Please see: https://gitlab.eclipse.org/eclipsefdn/helpdesk/-/wikis/Wiki-shutdown-plan for the plan.
Difference between revisions of "E4/Resources/Semantic File System/Demos/Running e4 Demo Twitter Client"
(New page: '''Prerequisite:''' Download and install e4 1.0 build from [http://download.eclipse.org/e4/downloads/ here]. 1. Start e4 with an empty workspace 2. Import the following projects from E...) |
|||
| Line 5: | Line 5: | ||
2. Import the following projects from Eclipse CVS: | 2. Import the following projects from Eclipse CVS: | ||
| − | *org.eclipse.e4.demo.e4twitterclient | + | *org.eclipse.e4.demo.e4twitterclient |
| − | *org.eclipse.core.resources.semantic | + | *org.eclipse.core.resources.semantic |
You may use following Project Set files for convenience: | You may use following Project Set files for convenience: | ||
| Line 17: | Line 17: | ||
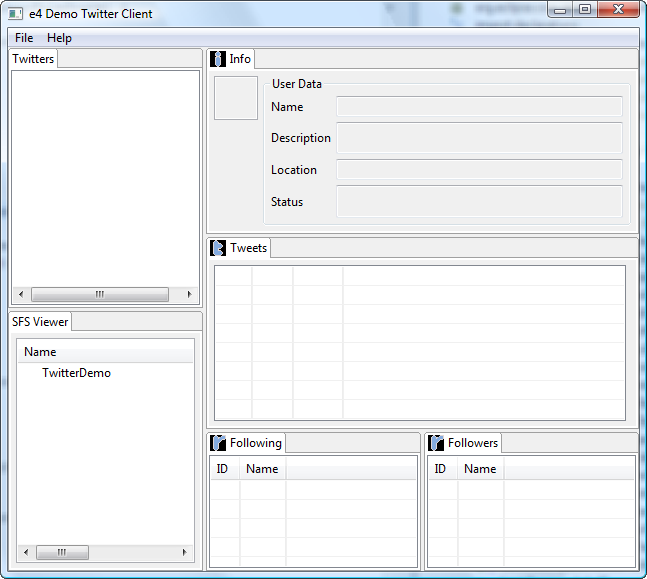
4. Start the e4 Demo Twitter Client. You should be able to see the following screen: | 4. Start the e4 Demo Twitter Client. You should be able to see the following screen: | ||
| − | + | [[Image:E4DemoTwitterClientInitialScreen.png]]<br>5. Select "File" > "Open". | |
| − | 5. Select "File" > "Open". | + | |
You should be able to see the following screen after pressing finish: | You should be able to see the following screen after pressing finish: | ||
<br>'''NB''', you may have problems to connect to the Internet from the e4 Photo app when using an HTTP/HTTPS proxy. In such a case, use "File" -> "Set Proxy Data" for setting required proxy parameters.<br> | <br>'''NB''', you may have problems to connect to the Internet from the e4 Photo app when using an HTTP/HTTPS proxy. In such a case, use "File" -> "Set Proxy Data" for setting required proxy parameters.<br> | ||
Revision as of 10:52, 14 July 2010
Prerequisite: Download and install e4 1.0 build from here.
1. Start e4 with an empty workspace
2. Import the following projects from Eclipse CVS:
- org.eclipse.e4.demo.e4twitterclient
- org.eclipse.core.resources.semantic
You may use following Project Set files for convenience:
- SFS APIs, SPIs and implementation: e4.resources.sfs.psf
- SFS examples including e4 Demo Twitter Client: e4.resources.sfs.examples.psf
3. Create a launch configuration to run org.eclipse.e4.demo.e4twitterclient.product as a product. For that, select the file "e4twitterclient.product" that resides in org.eclipse.e4.demo.e4twitterclient project. Then select "Run As" -> "Eclipse Application".
4. Start the e4 Demo Twitter Client. You should be able to see the following screen:
You should be able to see the following screen after pressing finish:
NB, you may have problems to connect to the Internet from the e4 Photo app when using an HTTP/HTTPS proxy. In such a case, use "File" -> "Set Proxy Data" for setting required proxy parameters.

