Notice: this Wiki will be going read only early in 2024 and edits will no longer be possible. Please see: https://gitlab.eclipse.org/eclipsefdn/helpdesk/-/wikis/Wiki-shutdown-plan for the plan.
Difference between revisions of "Define Tigerstripe Annotations"
(→Consuming Annotations from a Plugin Template) |
(→Accessing Annotations from a Plugin Template) |
||
| Line 90: | Line 90: | ||
#foreach($artifact in $artifacts) | #foreach($artifact in $artifacts) | ||
| − | #if ( $artifact.hasAnnotations( | + | #if ( $artifact.hasAnnotations("Note") ) |
| − | $artifact.FullyQualifiedName: $artifact.getAnnotation( | + | $artifact.FullyQualifiedName: $artifact.getAnnotation("Note").Text |
#end | #end | ||
Revision as of 06:21, 15 October 2008
Contents
< To: Tigerstripe_Tips-n-Tricks
This article will take you step-by-step through the definition of a new Annotation Scheme for Tigerstripe Models, and will show how to consume the annotations from a M1 Generator Plugin.
Note: The information doesn't have much specifics to Annotating Tigerstripe models. The same steps can be applied when defining annotation types not target to Tigerstripe model artifacts.
The example presented here is in the Tigerstripe CVS repository at
:pserver:anonymous@dev.eclipse.org:/cvsroot/technology/org.eclipse.tigerstripe/samples/org.eclipse.tigerstripe.annotation.example.designNotes
Alternatively, the latest can be downloaded as a .zip file from Org.eclipse.tigerstripe.annotation.example.designNotes.zip
Scenario & Context
For this article, we will assume that the goal is to create a new Annotation Scheme for Tigerstripe models, that should allow users to annotate any Tigerstripe model artifact component with 2 types of Annotations:
- Design Notes: that will contain a large Text Box to capture some human readable note.
- TODOs: that will denote the fact that some more work is required on a model component, by providing a "summary message" in a smaller-one-line text box, and a boolean attribute allowing to specify whether a "hack is in place".
We will then create a plugin that will use these annotations to generate a "design report" about all artifacts, highlighting any design note on each artifact and some potential TODO list.
Defining the new Annotation Scheme
First things first, let's define the annotation types that will be presented to the end-user.
Annotation types are defined through an EMF .ecore file that needs to be packaged into an Eclipse Plugin so it can be installed. This plugin will need to be present on the end-user Eclipse install for him/her to see the corresponding Annotation Types.
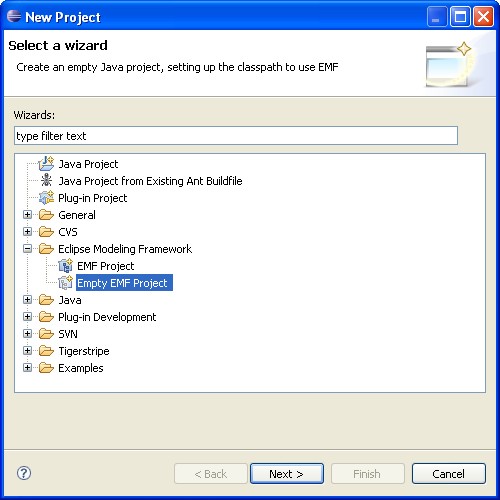
The easiest starting point is to create a new EMF Plugin. Select File->New Project->Eclipse Modeling Framework->Empty EMF Project. In this example, we'll use org.eclipse.tigerstripe.annotation.example.designNotes for a name.
In order to define Annotations, we'll need to add a few dependencies to that plugin:
These are required to access the necessary Extension Points defined by the Tigerstripe Annotation Framework (TAF).
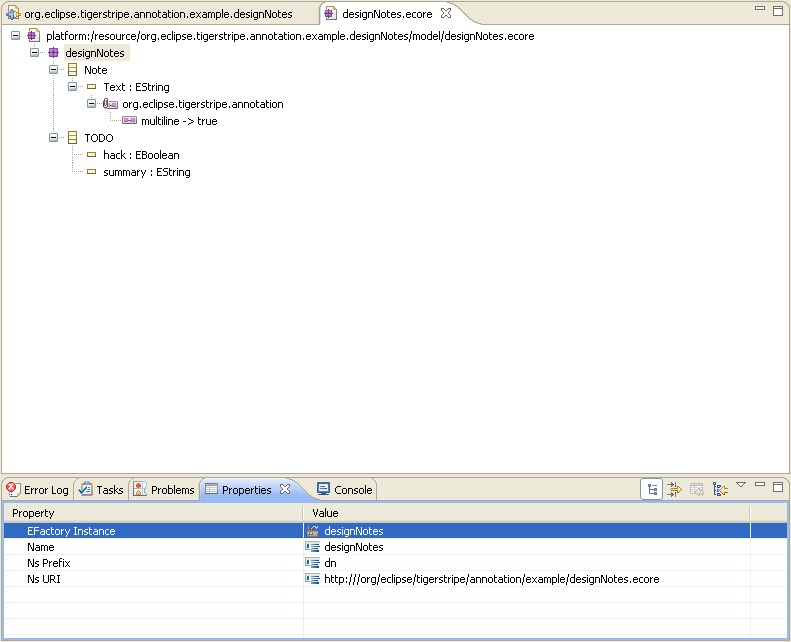
Next, let's define the .ecore, or EMF model, for the Annotations to be presented to the user. In our case, we will define:
- DesignNotes
- TODOs
A screenshot of the .ecore is shown below:
A couple of points to note here:
- additional EMF EAnnotations can be used to drive the rendering of the field in the UI. In this case make sure the Text for the Design Notes allow for multiline text. More details can be found at [1].
- The nsURI defined here for the package will be used to determine the filename of the annotation store, where all user annotations will be stored. In fact for each nsURI, a .ann file (in this case org.eclipse.tigerstripe.annotation.example.designNotes.ann) is created in the target Model Project to store the annotation values. Storing of annotation values goes to the Eclipse install for all non-tigerstripe related annotations. Tigerstripe defines a specific Router to ensure annotations are persisted in the context of the Model Project, so the values can be versioned through the same SCM. Here again more details about "annotation routers" can be found at [2].
- In a single .ecore we have define 2 annotation types: DesignNote and TODO. Each of them need to be registered with the TAF through an extension point (see below)
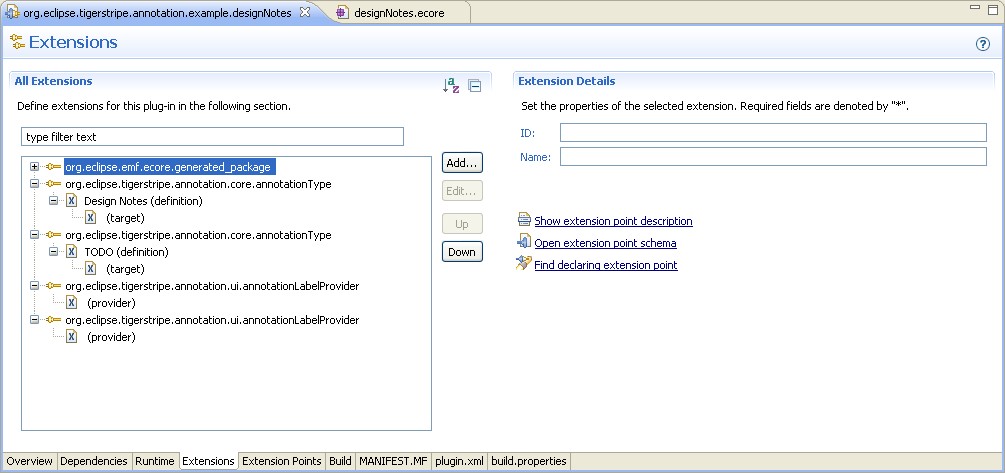
The next step consists of registering these 2 Annotation Types with the TAF. This is done thru the "org.eclipse.tigerstripe.annotation.core.annotationType" extension point. See below:
Note that we have defined specific target types for these 2 annotations ('IModelComponent'), which means only Tigerstripe Model Components will be "annotable" with these 2 Annotation Types. This will make the Annotation UI offer these annotation types to the user, only when a Tigerstripe Model Component is in focus. Without this, the "scheme" of the URIs used to store the annotations won't be "tigerstripe://..." and the "project routing" won't occur, reverting to storing the annotations in the local Eclipse install instead.
Optionally, we can define Label Providers for both annotation types to pretty up the UI.
Using the Annotation Scheme against a simple model
In order to use this new Annotation Scheme in a Tigerstripe install, we need to package up this plugin so it can be installed as any other Eclipse plugin.
To do that, we need to "export" the plugin (link on the right-bottom of the main view of the plugin.xml editor). The result is a .jar file that needs to be copied in the "plugins/" directory of your target Eclipse install. Eclipse needs to be restart so it picks it up.
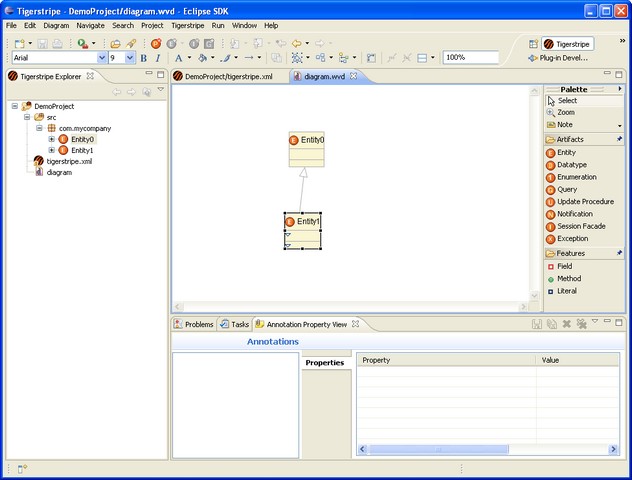
Upon restart, let's just create a very simple Tigerstripe Model as shown below:
You will notice the "Annotation Property View" at the bottom of the Tigerstripe perspective. This view will update upon selecting elements in the workspace. In the screenshot above, we have selected "Entity1" in the class diagram (same effect as selecting Entity1 from the Tigerstripe Explorer).
Let's create a "Design Note" on Entity1.
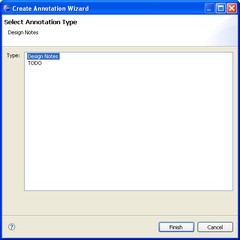
To do so, right-click->Add in the left pane of the Annotation Property View. This will bring up the following wizard:
Note that the content of the wizard will depend on:
- the active selected element.
- the annotation definition installed locally (as plugins see above)
Select "Design Note" and hit finish.
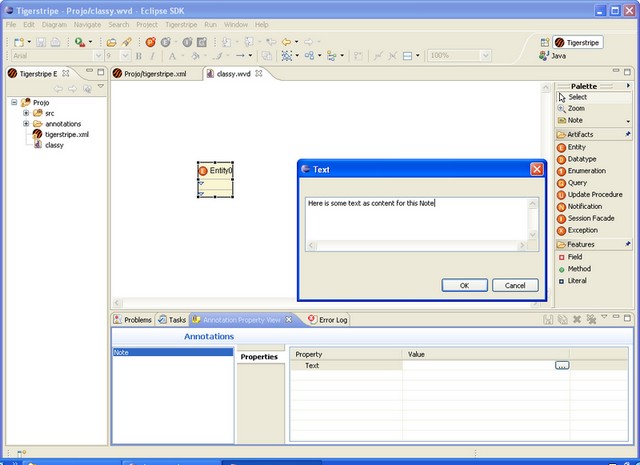
At this stage a new Annotation will be created against Entity1. You can edit the details of the annotation (text content in this case) through the Annotation Property View. Note that in this case, we had set this field to be multiline text, so a text dialog pops up:
Accessing Annotations from a Plugin Template
To access Annotations values from a plugin Template, you use all the "annotations"-related methods on the IModelComponent interface, which is implemented for all model components (Artifacts, methods, attributes, literals, etc...).
For example, you can do something like
#foreach($artifact in $artifacts)
#if ( $artifact.hasAnnotations("Note") )
$artifact.FullyQualifiedName: $artifact.getAnnotation("Note").Text

#end
#end
For a complete list of the methods related to accessing Annotations on a IModelComponent, check out the Tigerstripe Javadoc as included in Help->Help Contents->Tigerstripe Base API in your Eclipse Install with Tigerstripe Workbench.

