Notice: this Wiki will be going read only early in 2024 and edits will no longer be possible. Please see: https://gitlab.eclipse.org/eclipsefdn/helpdesk/-/wikis/Wiki-shutdown-plan for the plan.
Difference between revisions of "DSDP/TML/How to configure TmL demo"
(→Getting Device Framework) |
(→Getting the TmL Code) |
||
| Line 2: | Line 2: | ||
* Eclipse Ganymede 3.4 or newer | * Eclipse Ganymede 3.4 or newer | ||
| − | == Getting the TmL | + | == Getting the TmL == |
=== Getting TmL SDK Package === | === Getting TmL SDK Package === | ||
| Line 9: | Line 9: | ||
## Download site [http://download.eclipse.org/dsdp/tml/downloads/drops/R-0.1-200810100100/]. | ## Download site [http://download.eclipse.org/dsdp/tml/downloads/drops/R-0.1-200810100100/]. | ||
# The examples include source code. If you want TmL source download TmL-SDK-with-sources. | # The examples include source code. If you want TmL source download TmL-SDK-with-sources. | ||
| + | |||
| + | == Getting the TmL (optional) == | ||
=== Getting TmL from CVS === | === Getting TmL from CVS === | ||
Revision as of 12:17, 5 December 2008
Contents
Pre-requirements
- Eclipse Ganymede 3.4 or newer
Getting the TmL
Getting TmL SDK Package
- Getting TmL SDK 0.1 package
- The examples include source code. If you want TmL source download TmL-SDK-with-sources.
Getting the TmL (optional)
Getting TmL from CVS
- Go to vnc viewer download page
- Get the file tml-vnc-anonymous.psf (link)
- Import this file into Eclipse workspace. See cvs setup page for more details.
Getting Device Framework from CVS
- Go to device download page
- Get the file tml-device-anonymous.psf (link)
- Import this file into Eclipse workspace. See cvs setup page for more details.
Tips for Proxy Connections
- Sometimes the procedure above could not work if you are using a internet proxy based connection.
- If this is your case, open psf files and change all references "pserver:dev.eclipse.org:" by "pserver:proxy.eclipse.org:80".
Configuring the example org.eclipse.tml.device.qemuarm
- Get the file qemu-0.9.0-arm.zip (link). If you have any problem to download this file, try downloading it directly from QEmu ARM download page.
- Unzip this file into a temporary folder (Example: C:\Temp\)
- After unzipping it, open the folder qemu-0.9.0-arm
- Copy all files from this folder (including subfolders keymaps and License) to qemu folder on org.eclipse.tml.device.qemuarm plugin in your workspace. In case you are prompted for confirmation, overwrite any file. NOTE: If you obtained TmL from the SDK zip file, the plugin org.eclipse.tml.device.qemuarm will be in the form of a JAR file instead of a folder. In this case you must extract the JAR file to a folder named org.eclipse.tml.device.qemuarm inside the Eclipse plugins folder and perform the copy described above. Then, remove the JAR file, otherwise this plugin would look duplicated to Eclipse.
- Change files arm_root.img and integratorcp.zImage to read-only.
Configuring the example org.eclipse.tml.device.qemureact
- Get the file Preloaded with QEmu (sourceforge link). Don´t use save link as, it won´t work, just click it. If you have any problem to download this file you should try the Preloaded with QEmu link at QEmu ReactOS download page.
- Unzip this file into a temporary folder (Example: C:\Temp\).
- After unzipping it, open the folder ReactOS-0.3.3-QEMU.
- Copy all files from this folder (including subfolders keymaps and License) to qemu folder on org.eclipse.tml.device.qemureact plugin in your workspace. In case you are prompted for confirmation, overwrite any file. NOTE: If you obtained TmL from the SDK zip file, the plugin org.eclipse.tml.device.qemureact will be in the form of a JAR file instead of a folder. In this case you must extract the JAR file to a folder named org.eclipse.tml.device.qemureact inside the Eclipse plugins folder and perform the copy described above. Then, remove the JAR file, otherwise this plugin would look duplicated to Eclipse.
- Change the file ReactOS.vmdk to read-only.
Running TmL Demo
- After examples already configured rebuild all TmL projects (or use clean if your build automatically is checked).
- Select any TmL plugin and run it as Eclipse Application.
- Open the TmL Perspective so as to create emulator instances. As an example, the following steps guide you in creating and starting a QEmuReact instance.
- Create a new QEmuReact instance. Do this by selecting File > New > Other..., then choose QemuReact Device Instance Wizard inside Emulators folder and click Next.
- Type a name for the instance and click Next.
- Enter localhost for the Host, :0.0 for the Display and 5900 for the Port. Click Finish and the new instance is created.
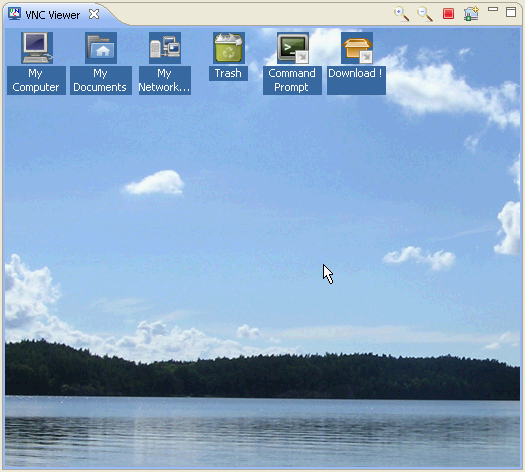
- Select the instance just created on Instance Management view and click Start Instance.
- After the instance starting process completes, select the the instance again on Instance Management view and click Connect VNC so as to start viewing the Emulator screen. The VNC Viewer view shows up displaying the QemuReact desktop. The desktop should look like this:

Comments and questions
- Please send us your comments, suggestions or questions. It is very important to help us improving our framework.
- Newsgroups: news://news.eclipse.org/eclipse.dsdp.tml
- Mailing List: dsdp-tml-dev@eclipse.org
Trademarks and Copyright
- QEmu is a trademark of Fabrice Bellard.
- ARM is a registered trademark of ARM Limited.
- ReactOS is a registered trademark or a trademark of ReactOS Foundation in the United States and other countries.