|
|
| Line 31: |
Line 31: |
| | # Select the name '''Axis2WSTest''' as the Dynamic Web project name (you can specify any name you prefer), and select the configured Tomcat runtime as the target runtime. <br />[[Image:Ws_buAxis2CreateDWPnext.jpg|alt]]<br />Click next. | | # Select the name '''Axis2WSTest''' as the Dynamic Web project name (you can specify any name you prefer), and select the configured Tomcat runtime as the target runtime. <br />[[Image:Ws_buAxis2CreateDWPnext.jpg|alt]]<br />Click next. |
| | # Select the Axis2 Web service facet <br />[[Image:Ws_buAxis2CreateDWPfacets.jpg|alt]]<br />Click Finish. | | # Select the Axis2 Web service facet <br />[[Image:Ws_buAxis2CreateDWPfacets.jpg|alt]]<br />Click Finish. |
| − | # This will create a dynamic Web project in the workbench <br />[[Image:b1.png|alt]]<br /><br /><br /> | + | # This will create a dynamic Web project in the workbench <br />[[Image:Ws_buAxis2DWPcreated.png|alt]]<br /><br /><br /> |
| | # Import the [http://www.eclipse.org/webtools/community/tutorials/BottomUpAxis2WebService/code/Converter.java wtp/Converter.java] class into Axis2WSTest/src (be sure to preserve the package). <br />[[Image:b2.png|alt]]<br />Build the Project, if its not auto build. | | # Import the [http://www.eclipse.org/webtools/community/tutorials/BottomUpAxis2WebService/code/Converter.java wtp/Converter.java] class into Axis2WSTest/src (be sure to preserve the package). <br />[[Image:b2.png|alt]]<br />Build the Project, if its not auto build. |
| | # Select Converter.java, open File -> New -> Other... -> Web Services -> Web Service <br />[[Image:c1.png|alt]]<br />Click next. | | # Select Converter.java, open File -> New -> Other... -> Web Services -> Web Service <br />[[Image:c1.png|alt]]<br />Click next. |
|
By Lahiru Sandakith
WSO2 Inc.
June 29, 2007
|
| Introduction
|
|
This tutorial is meant to demonstrate the use of the newly introduced Axis2 Web Services tools in the Web Tools Platform Project using the WTP 2.0 drivers. Also this shows how to create a simple Web service and Web service client from a JAVA class. The JAVA class in this scenario converts between the Celsius and Farenheit temperature scales and its the same class that used in the Axis web services tutorials.
|
| Set Up
|
|
Before creating the Web service, there are two prerequisites:
- Download Eclipse WTP 2.0 and unzip it.
- Configure Apache Tomcat inside Eclipse WTP.
|
| Creating a bottom up JAVA bean Web service and Web service client using Axis2 WTP Tools
|
|
This tutorial need a Axis2 runtime. You can download the latest axis2 binary distribution from here.
Note : Currently Axis2 version 1.2 and 1.3 are the supported versions for the Web Services Scenarios
- Download the latest Axis2 runtime from the above link and extract it.
- Now we point Eclipse WTP to downloaded Axis2 Runtime. Open Window -> Preferences -> Web Services -> Axis2 Emitter
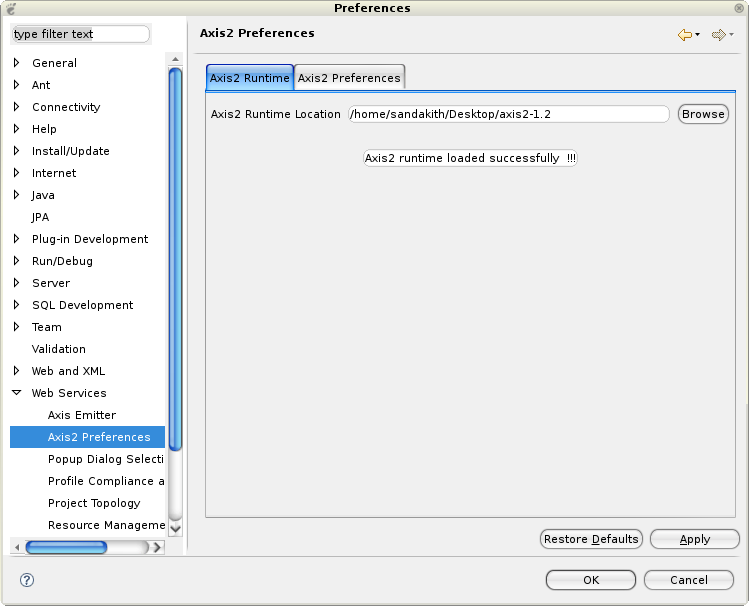
Select the Axis2 Runtime tab and point to the correct Axis2 runtime location. Alternatively at the Axis2 Preference tab, you can set the default setting that will come up on the Web Services Creation wizards. For the moment we will accept the default settings.
- Click OK.
- Next we need to create a project with the support of Axis2 features. Open File -> New -> Other... -> Web -> Dynamic Web Project
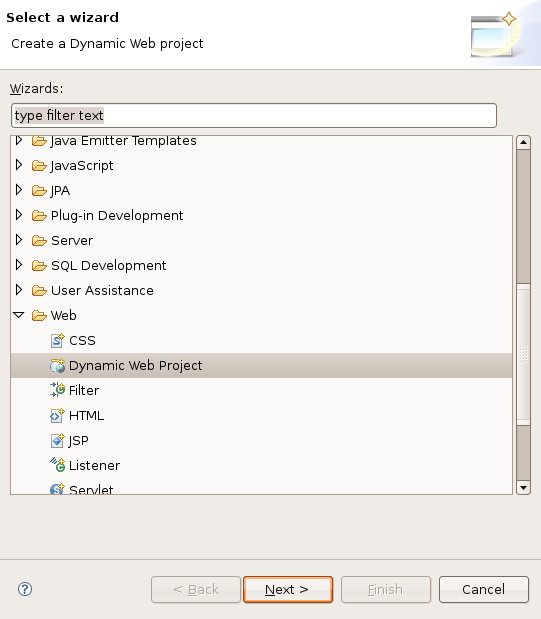
Click next
- Select the name Axis2WSTest as the Dynamic Web project name (you can specify any name you prefer), and select the configured Tomcat runtime as the target runtime.

Click next.
- Select the Axis2 Web service facet
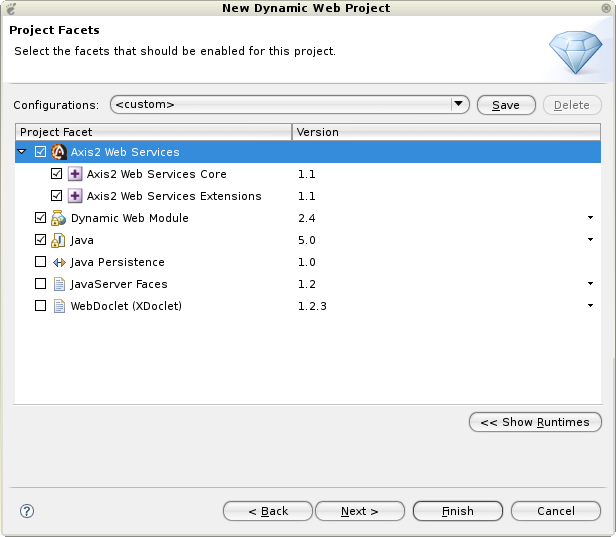
Click Finish.
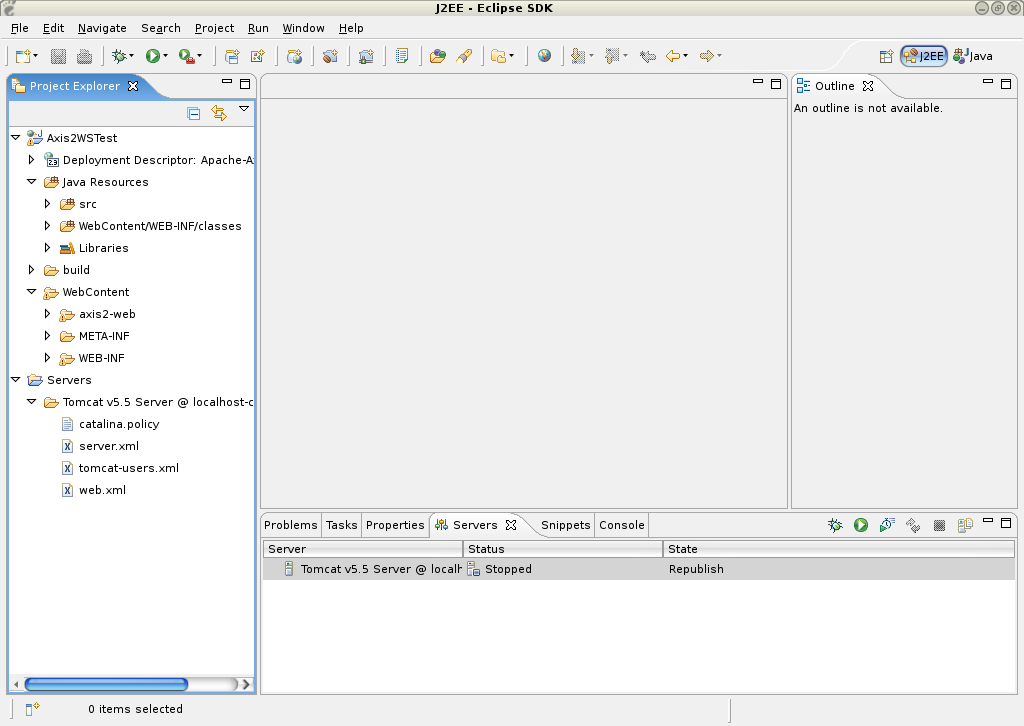
- This will create a dynamic Web project in the workbench
- Import the wtp/Converter.java class into Axis2WSTest/src (be sure to preserve the package).
alt
Build the Project, if its not auto build.
- Select Converter.java, open File -> New -> Other... -> Web Services -> Web Service
alt
Click next.
- The Web service wizard would be brought up with Web service type set to Bottom up Java bean Web Service with the service implementation automatically filled in. Move the service scale to Start service.
alt
- Click on the Web Service runtime link to select the Axis2 runtime.
alt
Click OK.
- Ensure that the correct server and service project are selected as displayed below.
alt
Click next.
- This page is the service.xml selection page. if you have a custom services.xml, you can include that by clicking the Browse button. For the moment, just leave it at the default.
alt
Click next.
- This page is the Start Server page. It will be displayed if the server has not been started. Click on the Start Server button. This will start the server runtime.
alt
Click next.
- This page is the Web services publication page, accept the defaults.
alt
Click Finish.
- Now, select the Axis2WSTest dynamic Web project, right-click and select Run -> Run As -> Run on Server to bring up the Axis2 servlet.
alt
Click Next.
- Make sure you have the Axis2WSTest dynamic Web project on the right-hand side under the Configured project.
alt
Click Finish.
- This will deploy the Axis2 server webapp on the configured servlet container and will display the Axis2 home page. Note that the servlet container will start up according to the Server configuration files on your workspace.
alt
- Click on the Services link to view the available services. The newly created converter Web service will be shown there.
alt
- Click on the Converter Service link to display the ?wsdl URL of the newly created Web service. Copy the URL.
alt
- Now we'll generate the client for the newly created service by referring the ?wsdl generated by the Axis2 Server. Open File -> New -> Other... -> Web Services -> Web ServiceClient
alt
- Paste the URL that was copied earlier into the service definition field.
alt
- Click on the Client project hyperlink and enter Axis2WSTestClient as the name of the client project. Click OK.
alt
- Back on the Web Services Client wizard, make sure the Web service runtime is set to Axis2 and the server is set correctly. Click Next.
- Next page is the Client Configuration Page. Accept the defaults and click Finish.
alt
- The Clients stubs will be generated to your Dynamic Web project Axis2WSTestClient.
alt
- Now we are going to write Java main program to invoke the client stub. Import the ConverterClient.java file to the workspace into the wtp package in the src folder of Axis2WSTestClient.
alt
- Then select the ConverterClient file, right-click and select Run As -> Java Application. Here's what you get on the server console:
alt
- Another way to test and invoke the service is to select Generate test case to test the service check box on the Axis2 Client Web Service Configuration Page when going through the Web Service Client wizard.
alt
- If that option is selected, the Axis2 emitter will generate JUnit testcases matching the WSDL we provide to the client. These JUnit testcases will be generated to a newly added source directory to the Axis2WSTestClient project called test.
alt
- Next thing we need to do is to insert the testcase with the valid inputs as the Web servivce method arguments. In this case, let's test the ConverterConverterSOAP11Port_httpTest.java by provide values for Celsius and Farenheit for the temperature conversion. As an example, replace the generated TODO statement in each test method to fill in the data with values as:
				testfarenheitToCelsius() -> farenheitToCelsius8.setFarenheit(212);

				testStartfarenheitToCelsius() -> farenheitToCelsius8.setFarenheit(212);

				testcelsiusToFarenheit() -> celsiusToFarenheit10.setCelsius(100);

				testStartcelsiusToFarenheit() -> celsiusToFarenheit10.setCelsius(100);
				Here the testcases were generated to test both the synchronous and asynchronous clients.
- After that, select the testcase, right-click, select Run As -> JUnit Test. You will be able to run the unit test successfully invoking the Web service.
alt
|
| Summary
|
|
In this example, we show using the Web Services wizard followed by using the Web Service client wizard. You could also choose to generate both service and client using the Web Services wizard:
alt
The Web Service wizard orchestrates the end-to-end generation, assembly, deployment, installation and execution of the Web service and Web service client. Now that your Web service is running, there are a few interesting things you can do with this WSDL file. Examples:
- You can choose Web Services -> Test with Web Services Explorer to test the service.
- You can choose Web Services -> Publish WSDL file to publish the service to a public UDDI registry.
|
| Resources
|
|
You can also refer to the Axis Web services tutorials:
|


