Notice: this Wiki will be going read only early in 2024 and edits will no longer be possible. Please see: https://gitlab.eclipse.org/eclipsefdn/helpdesk/-/wikis/Wiki-shutdown-plan for the plan.
Difference between revisions of "Create and Export MySQL JDBC driver bundle"
| Line 1: | Line 1: | ||
This page explains how to create an OSGi bundle for the MySQL JDBC driver that you downloaded as part of [[CDO_Source_Installation#Downloads]] and export it to the [[CDO_Source_Installation#Target Platform|target platform]] of your [[CDO_Source_Installation#Workspace|CDO workspace]]. | This page explains how to create an OSGi bundle for the MySQL JDBC driver that you downloaded as part of [[CDO_Source_Installation#Downloads]] and export it to the [[CDO_Source_Installation#Target Platform|target platform]] of your [[CDO_Source_Installation#Workspace|CDO workspace]]. | ||
| − | * In your Eclipse IDE open the ''New Project'' wizard and select ''Plug-in from existing JAR archives'':<br> | + | * In the file system extract the MySQL driver JAR from the downloaded MySQL ZIP file to the <tt>downloads</tt> folder:<br>[[Image:ExtractMysqlJar.png]] |
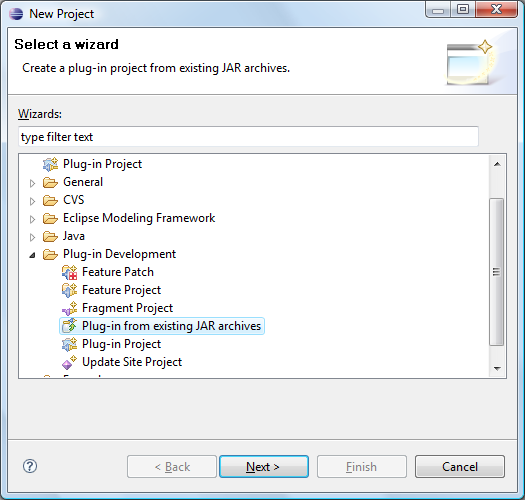
| + | * In your Eclipse IDE open the ''New Project'' wizard and select ''Plug-in from existing JAR archives'':<br>[[Image:JarPluginWizard.png]] | ||
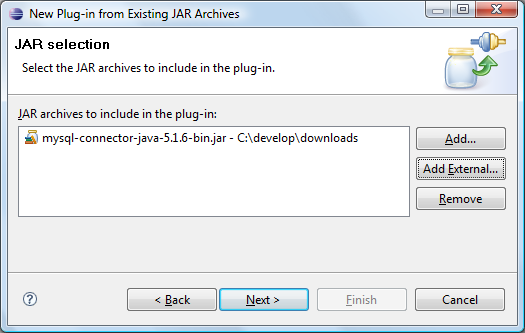
| + | * On the ''JAR selection'' page use ''Add External...'':<br>[[Image:JarPluginWizard2.png]] | ||
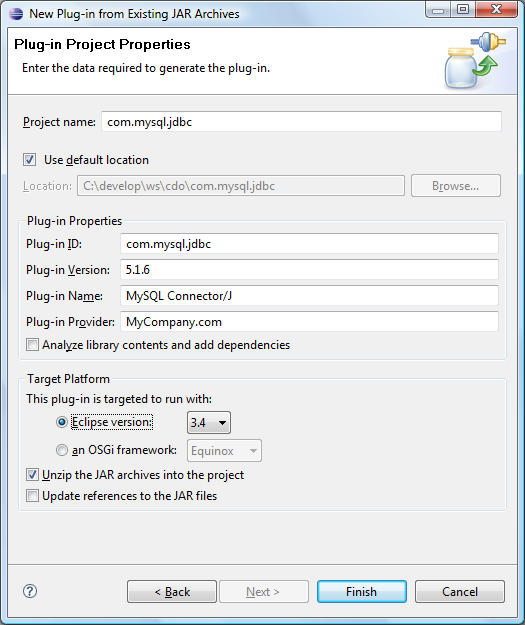
| + | * On the ''Plug-in Project Properties'' page enter the following information:<br>[[Image:JarPluginWizard3.png]] | ||
| + | * After clicking ''Finish'' the new plug-in project should appear in your workspace:<br>[[Image:JarPluginWizardResult.png]] | ||
Revision as of 11:58, 27 June 2008
This page explains how to create an OSGi bundle for the MySQL JDBC driver that you downloaded as part of CDO_Source_Installation#Downloads and export it to the target platform of your CDO workspace.
- In the file system extract the MySQL driver JAR from the downloaded MySQL ZIP file to the downloads folder:

- In your Eclipse IDE open the New Project wizard and select Plug-in from existing JAR archives:
- On the JAR selection page use Add External...:
- On the Plug-in Project Properties page enter the following information:
- After clicking Finish the new plug-in project should appear in your workspace:


