Notice: this Wiki will be going read only early in 2024 and edits will no longer be possible. Please see: https://gitlab.eclipse.org/eclipsefdn/helpdesk/-/wikis/Wiki-shutdown-plan for the plan.
Compiling and Running the Parallel Ocean Program using Photran 5.0, PTP 3.0, and RDT
(Note: This tutorial was written for a CVS version of PTP 3.0 and is outdated for the public 3.0 release.)
This tutorial will walk the user through setting up a photran project with standard makefile with PTP and RDT. The program we will use for this is the Parallel Ocean Program, whose source is freely available from http://climate.lanl.gov/Models/POP/.
Contents
Assumptions
I will assume that Photran 5.0, PTP 3.0, RDT, RSE, gfortran (part of the gcc package), and OpenMPI are already installed. For this tutorial, we will assume the user has SSH access to the remote linux machine. We will use SSH tunneling to access the ports on the remote machine and we will run the server manually as a user. If you are using the command line ssh client, you can tunnel the ports by typing ssh -L 4242:localhost:4242 -L 4243:localhost:22 username@domain.
Before you begin, you should install the netcdf library on the remote machine. It is required to compile POP and can be obtained from http://www.unidata.ucar.edu/software/netcdf/.
Configuring POP
On the remote machine, we will extract POP and get our project directory setup for when we create the project in Eclipse.
- Download version 2.0.1 of the POP source code from http://climate.lanl.gov/Models/POP/.
- Extract this file on the remote machine, somewhere under your home directory.
- cd into the directory where you extracted POP
- Run ./setup_run_dir test test. This copies the necessary files for testing in the test directory. Refer to the user manual at http://climate.lanl.gov/Models/POP/UsersGuide.pdf if you want to use a non-testing setup.
- Change to the test directory
- Set your ARCHDIR environment variable to linux (if you're using bash, export ARCHDIR=linux).
- Type make.
If there are no compile errors, continue on. If you have an error, here are a few things that could have gone wrong:
- If you installed netcdf to a non-default directory, you need to edit the linux.gnu file. Change the NETCDFINC and NETCDFLIB assignments to the directory you installed netcdf to. (example: NETCDFINC = -I/home/myuser/netcdf/include)
- A fortran compiler might not be installed on your system or the compiler may be an old version. If you are unsure, try typing gfortran -v. If you have gfortran but are having compile problems still, try making sure you have at least version 4.3.
- If you switch from gfortran to a different fortran compiler (such as Intel's), make sure you have compiled netcdf (and possibly OpenMPI) with the new compiler.
Obtaining the RDT Server
The rdt-server is run on the remote machine and will be used to connect with Eclipse in the next section.
- Download the latest rdt-server package from http://wiki.eclipse.org/PTP/builds/3.0.0 and copy it to your remote machine.
- Extract the rdt-server package on the remote machine.
Setting up RSE
In this section we will create and configure a Remote System Explorer (RSE) connection. This connection will work with the rdt-server to give us access to files, processes,and shells on the remote machine.
- Creating an RSE Connection
- In Eclipse, on the local machine, change to the Remote System Explorer perspective. The Remote Systems view should appear on the left-hand side of the screen.
- Click on the new remote connection icon
 in the Remote Systems view.
 - In the wizard that pops up, select Linux.
- On the next page, enter localhost as the hostname and a name for the connection.
- The rest of the default settings should be sufficient, so click Finish.
- In Eclipse, on the local machine, change to the Remote System Explorer perspective. The Remote Systems view should appear on the left-hand side of the screen.
- Configuring the RSE Connection
- Find the connection you created on the list. Make sure it is expanded and right click on Files, then click Properties.
- Select Server Launcher Settings and click on "Connect to running server." Since we are using SSH tunneling, we don't need to enable SSL.
- Select Subsystem. We will run the RDT server on port 4242, so click the arrow next to "Port(1-65535)" and enter 4242. Then make sure the user id is your username on the remote host. Click OK.
- Find the connection you created on the list. Right click on Ssh Terminals, and then click Properties.
- Click Subsystem. In case the user is running an ssh server on the local machine, we will tunnel the port to 4243, so click the arrow next to "Port(1-65535)" and enter 4243. Make sure the user id is your username on the remote host. Click OK.
- Starting the RSE Connection
- On the remote machine, start the RDT server by entering the directory and typing perl server.pl 4242. (Note: you may need to run this as the same user you are using for your RSE connection.)
- Right click on the connection you created. Click Connect. You should now be connected to the remote machine. (Note: The server will timeout after about 60 seconds, so you may need to restart the server if you wait too long before connecting.)

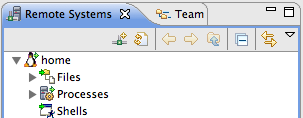
At this point you should be connected to your remote machine. Make sure you can browse the remote machine's files before moving to the next step. (To browse the files, in the Remote System Explorer perspective, expand your connection -> Files -> My Home and make sure your home directory files are appearing.)
Creating a Remote Project
Now that we have access to the files on the remote system, we can make a project using the directory we extracted POP to.
- Go to File -> New -> Project.
- Expand the Remote category and select New Remote C/C++ Project. Click Next.
- Type in a name for the project.
- Uncheck Use default location.
- Change the file system from default to RSE and click Browse.
- Set the Connection to the connection you created previously.
- Expand My Home and find the directory you extracted POP to. Select it and click OK.
- Click Next until you get to the Configure Services dialog.
- Change the Build provider to RDT Remote Build Service. Click Configure.
- Change the Provider to RSE, and change Connection to the connection you created previously. Click OK.
- Change the C/C++ Indexing Provider to RDT Remote C/C++ Indexing Service. Click Configure.
- Change the Host to the connection you created previously. Click OK.
- Click Finish. You should now be able to find the project you created in the C/C++ Perspective.
Configuring the Project
In this section, we will setup the environment variables and build directory change necessary to compile POP.
- Switch to the C/C++ Perspective.
- Right click on the project and then click Properties.
- Click C/C++ Build and change the Build directory field to the path to pop/test on your remote machine. (Ex: /home/rdt-test/pop/test)
- Expand the C/C++ Build tree and select Environment. Click Add to add an environment variable with the name ARCHDIR and the value linux. This environment variable is required by POP for compilation. Click OK.
- Expand the Fortran Build tree and choose Settings. Select the Error Parsers tab and click Check All. Click OK.
- Click OK in the project properties window to save your changes.
At this point, you should be able to successfully build the project by clicking Project -> Build Project in the menu bar. If you cannot do this, check the following things:
- The server is running and you have connected to it in the Remote System Explorer perspective.
- Your build path is correct. (Look at step 3 above)
- You have netcdf installed on the remote machine. If you want to install netcdf to a non-standard location, edit the linux.gnu file in the pop/test directory. Change the lines NETCDFINC=... to the include directory where you installed netcdf and NETCDFLIB=... to the lib directory where you installed netcdf.
- You have mpif90. If OpenMPI is installed but mpif90 doesn't exist, this is usually because a fortran compiler wasn't installed at the time OpenMPI was compiled. Reconfigure and recompile OpenMPI to fix this.
Creating a Resource Manager
In this section, we will create a resource manager, which is used to run our program on the remote machine with the correct instruction (depending on if we want to use MPICH, OpenMPI, etc.).
- Switch to the PTP Runtime Perspective.
- Right click in the Resource Managers box and click Add Resource Manager....
- Choose the resource manager type according to how you plan to run the application on the remote machine. For the purpose of this tutorial, we will use OpenMPI.
- On the next page, change the remote service provider to RSE and change the connection to the one you created previously. Then click Finish.
- The resource manager should now show up on the list. Right click on it and then click Start Resource Manager.
If all goes well, the resource manager will start without a problem. If you get a message saying the resource manager could not be started or an internal error: null argument, remove and create the resource manager again. Be sure to leave the settings default.
Creating a Run Configuration for POP
Now we will tie together everything we've done so far with a run configuration.
- Go to Run->Run Configurations...
- Double click on Parallel Application to create a new run configuration of that type.
- Under the Resources tab, select the resource manager you created previously. Change any settings you need to (such as the number of processes).
- Under the Application tab, change the parallel project to the desired project.
- Change the Application Program field to point to the pop binary (for example: /home/rdt-test/pop/test/pop).
- Under the Debugger tab, choose SDM and supply the path to the sdm binary. (note: need to look into this more. does sdm need to be compiled for the remote system? is there an easy way to compile sdm for the remote system?)
- Under the Arguments tab, type pop_in in the "Parallel program arguments" textbox.
- Click Apply and then Close.
Configuring POP (part 2)
In this section, we will setup some variables that POP uses in its execution.
- In your pop/test directory, edit the file pop_in. There are two lines close to the top that say nprocs_clinic and nprocs_tropic. Change these to the number of processes you specified in the run configuration.
- Run POP. You should get a message along the lines of "POP aborting... clinic blocks exceed max: increase max to 92".
- Edit the file domain_size.F90 in the test directory. Scroll down and set max_blocks_clinic to the number POP suggested previously.
- Recompile and run again. You should get a message along the lines of "POP aborting... tropic blocks exceed max: increase max to 92".
- Edit domain_size.F90 again. This time set max_blocks_tropic to the number POP suggested.
- Recompile.
At this point, everything should be fully configured and ready to run.