Notice: this Wiki will be going read only early in 2024 and edits will no longer be possible. Please see: https://gitlab.eclipse.org/eclipsefdn/helpdesk/-/wikis/Wiki-shutdown-plan for the plan.
COSMOS UI Testing
This page provides instructions on how to install and run the COSMOS UI test cases for i8.
Contents
Objective of the Demo
Installation
Download COSMOS Demo and Pre-requisites
This section provides instructions for running the unit test cases that is provided in the COSMOS i8 build.
- Follow the instruction at http://wiki.eclipse.org/COSMOS_DEMO_i9
- From the COSMOS download page, click on the link of the latest stable build (for i9). (Note: prior to an i9 stable build being created, testers should use the latest test driver.) Download the zip file under the "Data Reporting Web Application" section.
- Unzip the zip file to a directory. You will see a directory called "COSMOSUITests". This directory will be referred to as <COSMOSUITests> in this document.
- Copy the <COSMOSUITests> directory to <tomcat_install_dir>\webapps.
Configurations
- Download the dojo 1.0.0 driver.
- Unzip the dojo zip file to <tomcat_install_dir>\webapps\<COSMOSUITests>.
Running the Unit Tests
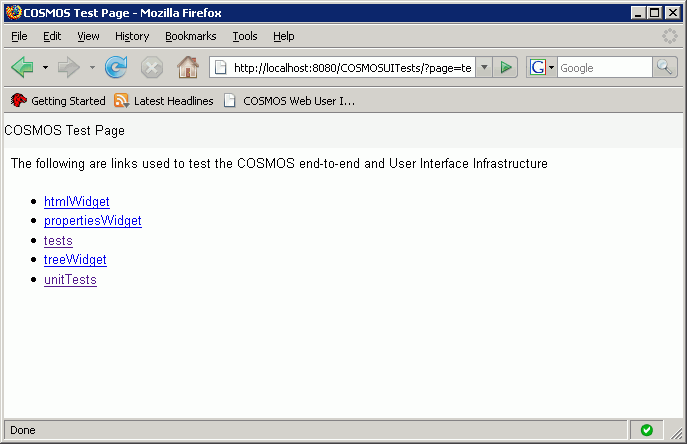
- Now open FireFox 2.0 or IE 6+ and type http://localhost:8080/COSMOSUITests/?page=tests. You should see the COSMOS UI Test Page. This page provides several configured test pages that tests widgest and various data visualization components. Testers should open up each of the test pages and manual determine if the widgets are rendered properly. Note that the "tests" link is the page shown below:
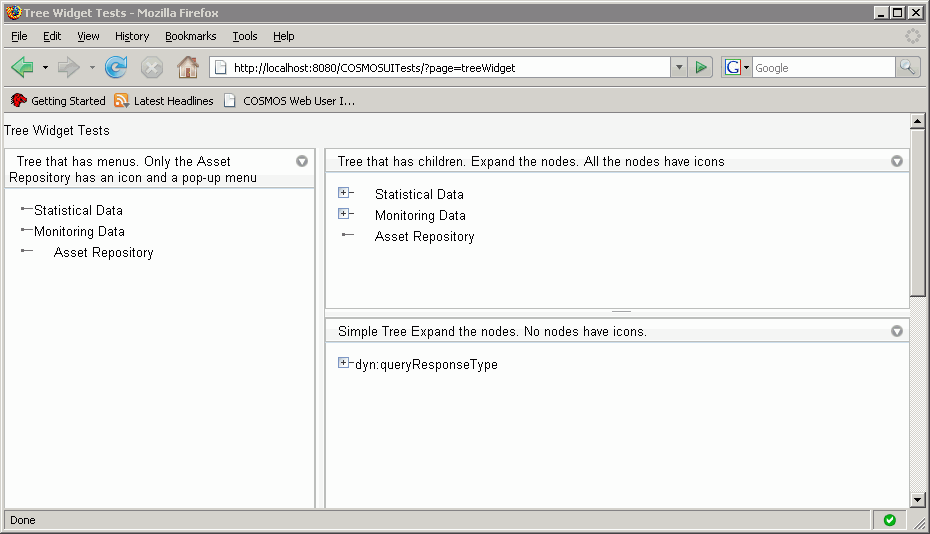
- The following shows the test page to test the COSMOS tree widget. As you can see that the page presents three configuration of the tree. The tester would normally view this page and make sure that the widget is rendered and operates properly.
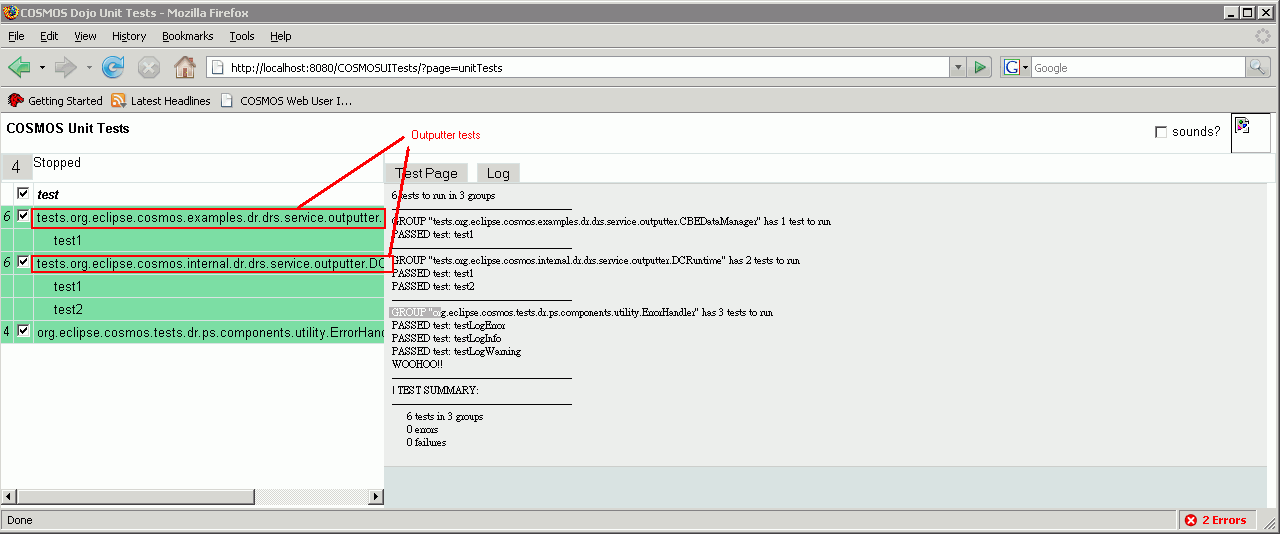
- The "unitTests" link provides a unit test page. These junit tests sends request to the server side component and executes a particular outputter and compares the output to an expected json structure. Unit tests are also provided to test the error handling framework.
Running TPTP Unit Tests
The following will run through the steps to run the TPTP junit tests.
- You need to download a TPTP 4.4 driver
- Unzip the driver to a directory and open a new workspace
- Import the following project set file. This will download two test projects in your workspace. Note that you need a CVS user id and password. This is assuming you will check in your test execution file.
- You need to modify the workspace directory parameter under /org.eclipse.cosmos.dr.tests.drs.service.handler/src/org/eclipse/cosmos/dr/tests/drs/service/handler/ProcessHandlerTestFactory.java. Change this location to the location of your workspace directory
workspaceDir = "D:\\development\\TPTP440\\eclipse\\workspace\\org.eclipse.cosmos.dr.tests.drs.service.handler";
- From the menu bar select Run>Open Run Dialog...
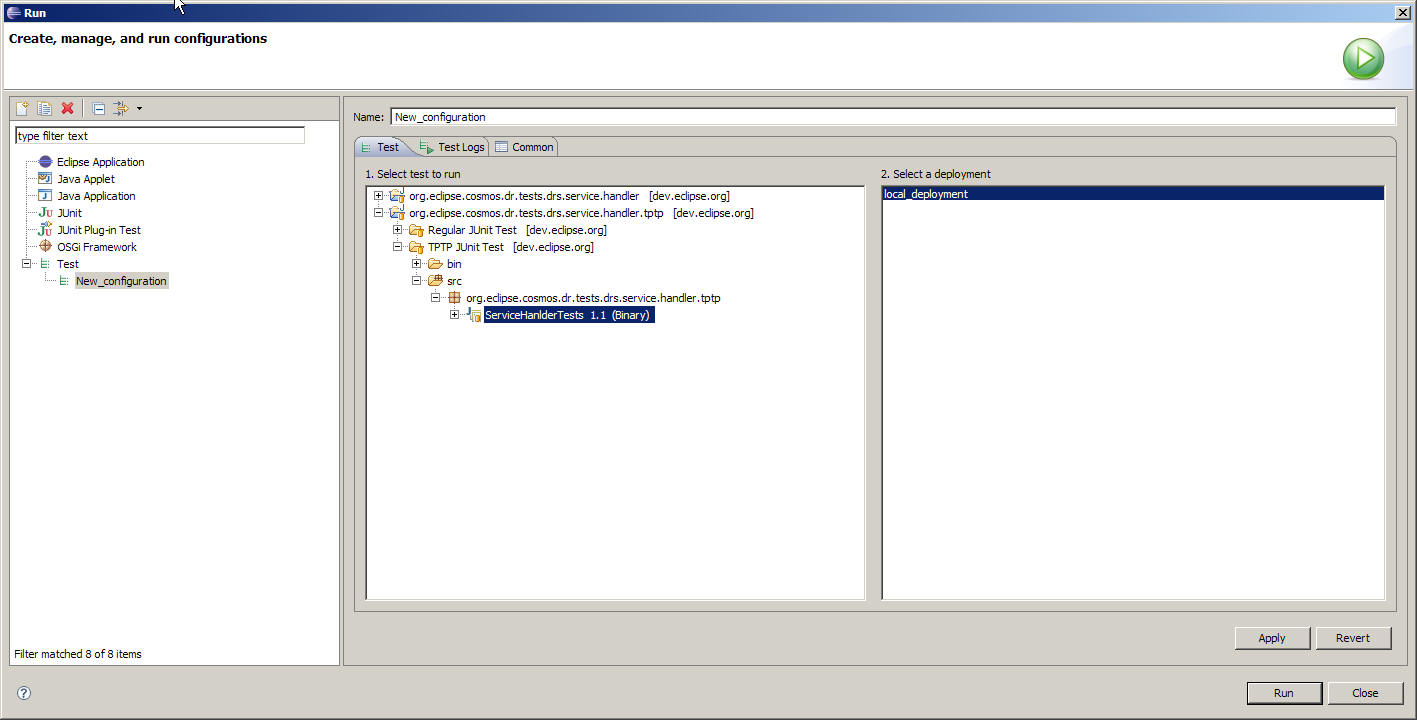
- Create a TPTP Test run configuration as shown in the following screenshot
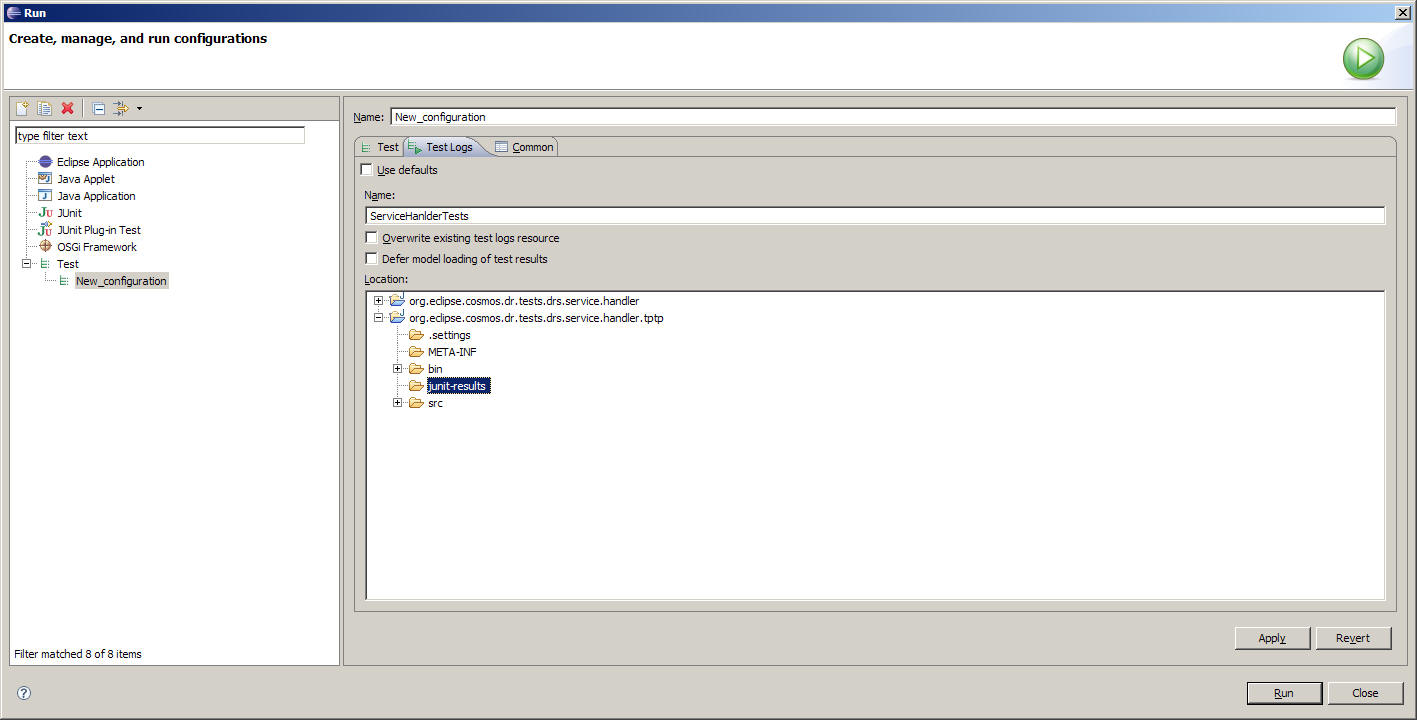
- Go to the Test Logs tab and uncheck the "use defaults" option and select the junit-results folder as shown in the following screenshot. This will save the test execution file under the junit-results folder.
- Click Run
- Click on the execution file at org.eclipse.cosmos.dr.tests.drs.service.handler.tptp\junit-results\ServiceHanlderTests_1201113386531.execution. Note that an id number is appended to the file name.
- Check in the test execution file into CVS
Notes on the Unit tests
The results (pass/fail) of the Unit tests are determined by comparing the expected JSON output file to the actual JSON output file. The JSON output of the Domain and Broker tests contain IP addresses. Since the addresses vary depending on the test system, the expected JSON output files must be manually modified with your actual IP addresses before running the tests. To modify the files, replace all occurrences of "localhost" with the IP address of your test machine.
In the future, we expect to add a new feature to the UI Unit testing which will eliminate this manual step.

