Notice: this Wiki will be going read only early in 2024 and edits will no longer be possible. Please see: https://gitlab.eclipse.org/eclipsefdn/helpdesk/-/wikis/Wiki-shutdown-plan for the plan.
Difference between revisions of "CDT/Setting Up Eclipse CDT"
(Remove unneeded <div> that causes HTML problems) |
|||
| (3 intermediate revisions by the same user not shown) | |||
| Line 71: | Line 71: | ||
The following screen allows you to select a directory to install to. The default directory <code>C:\MinGW</code> is fine. You can select almost anything you like. | The following screen allows you to select a directory to install to. The default directory <code>C:\MinGW</code> is fine. You can select almost anything you like. | ||
| − | + | ||
Do not select a path containing spaces! This will lead to trouble later on! | Do not select a path containing spaces! This will lead to trouble later on! | ||
| − | + | ||
[[File:Setting_Up_Eclipse_CDT_mingwgetinst5.png|alt=Select a path for MinGW and MSYS|Select a path for MinGW and MSYS]] | [[File:Setting_Up_Eclipse_CDT_mingwgetinst5.png|alt=Select a path for MinGW and MSYS|Select a path for MinGW and MSYS]] | ||
| Line 112: | Line 112: | ||
The next thing you need to do is set up your Path environment variable. | The next thing you need to do is set up your Path environment variable. | ||
| − | On Windows 2000/XP, right-click on <code>My | + | On Windows 2000/XP, right-click on <code>My Computer</code> and select <code>Properties</code>. Then, select the <code>Advanced</code> tab. There should be a button called <code>Environment Variables</code>. |
| − | + | ||
[[File:Setting_Up_Eclipse_CDT_systemproperties.png|alt=Finding Environment Variables (Windows 2000)|Finding Environment Variables (Windows 2000)]] | [[File:Setting_Up_Eclipse_CDT_systemproperties.png|alt=Finding Environment Variables (Windows 2000)|Finding Environment Variables (Windows 2000)]] | ||
| Line 135: | Line 134: | ||
''Warning: I had reports of people deleting their existing Path environment variable! Please be very careful when editing an existing value! By default, Windows has the whole line selected, resulting in overwriting what was in there!'' | ''Warning: I had reports of people deleting their existing Path environment variable! Please be very careful when editing an existing value! By default, Windows has the whole line selected, resulting in overwriting what was in there!'' | ||
| − | If you want to set it for everyone, look for the variable <code>Path</code> in the section <code>System | + | If you want to set it for everyone, look for the variable <code>Path</code> in the section <code>System variables</code>. Click <code>Edit</code>. There should already be some text in there, append <code>;C:\MinGW\bin;C:\MinGW\msys\1.0\bin;</code> (or your appropriate paths, e.g. <code>;C:\msys\1.0\bin;C:\mingw\bin</code> if you installed MinGW 5 / MSys 1.0.11) to it, and select <code>OK</code> multiple times. Please make sure that you do not overwrite what was in there! |
| − | + | ||
If you just want to set it for you, look for <code>Path</code> in the upper section. It is very likely not there yet. So select <code>New...</code> and enter <code>C:\MinGW\bin;C:\MinGW\msys\1.0\bin</code> (or your appropriate paths, see paragraph above). Then select <code>OK</code> multiple times. Again, if there was a setting before, do not delete it, but rather append your path! | If you just want to set it for you, look for <code>Path</code> in the upper section. It is very likely not there yet. So select <code>New...</code> and enter <code>C:\MinGW\bin;C:\MinGW\msys\1.0\bin</code> (or your appropriate paths, see paragraph above). Then select <code>OK</code> multiple times. Again, if there was a setting before, do not delete it, but rather append your path! | ||
| Line 178: | Line 176: | ||
To get the compiler, you have to install developer tools (Xcode) from the App Store. After downloading, you have to run the installer to actually install the developer tools. | To get the compiler, you have to install developer tools (Xcode) from the App Store. After downloading, you have to run the installer to actually install the developer tools. | ||
| − | + | ||
If you have upgraded to Lion from an older version of OS X, you have to redo both of these steps (download + install). Upgrading to Lion breaks your existing developer tools. Again: You have to do this after an upgrade to Lion, even if you have previously installed the developer tools! | If you have upgraded to Lion from an older version of OS X, you have to redo both of these steps (download + install). Upgrading to Lion breaks your existing developer tools. Again: You have to do this after an upgrade to Lion, even if you have previously installed the developer tools! | ||
| − | + | ||
[[File:Setting_Up_Eclipse_CDT_xcode1.png|alt=Find XCode in App Store|Find XCode in App Store]] | [[File:Setting_Up_Eclipse_CDT_xcode1.png|alt=Find XCode in App Store|Find XCode in App Store]] | ||
| Line 195: | Line 193: | ||
: You may need to do two things: | : You may need to do two things: | ||
;# Close iTunes, see if that helped. | ;# Close iTunes, see if that helped. | ||
| − | ;# In a Terminal window, type: <code>killall | + | ;# In a Terminal window, type: <code>killall iTunesHelper</code> |
| − | + | ||
; No matching processes belonging to you were found | ; No matching processes belonging to you were found | ||
: This can happen if your Unix username contains a space. The workaround is to create an admin user to be used during the installation. | : This can happen if your Unix username contains a space. The workaround is to create an admin user to be used during the installation. | ||
| Line 262: | Line 259: | ||
== Installing the CDT == | == Installing the CDT == | ||
| − | + | ||
This is only required if you did not download the CDT version as described above. Please check if you are able to create a new C++ project (as described in [[#Hello, World!|Hello, World!]]) before going through this section! | This is only required if you did not download the CDT version as described above. Please check if you are able to create a new C++ project (as described in [[#Hello, World!|Hello, World!]]) before going through this section! | ||
| − | + | ||
| − | + | ||
This section described the current (3.5, 3.6, and 3.7) version of Eclipse. For the previous version (3.4) Please see [[#Installing the CDT|Installing the CDT]]). | This section described the current (3.5, 3.6, and 3.7) version of Eclipse. For the previous version (3.4) Please see [[#Installing the CDT|Installing the CDT]]). | ||
| − | + | ||
In the "Help" menu select "Install New Software..." | In the "Help" menu select "Install New Software..." | ||
| Line 401: | Line 398: | ||
== /bin/sh: line 1: g++: command not found, Error launching external scanner info generator == | == /bin/sh: line 1: g++: command not found, Error launching external scanner info generator == | ||
| − | This error message means that g++ is either not installed or not in your path. Check your path settings as described in [[#Build error (Exec error:Launching failed), CreateProcess: make -k all error=2,|Build error (Exec error:Launching failed), CreateProcess: make -k all error=2,]], but this time try the commands: < | + | This error message means that g++ is either not installed or not in your path. Check your path settings as described in [[#Build error (Exec error:Launching failed), CreateProcess: make -k all error=2,|Build error (Exec error:Launching failed), CreateProcess: make -k all error=2,]], but this time try the commands: <pre>gcc --version</pre> and <pre>g++ --version</pre>. If gcc works, but g++ doesn't, it means you have only installed the C and not the C++ version of the gcc compiler, which happens quite frequently on Linux distributions. Check if you have all needed packages installed, and check [[#Setting up a compiler|Setting up a compiler]]. |
If you are on windows, and neither of them worked, install MinGW and set your path environment variable. If only gcc one worked, reinstall MinGW and don't forget to select the C++ compiler! | If you are on windows, and neither of them worked, install MinGW and set your path environment variable. If only gcc one worked, reinstall MinGW and don't forget to select the C++ compiler! | ||
| Line 463: | Line 460: | ||
* You have not installed Java. Please see [[#Java|Java]]. | * You have not installed Java. Please see [[#Java|Java]]. | ||
* Your "path" environment is messed up (Windows). Please see [[#Environment Variables|Environment Variables]]. Make sure <code>C:\windows\system32</code> is in your path (should be there by default). | * Your "path" environment is messed up (Windows). Please see [[#Environment Variables|Environment Variables]]. Make sure <code>C:\windows\system32</code> is in your path (should be there by default). | ||
| − | * [http://www.java.com java.com] has a button called <code>verify | + | * [http://www.java.com java.com] has a button called <code>verify installation</code>. |
| − | + | ||
== I have no binaries == | == I have no binaries == | ||
| Line 494: | Line 490: | ||
== Launch failed Reason: Unable to set working directory == | == Launch failed Reason: Unable to set working directory == | ||
| − | Your workspace or your eclipse installation may use a path with includes spaces, such as <code>C:\Documents and | + | Your workspace or your eclipse installation may use a path with includes spaces, such as <code>C:\Documents and Settings</code>. Eclipse sometimes fails in this case. Try creating your workspace in a different directory. |
| − | + | ||
== Problems not covered here == | == Problems not covered here == | ||
| Line 503: | Line 498: | ||
If you are still having trouble, you may try and send me an email. Please be aware that I may not respond to every email, as I am doing this support mainly as a hobby. Make sure your email includes the following. Please send the complete output! | If you are still having trouble, you may try and send me an email. Please be aware that I may not respond to every email, as I am doing this support mainly as a hobby. Make sure your email includes the following. Please send the complete output! | ||
| − | * The contents of your PATH environment variable (in Windows: <code>echo %PATH%</code>. In Linux / Mac OS X: <code>echo | + | * The contents of your PATH environment variable (in Windows: <code>echo %PATH%</code>. In Linux / Mac OS X: <code>echo $PATH)</code>. |
| − | + | * Version of GCC you're using (<code>gcc --version</code>) | |
| − | * Version of GCC you're using (<code>gcc | + | |
| − | + | ||
* Version of Make you're using (<code>make --version</code> or <code>gmake --version</code>) | * Version of Make you're using (<code>make --version</code> or <code>gmake --version</code>) | ||
* Version of Eclipse you're using | * Version of Eclipse you're using | ||
| Line 602: | Line 595: | ||
== Installing the CDT on Eclipse 3.4 == | == Installing the CDT on Eclipse 3.4 == | ||
| − | + | ||
This is only required if you did not download the CDT version as described above. Please check if you are able to create a new C++ project (as described in [[#Hello, World!|Hello, World!]]) before going through this section! | This is only required if you did not download the CDT version as described above. Please check if you are able to create a new C++ project (as described in [[#Hello, World!|Hello, World!]]) before going through this section! | ||
| − | + | ||
In the "Help" menu select "Software Updates..." | In the "Help" menu select "Software Updates..." | ||
| Line 691: | Line 684: | ||
[[File:Setting_Up_Eclipse_CDT_splash.png|alt=Eclipse splash screen|Eclipse splash screen]] | [[File:Setting_Up_Eclipse_CDT_splash.png|alt=Eclipse splash screen|Eclipse splash screen]] | ||
| − | Immediately after that Eclipse will ask you for your workspace location. It defaults to: <code>C:\Program | + | Immediately after that Eclipse will ask you for your workspace location. It defaults to: <code>C:\Program Files\eclipse\workspace</code> which is actually very bad. Depending on where you want to use Eclipse, please set your workspace to the appropriate folder. If you are in a computer lab, check their policy on personal home folders. If you are on your own computer, a place within your personal settings is usually best: |
| − | + | ||
[[File:Setting_Up_Eclipse_CDT_workspace.png|alt=Eclipse asking for workspace|Eclipse asking for workspace]] | [[File:Setting_Up_Eclipse_CDT_workspace.png|alt=Eclipse asking for workspace|Eclipse asking for workspace]] | ||
Latest revision as of 15:54, 7 September 2020
Contents
- 1 Introduction
- 2 Other Resources
- 3 Setting up a compiler
- 4 Setting up Eclipse
- 5 Common Problems
- 5.1 How to fix most of the common errors on Windows
- 5.2 How to fix most of the common errors on Lion (Mac OS X 10.7)
- 5.3 Build error (Exec error:Launching failed), CreateProcess: make -k all error=2,
- 5.4 /bin/sh: line 1: g++: command not found, Error launching external scanner info generator
- 5.5 Undefined symbols for architecture x86_64 (OS X 10.7)
- 5.6 No output or only sometimes output
- 5.7 Error launching 'cygpath' command
- 5.8 I do not have the option to start a C++ project
- 5.9 Error 1, open output file blabla.exe: Permission denied
- 5.10 The debugger doesn't work (on windows, with MinGW)
- 5.11 Incorrect command line argument: -k'
- 5.12 A Java Runtime Envrionment (JRE) or Java Development Kit (JDK) must be available...
- 5.13 I have no binaries
- 5.14 Unable to access jarfile startup.jar
- 5.15 Problems when CYGWIN is installed on Windows
- 5.16 Launch failed Reason: Unable to set working directory
- 5.17 Problems not covered here
- 6 Older Instructions
- 7 Feedback
Introduction
There are several freely available C and C++ development environments. Most of them have the disadvantage that they require one particular operating system. The Eclipse IDE was written as a cross-platform development environment. Initially just written for Java, it also has a very good C/C++ development mode.
If you have already tried (and I assume failed, otherwise you wouldn't be reading this document) to install Eclipse CDT, you may want to go directly to Common Problems.
This document describes how to install everything necessary to develop with C or C++ using only free tools on the three major operating systems Windows, Linux, and Mac OS X. It uses the Eclipse IDE, which is the same on all operating systems, thus providing a consistent user experience once installed.
There are two versions of this document:
- The free online version
- The free version of Setting up Eclipse CDT on Windows, Linux/Unix, Mac OS X can be found on Max Bergers website. It will always be the previous major revision of the document.
- A paid eBook version
- The eBook version of Setting up Eclipse CDT on Windows, Linux/Unix, Mac OS X is distributed through Amazon.com, Amazon.co.uk, and Amazon.de. It will always be the current major revision of the document.
- Setting up Eclipse CDT on Window, Linux/Unix, Mac OS X on Amazon.com
- Setting up Eclipse CDT on Window, Linux/Unix, Mac OS X on Amazon.co.uk
- Setting up Eclipse CDT on Window, Linux/Unix, Mac OS X on Amazon.de
- Setting up Eclipse CDT on Window, Linux/Unix, Mac OS X on Amazon.fr
- Setting up Eclipse CDT on Window, Linux/Unix, Mac OS X on Amazon.it
- Setting up Eclipse CDT on Window, Linux/Unix, Mac OS X on Amazon.es
At this time, the eBook version contains updates for the following items which are not yet in the free version:
- There are no updates in the ebook version at this time.
Screenshots may still reflect older versions of the used software, they are only updated if there is a significant change.
Other Resources
When looking for Instructions, I found the following websites:
- http://wiki.eclipse.org/CDT/User/FAQ
- http://yongshin.blogspot.com/2005/11/how-to-use-cdt-and-mingw-for-eclipse.html
- http://www.cs.umanitoba.ca/~eclipse/7-EclipseCDT.pdf
Setting up a compiler
Unfortunately Eclipse only provides the Integrated Development Environment (IDE) but it is missing the actual compiler. To install a compiler, please follow the instructions for your operating system.
Windows compiler
Windows doesn't come with a build-in compiler. You could try to install Visual Studio, but it is tricky to get that working with Eclipse. Therefore we will install MSYS. MSYS is part of the MinGW suite, which provides free development tools for Windows.
You will have to follow these 4 steps:
- Download and install MinGW
- Download and install MSYS
- Set your path environment variable
- Restart Eclipse if it was started.
MinGW + MSYS
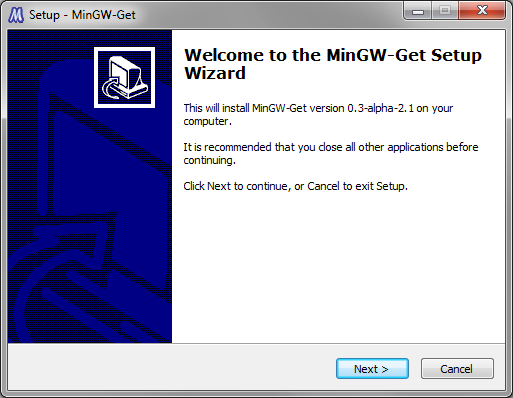
First, you need to download MinGW. You can either click through the websites mentioned above or go directly to the MinGW download area. Look for the Section "Automated MinGW Installer", then "mingw-get-inst". There, download the newest subdirectory. and in there download the file ending in .exe. The file name should be something like "mingw-get-inst-20110802.exe". You can also download mingw-get-inst-200110802.exe from the link given here.
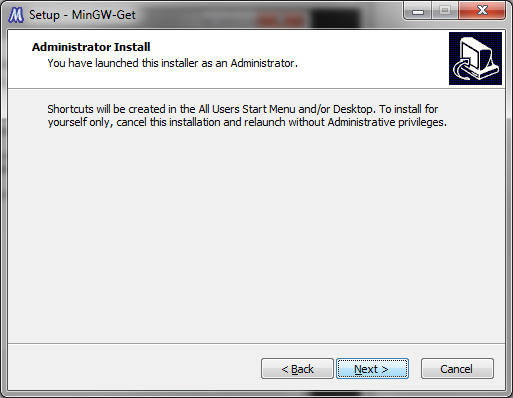
Make sure you install the program with Administrator Priviledges. Right-click on the downloaded file, and select "Run as Administrator".
Make sure the second screen tells you that this is an Administrator install. If you don't get this screen, select "Cancel" and re-start as administrator.
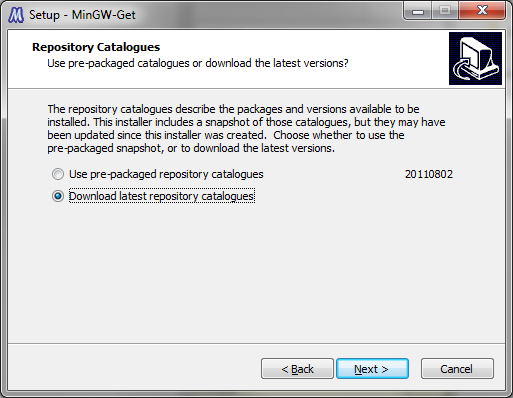
The next screen asks you if you want up-to-date versions of the files. Tell the installer that you want do download the newest catalog data.
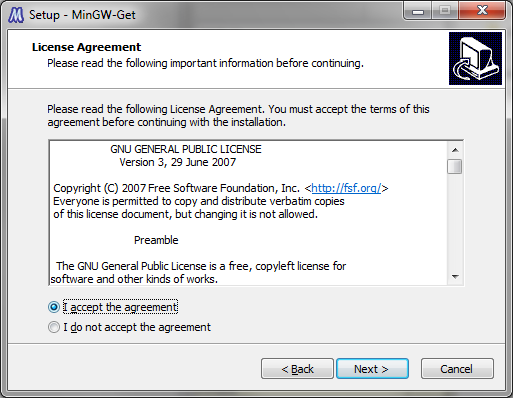
Next, you have to accept the License.
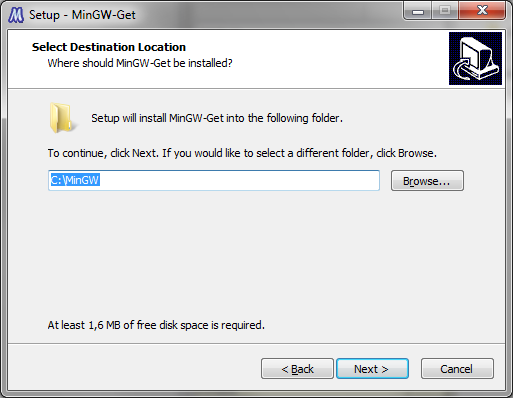
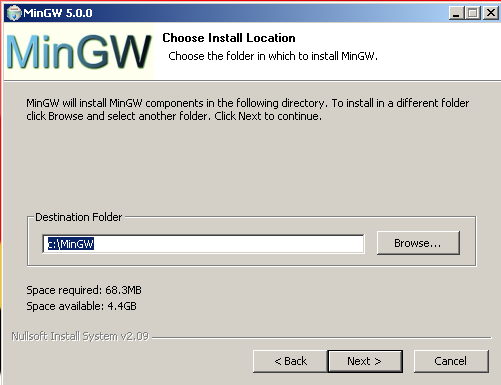
The following screen allows you to select a directory to install to. The default directory C:\MinGW is fine. You can select almost anything you like.
Do not select a path containing spaces! This will lead to trouble later on!
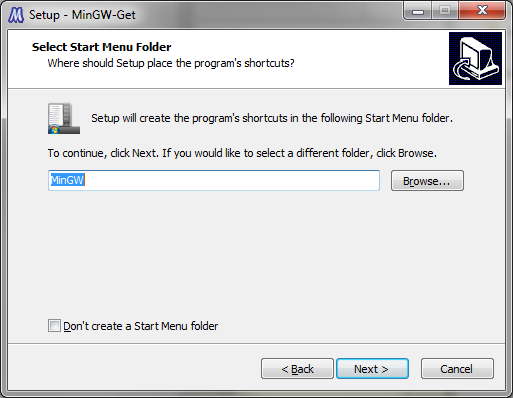
Next, you're asked if you want to create a start menu entry. This is a good idea for checking the install, so do it.
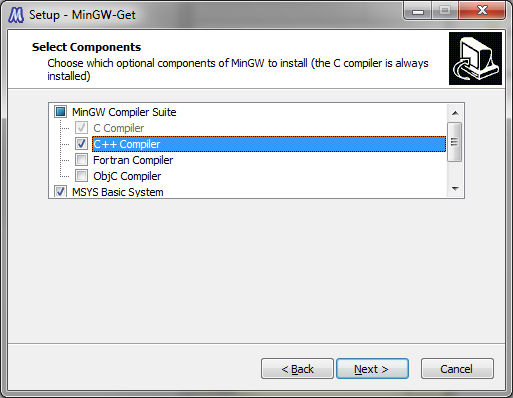
On the next screen, you again have to change things. You have to select "C++Compiler" and "MSYS Basic System". These two are necessary to run the compiler and the build-system on Windows.
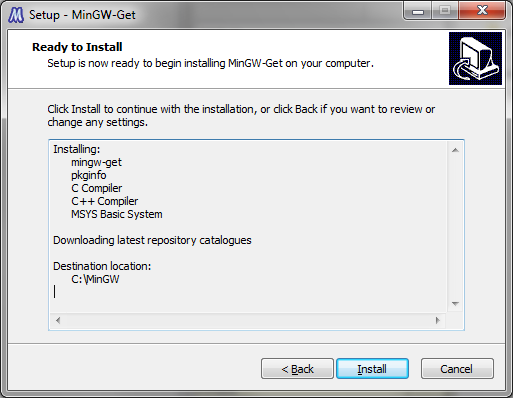
The next screen lets you check the installation. Make sure it looks like this screenshot.
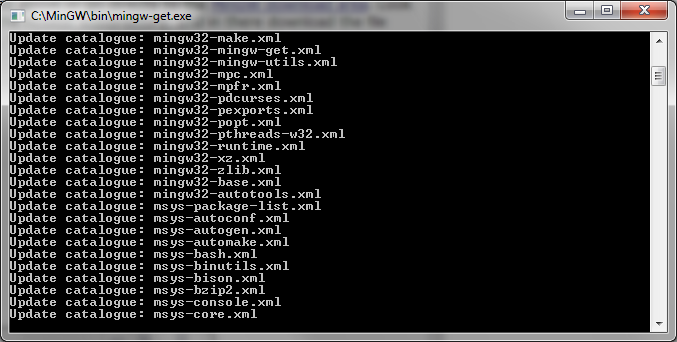
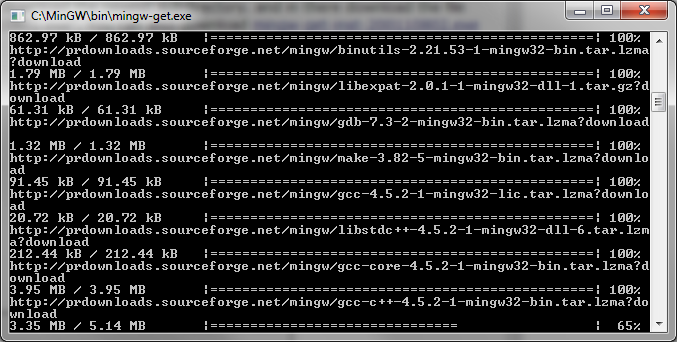
After selecting "Install", you have to wait for the installation process to complete.
Once the installation is complete, hit "Finish".
Checkpoint: You should be able to start MSYS by going to Start / Programs / MinGW / MinGW Shell. A console window should open. There, the following commands should give you some output:
gcc --version
g++ --version
make --version
Close the MSYS shell again. We'll make sure that these tools are available for all Windows programs in the next section.
Environment Variables
The next thing you need to do is set up your Path environment variable.
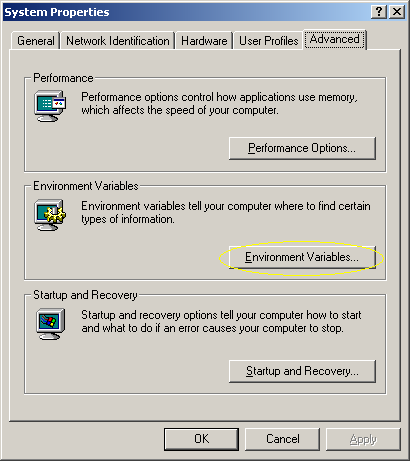
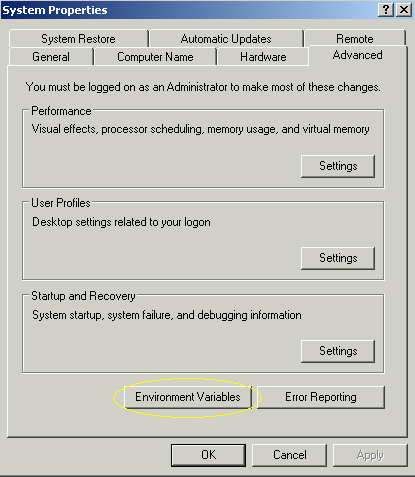
On Windows 2000/XP, right-click on My Computer and select Properties. Then, select the Advanced tab. There should be a button called Environment Variables.
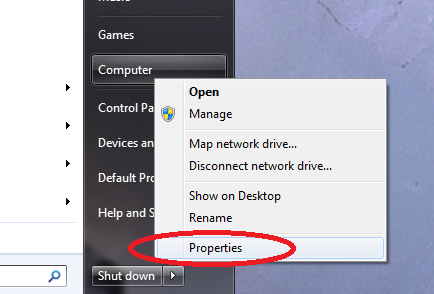
In Windows Vista / Windows 7, Click on the Windows Logo, right click on Computer, select Properties
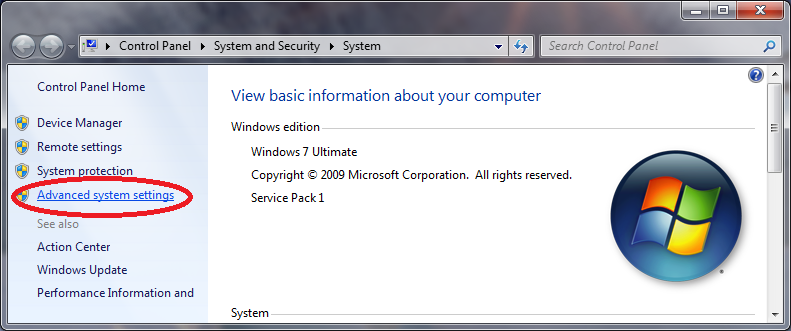
In the control panel, select "Advances system settings"
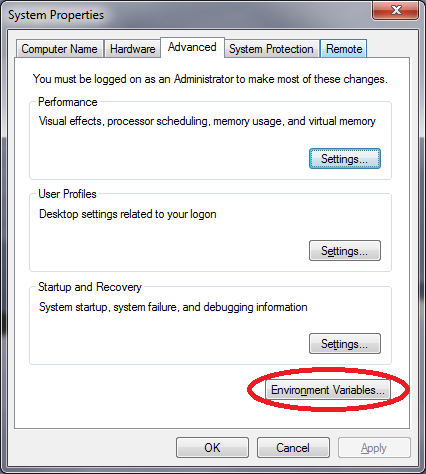
Finally, click on "Environment Variables"
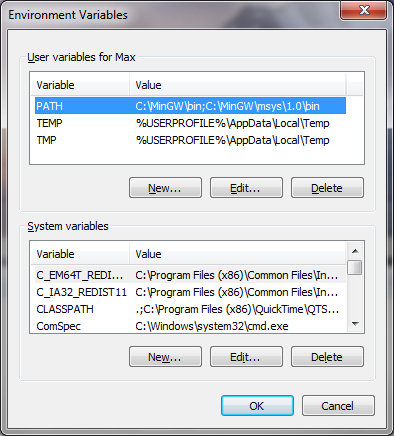
In the environment variables, there are two sections, one for the local user (you) and one for the system. Depending on whether you want the paths to be set for everyone, or for you, do one of the following:
Warning: I had reports of people deleting their existing Path environment variable! Please be very careful when editing an existing value! By default, Windows has the whole line selected, resulting in overwriting what was in there!
If you want to set it for everyone, look for the variable Path in the section System variables. Click Edit. There should already be some text in there, append ;C:\MinGW\bin;C:\MinGW\msys\1.0\bin; (or your appropriate paths, e.g. ;C:\msys\1.0\bin;C:\mingw\bin if you installed MinGW 5 / MSys 1.0.11) to it, and select OK multiple times. Please make sure that you do not overwrite what was in there!
If you just want to set it for you, look for Path in the upper section. It is very likely not there yet. So select New... and enter C:\MinGW\bin;C:\MinGW\msys\1.0\bin (or your appropriate paths, see paragraph above). Then select OK multiple times. Again, if there was a setting before, do not delete it, but rather append your path!
There seems to be a problem with a very long PATH environment variable on some systems. According to reports, Eclipse will fail to compile and build, where as compiling and building from a command window may work fine. In this case, try to prepend the path to MinGW and MSYS rather than appending it.
Congratulations. Now you have a complier and make set up on your computer. Continue with Setting up Eclipse.
Checkpoint: Open up a command terminal (cmd) and type:
make --version
g++ --version
gcc --version
Each one of these should work now. If not, you have either not installed MSYS correctly or not set your path environment variable. Also, try logging out and back in.
Linux / Unix Compiler
In most Linux and Unix distributions the compiler is already installed. Check if you can run
g++ --version
and either
make --version
or
gmake --version
If both of them (g++ and either make or gmake) work then you are already done. If not, please install those. This may be very different depending on which Linux or Unix distribution you have. Install the tools and continue with Setting up Eclipse.
Mac OS X Compiler
On Mac OS X you can also try the commands explained in Linux / Unix Compiler to check if you have the necessary tools installed. If not, you will need to install the developer tools
Mac OS X up to Snow Leopard (10.6)
The developer tools are either on one of your Mac OS X CDs that came with your computer, or you can download them at: Apple's developer connection.
Mac OS X Lion (10.7) and Newer
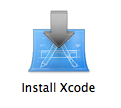
To get the compiler, you have to install developer tools (Xcode) from the App Store. After downloading, you have to run the installer to actually install the developer tools.
If you have upgraded to Lion from an older version of OS X, you have to redo both of these steps (download + install). Upgrading to Lion breaks your existing developer tools. Again: You have to do this after an upgrade to Lion, even if you have previously installed the developer tools!
After you've downloaded developer tools (Xcode), you have to go to your Applications folder and run the installer.
During the install, you may encounter the following error messages:
- In order to continue installation, please close the following application
- iTunes
- You may need to do two things:
- Close iTunes, see if that helped.
- In a Terminal window, type:
killall iTunesHelper
- No matching processes belonging to you were found
- This can happen if your Unix username contains a space. The workaround is to create an admin user to be used during the installation.
- Open system preferences, go to "Users and groups"
- Unlock the user preferences, type in you password
- Click on "+" to create a new user
- For "New account" select "Administrator"
- For fullname and account name enter something in all lower cases without spaces, e.g. "admin".
- In der Dropdownmenu for "new account" change "Standard" to "Administrator".
- Log out, and log back in as your new admin user.
- Try installing again.
- Log out, log back in as your normal user
- Delete the admin user (System preferences, Users and Groups, unlock, select the admin user, click on "-")
After Xcode has finished installing, you can open up a terminal (Applications / Utilities / Terminal) and check if g++, gcc and make are working:
gcc --version
g++ --version
make --version
Setting up Eclipse
On Windows XP and later, this may be a good point in time to create a system restore point. This may safe you trouble in the long run if the installation fails.
Java
Eclipse was originally written for the Java platform. It still requires a Java Runtime Environment (JRE) or a Java Development Kit (JDK), version 1.5 or greater. You will most probably already have Java installed (it comes included in Mac OS X until 10.6 and will be auto-installed in Mac OS X 10.7 / Lion). However, if you don't have Java installed, and you are on Windows or Linux, you can download a JRE from Sun's Java website or from java.com. At the time of this writing the latest version was Java Runtime Environment (JRE) 7. Look for the section called "Java SE Runtime Environment (JRE)" and select "JRE 7" (or similar). You will not need NetBeans, JDK, or EE, they are just larger downloads with more programs. You may need the JDK if you want to do Java development.
Note: There may be an incompatibility between Eclipse Helios and Java 1.6 update 21.
To find out if you have Java installed, and which version it is, you can open a command prompt / shell and type in:
java -version
Downloading Eclipse
Eclipse is a modular software, but ever summer there are bundled released. The link is:
I recommend the complete "Eclipse IDE for C/C++ Developers" bundle, which already contains the CDT. If you download a different bundle, you will probably have to install the CDT manually, as described in Installing the CDT.
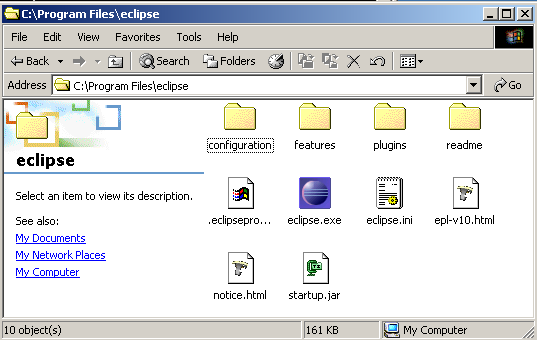
The file is about 86 MB in size, so it will take a while to download. You will end up with a .ZIP file. Use either FilZip or your favorite ZIP Program (Windows XP/Vista/7 and Mac OS X have .ZIP support build in) to unpack the file. Move the unpacked folder to any location, for example C:\Program Files\eclipse. You can now start Eclipse by double-clicking it.
First Run of Eclipse
However you installed eclipse, you should now be able to run it. Double-click the icon or start the appropriate script in UNIX and Eclipse's splash-screen will appear:
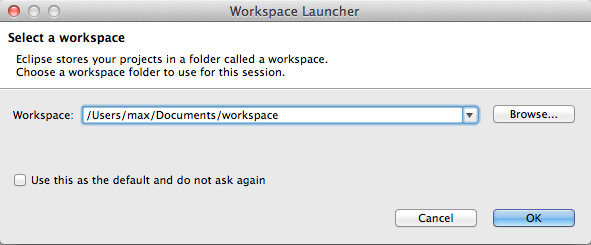
Immediately after that Eclipse will ask you for your workspace location. It defaults to a place within your personal settings. It is a good idea to use the default workspace, you may want to note where it is located.
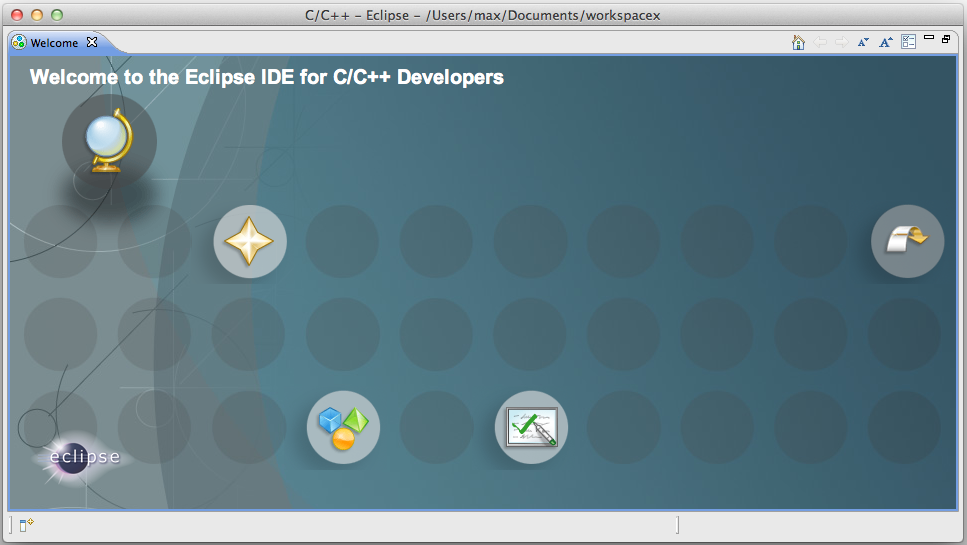
If you always want to use the same workspace, you may select the Use this as the default... and you'll never have to worry about workspaces again. This is usually a good idea once you've used Eclipse for a while. Finally Eclipse starts up with the welcome screen:
And if you select the "Go to the workbench" (the backward arrow) on the right, then you are inside Eclipse.
If you downloaded the "Eclipse IDE for C/C++ Developers" you can skip the next section and go straight to Configuring the CDT.
If you have downloaded a different package, there are additional tools needed to start programming. We want to develop in C++, so we will continue with the next section.
Installing the CDT
This is only required if you did not download the CDT version as described above. Please check if you are able to create a new C++ project (as described in Hello, World!) before going through this section!
This section described the current (3.5, 3.6, and 3.7) version of Eclipse. For the previous version (3.4) Please see Installing the CDT).
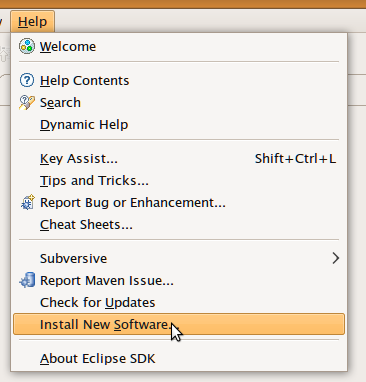
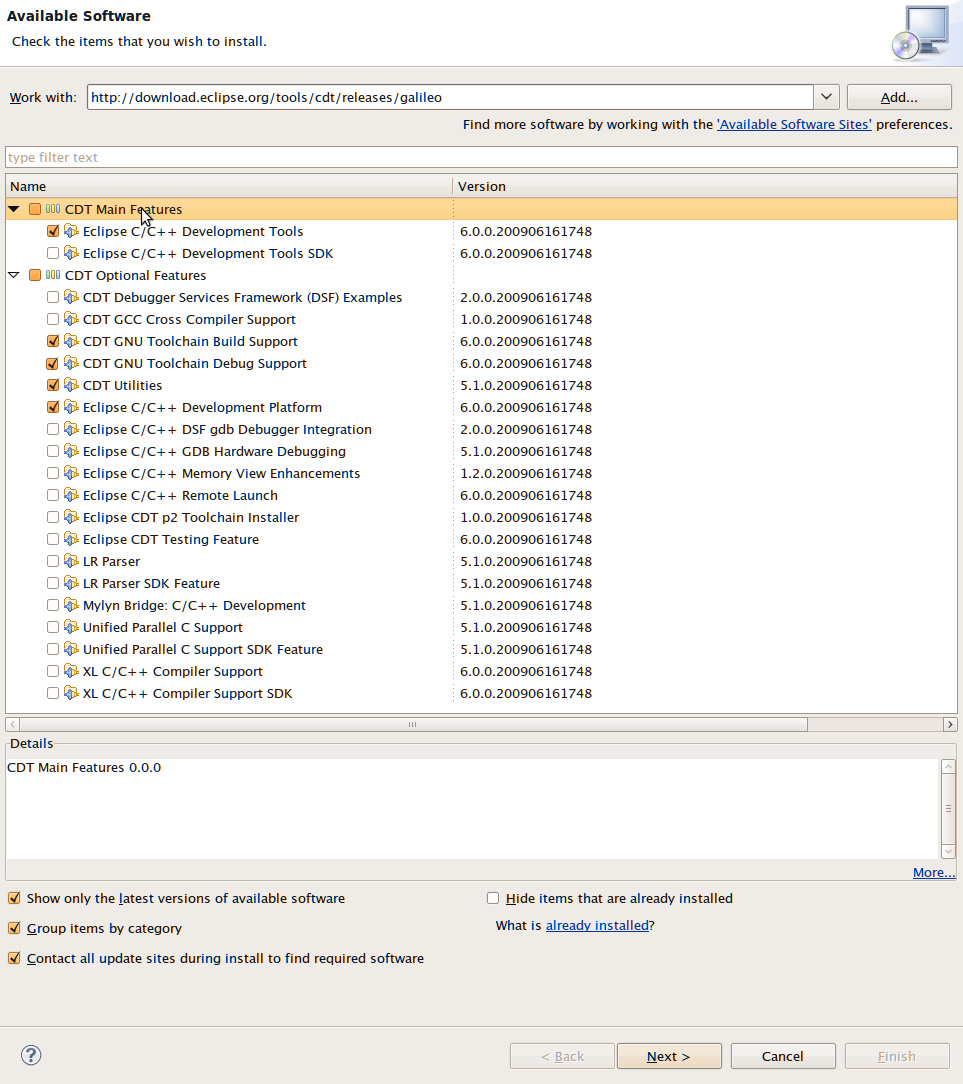
In the "Help" menu select "Install New Software..."
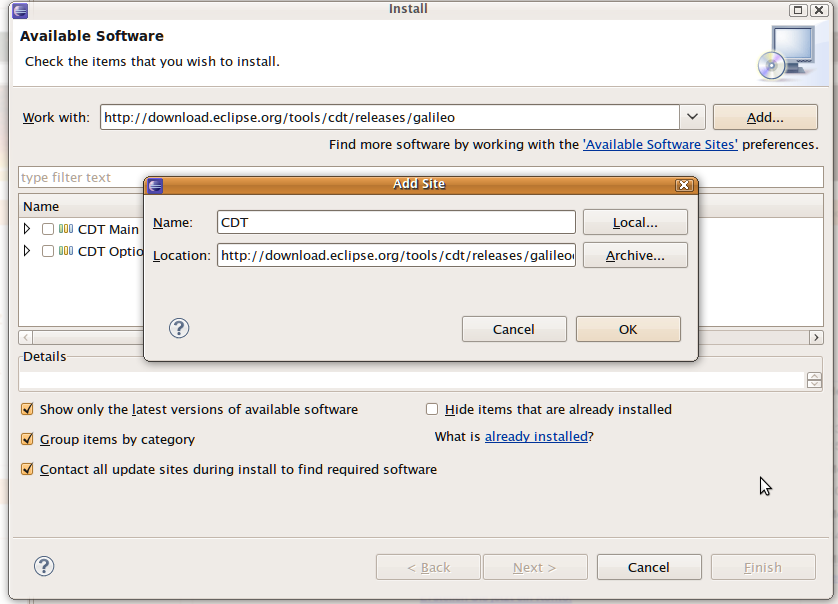
This will show you the list of available software update sites. CDT is part of the standard release, so you can select an update site matching your eclipse version.
Please note: It is important to install the right Version of CDT for your version of eclipse:
- For Eclipse 3.7 (Indigo): Use
http://download.eclipse.org/tools/cdt/releases/indigo - For Eclipse 3.6 (Helios): Use
http://download.eclipse.org/tools/cdt/releases/helios - For Eclipse 3.5 (Galileo): Use
http://download.eclipse.org/tools/cdt/releases/galileo
When you have found the CDT site, it will give you two entries: CDT Main Features and CDT Optional Features. Expand both, and find the latest version of the CDT. Make sure you select at least the following:
- C/C++ Development Tools
- C/C++ GNU Toolchain Build Support
- C/C++ GNU Toolchain Debug Support
- C/C++ Development Platform
Do not select all items! Some of these require dependencies from other projects, which may not be installed and thus fail to install. Select only the features you need!
The select "Next..."
You will have to confirm the selection with "Next".
And accept the license agreement with "Finish".
Downloading and installing will take a while. Once its done it will ask you to restart Eclipse. This is a good idea, so select "Yes".
Once Eclipse has restarted you may need to configure it for your computer.
Configuring the CDT
Fortunately, this is very easy. If your path is set correctly, there should be absolutely nothing you need to configure. This is true if you followed these instructions for Windows or Mac OS X.
On some Unix systems you might have to change your "make" program to "gmake". You will find the setting in Window / Preferences (Eclipse / Preferences on Mac OS X). Then expand "C / C++", then "New CDT Project Wizard", "Makefile Project" and select "Builder Settings". In the section "builder", de-select "use default build command" and for "Build command" enter "gmake".
Hello, World!
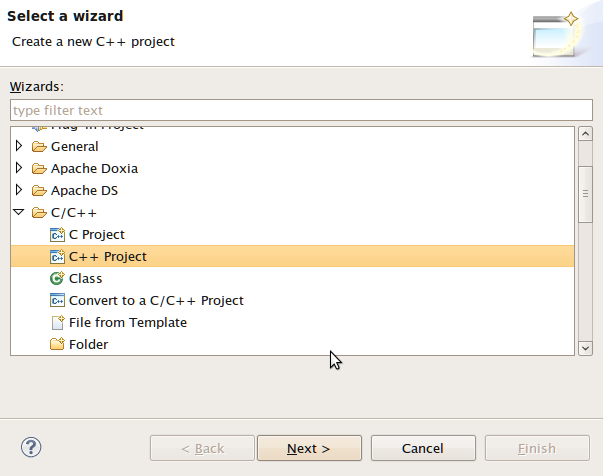
Once you are in Eclipse, you are given an empty workspace. You now have to start a new project. To do so, select "File" / "New" / "Project...". Expand the section "C++" and select "C++ Project", then click "Next >".
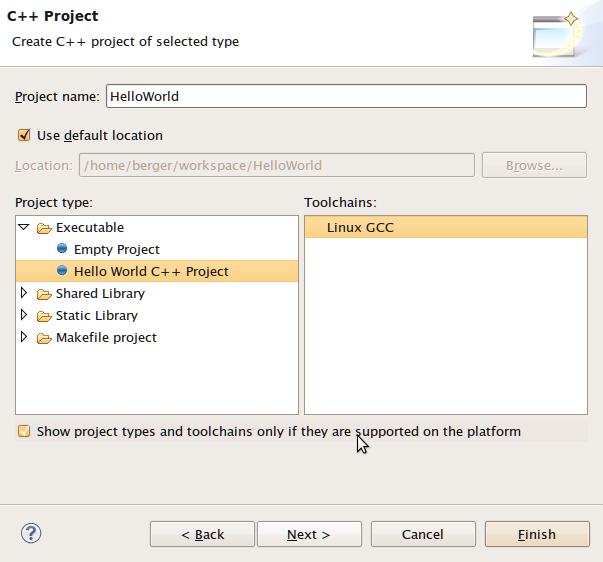
On the next screen, you have to give your project a name. In this case, it will be "HelloWorld", however, you may use any name you like. Also, you have to select a toolchain.
- For Windows, select "MinGW GCC"
- For Linux, select "Linux GCC"
- For Mac OS X, select "MacOSX GCC"
- Do not use "Cross GCC"! Unfortunately this option may be selected by default if you create an empty project!
Click "Next".
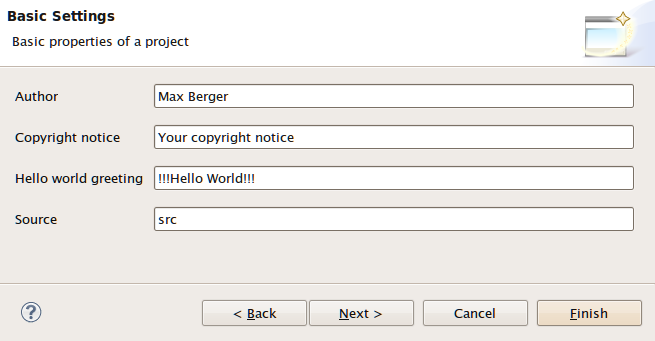
The next screen contains some Basic settings. Fill in what you like:
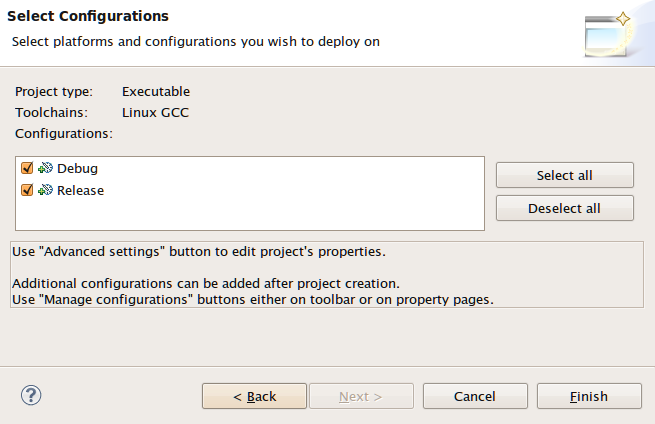
In the last setting you can chose output formats, it is always good to have a release and a debug configuration. Click "Finish".
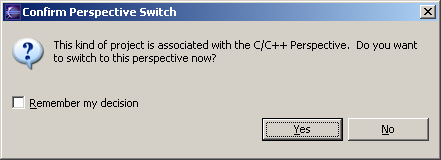
Eclipse will now generate a few things, and then ask you if you want to switch to the C/C++ Perspective. This is a good idea, so say yes.
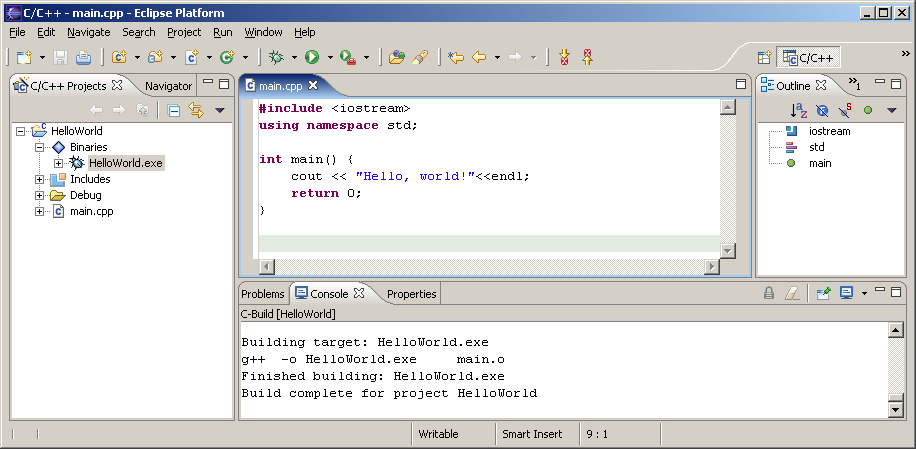
Great. You have a project now, and it does contain some sample code! You will immediately get an editor window for your project. Eclipse will also auto-build your project every time you save.
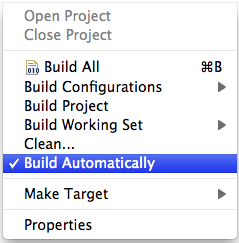
If eclipse does not auto-build, you have to turn on "build automatically" in the Project Menu, or click the "Build All" button after every change.
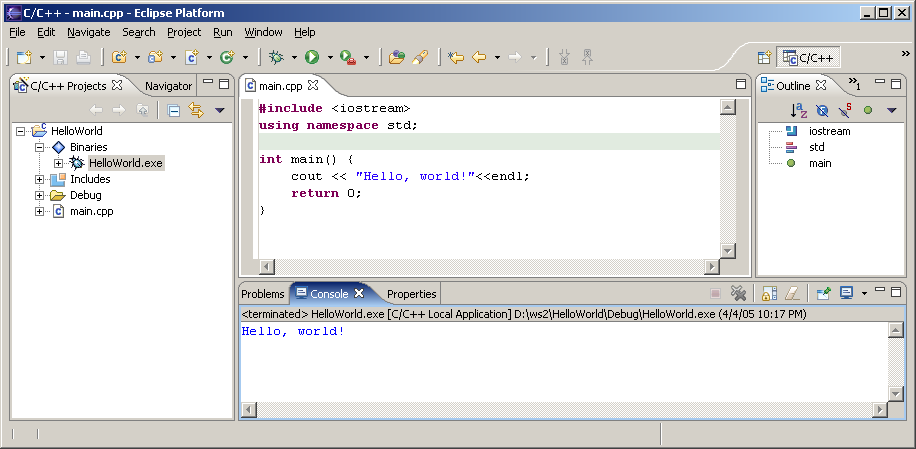
Now here comes the tricky part: On the left pane, select "C/C++ Projects", expand "Binaries" and you should see and executable (HelloWorld.exe on Windows). Now right-click that executable, and select "Run" / "Run Local C/C++ Application". If everything goes well your output will be in the bottom right window in the "Console" tab and it should say "Hello, World".
Congratulations! You have successfully installed a compiler, a build system and an IDE. You have successfully created, edited, compiled and run a project. You should now be able to start your own projects!
Common Problems
If you have followed these instructions everything should work. However, you may have ran into trouble, and then decided to look for the manual (at least, that's the way I would have done it). So now you have a problem and need an answer:
Please note if you are reading the online version: Some problems may covered in a newer version of this document, please refer to Introduction.
How to fix most of the common errors on Windows
Make sure you have done the following things:
- Installed the CDT
- Installed (not just downloaded) MinGW and MSYS with Administrator privileges
- Set up your path environment variable
Especially made sure you did the last step. You will need to restart eclipse (full restart with shutdown, File / Restart is not sufficient). This solves about 99% of all support mails I've got so far.
How to fix most of the common errors on Lion (Mac OS X 10.7)
Make sure you have done the following this:
- Downloaded XCode from App Store
- Installed XCode using the "Install XCode button"
Both of these steps are important, in particular when you upgraded from an earlier version of Mac OS X. Upgrading to Lion breaks your existing developer tools! Read also the full description in Mac OS X Compiler. It also covers problems during the XCode install.
Build error (Exec error:Launching failed), CreateProcess: make -k all error=2,
You have just tried the build the hello world program, and you get this error message instead of an executable. This means that make is not in your path. Open up a command prompt (In OS X: Terminal in Applications/Utilities, in Windows: Start/Run, type in cmd) and type in make. If that doesn't work, try gmake.
If gmake worked, see Configuring the CDT.
If neither worked, make sure you install make (See Setting up a compiler) and set your path (See Environment Variables in the case of Windows).
To check your path (on windows), open up cmd and type in echo %path%. This should show the path to MSYS and MinGW. Also, make sure that you restarted Eclipse (or cmd if you are testing) after setting your path.
If you are on Windows, and you have installed MinGW, but not MSYS, you may have an executable called mingw-make. In this case you have to go to Configuring the CDT and configure appropriately. It is possible to just use mingw-make and no MSYS at all, however, mingw-make has some limitations. Eclipse CDT managed makefiles may or may not work with it. Please see the MinGW FAQ for more information.
/bin/sh: line 1: g++: command not found, Error launching external scanner info generator
This error message means that g++ is either not installed or not in your path. Check your path settings as described in Build error (Exec error:Launching failed), CreateProcess: make -k all error=2,, but this time try the commands:gcc --versionand
g++ --version. If gcc works, but g++ doesn't, it means you have only installed the C and not the C++ version of the gcc compiler, which happens quite frequently on Linux distributions. Check if you have all needed packages installed, and check Setting up a compiler.
If you are on windows, and neither of them worked, install MinGW and set your path environment variable. If only gcc one worked, reinstall MinGW and don't forget to select the C++ compiler!
Undefined symbols for architecture x86_64 (OS X 10.7)
Make sure you have done the steps in How to fix most of the common errors on Lion (Mac OS X 10.7).
If the problem still persist, and you are trying to compile C++ code, make sure your source files actually have an extension of ".cc" or ".cpp".
No output or only sometimes output
If you are on windows and use Eclipse 3.1 with CDT 3.0.0 there is a bug. See Configuring the CDT.
Please note that debug sessions in Windows have their own console window (a black console window) and do not appear in the regular Eclipse console. If you're running a debug session, please watch which windows appear in your task bar.
Error launching 'cygpath' command
If you followed these instructions you have installed MSYS instead of cygwin. You may safely ignore this error message.
I do not have the option to start a C++ project
You have not installed the CDT. See Installing the CDT.
Error 1, open output file blabla.exe: Permission denied
Every time I start Eclipse on my laptop, I can only compile and run a program once. After that it asks if I want to run it with errors every time. The compiler says this:
Building target: Project01Test.exe
Invoking: GCC C++ Linker
g++ -oProject01Test.exe ./test.o
C:\MinGW\bin\..\lib\gcc\mingw32\3.4.2\..\..\..\..\mingw32\bin\ld.exe: cannot
open output file Project01Test.exe: Permission denied
collect2: ld returned 1 exit status
make: *** [Project01Test.exe] Error 1
make: Target `all' not remade because of errors.
Build complete for project Project01Test
Answer: Your program may still be running. Try stopping it by using the small red square on the console window (the one for your program). Another way is switching to the "Debug" perspective, selecting your running program, and stopping it there (also the small red square).
The debugger doesn't work (on windows, with MinGW)
Unfortunately gdb is not included in the current (4.1.1 or 5.0.2) version of MinGW. See GDB (optional!).
Incorrect command line argument: -k'
Make sure you are using the make programs provided by MinGW. If your output in the console shows something like:
make -k clean all
MAKE Version 5.2  Copyright (c) 1987, 2000 Borland
Incorrect command line argument: -k
Then you have make installed from a previous installation of Borland C++. You have several choices:
- Adjust your PATH environment variable to have the MinGW / MSYS installation come before Borlands tools. Please be warned that this may break your Borland tools!
- Remove the path to the Borland tools from your PATH. This will definitely break your Borland tools.
- Download "mingw32-make". This is an option when installing MinGW. Make sure you set your make setting to be "mingw32-make". If you still get an error, try setting it for the build settings in your project. In this case you may even skip the installation of MSYS, but you will get limited functionality.
A Java Runtime Envrionment (JRE) or Java Development Kit (JDK) must be available...
There are several possible reasons for that:
- You have not installed Java. Please see Java.
- Your "path" environment is messed up (Windows). Please see Environment Variables. Make sure
C:\windows\system32is in your path (should be there by default). - java.com has a button called
verify installation.
I have no binaries
If you have no binaries folder, then one of several things may have happened:
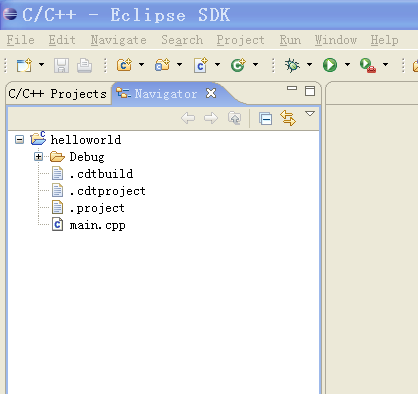
- You are not looking at the C/C++ Project view. Make sure you are in the C++ perspective and "C/C++ Projects" is active. An example of this situation is shown in figure_title: Click on "C/C++ Projects" to fix.
- Your program didn't compile. Check the output of the "Console" Window. It is either an error in your program or a configuration error. For configuration errors, check the other problems.
- AutoBuild is turned off. Turn it on as described in figure_title.
- If you do have a binaries folder, then make sure you run you program by right-clicking (on the mac: hold down ctrl and click) on the binary, and then selecting Run / Run as C/C++ Application. Just hitting the run button will only work after you have done that at least once!
Unable to access jarfile startup.jar
This problem happens on Windows when you moved Eclipse out of its directory instead of creating a shortcut. Please move it back into the Eclipse directory, then drag'n'drop it using the right mouse button, where you can select "Create Shurtcut"
Problems when CYGWIN is installed on Windows
I personally do not recommend the installation of cygwin, but rather the installation of MinGW and MSYS as described in Windows compiler. However, the following problems have been reported by users:
Binaries require cygwin.dll
Eclipse prefers to use cygwin if it is installed, and will do everything to manipulate the path to include cygwin if it is installed. Binaries will therefore by default be linked against the cygwin libraries. Possible workarounds:
- add
-mno-cygwinto your compiler settings - Overwrite the path variable in eclipse: In the Project Properties: C/C++ Build -> Environment -> User Variables -> New. Select PATH, remove the cygwin directory and select Replace as Operation.
Launch failed Reason: Unable to set working directory
Your workspace or your eclipse installation may use a path with includes spaces, such as C:\Documents and Settings. Eclipse sometimes fails in this case. Try creating your workspace in a different directory.
Problems not covered here
If you read the online version of this document, check out Introduction. You problem may be covered in a newer version of this document.
If you are still having trouble, you may try and send me an email. Please be aware that I may not respond to every email, as I am doing this support mainly as a hobby. Make sure your email includes the following. Please send the complete output!
- The contents of your PATH environment variable (in Windows:
echo %PATH%. In Linux / Mac OS X:echo $PATH). - Version of GCC you're using (
gcc --version) - Version of Make you're using (
make --versionorgmake --version) - Version of Eclipse you're using
- Version of the CDT you're using
- The complete output of your "Console" window (at the bottom of eclipse) when your error occurs.
- The steps you did so before the problem occurred.
Older Instructions
Sometimes you may not be happy with the current version of a certain program. I have left instructions for the older versions here in case you need them:
MinGW 5, MSYS 1.0.11
This is the old MSYS/MinGW installation used before the new mingw-get-inst was available.
MinGW 5.x
First, you need to download MinGW. You can either click through the websites mentioned above or go directly to the MinGW download area. Look for the Package "Automated MinGW Installer". There, download the file ending in .exe. The file name should be something like "MinGW-5.1.4.exe". You can also download MinGW Version 5.1.4 from the link given here.
You may also download an older version, and follow the instructions given in Older Instructions:
- You may download MinGW 4 and follow the instructions in MinGW 4.x.
- You may download MinGW 3 and follow the instructions in MinGW 3.1.
Most of the options in the MinGW 5 installer are pretty straightforward. I will point out some of the more tricky options.
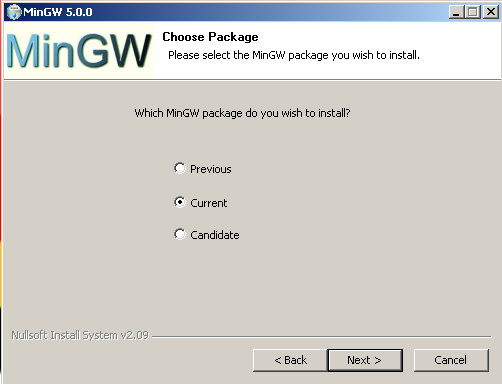
The first one of such options is which "MinGW" package to install. Any of those should work just fine, but I would recommend Current.
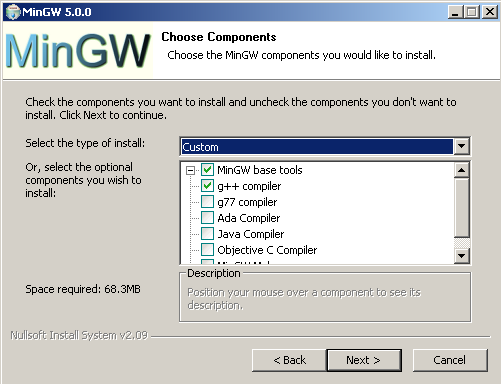
MinGW will ask which components to install. Either select All or at least make sure that you have the g++ compiler checked. This is needed for C++ support.
When asked for the install folder, please do not change it. You will have a lot of trouble later on, especially if you chose a path that contains spaces.
That's already it for MinGW. There are two more steps: MSYS and the Environment Variables.
Checkpoint: To test if everything worked, please reboot. Then open up a terminal. (Start/Run, type CMD). Try these commands:
gcc --version
should print the version of gcc. If you get a "File not found", try logging out and logging back in, or even rebooting your computer. If it still does not work, you have not installed MinGW correctly. You may also need to set your environment variables manually (see below).
g++ --version
should print the version for g++. You did select the "g++ compiler" I hope. If not, install again!
GDB (optional!)
This section is completely optional. You may skip it and go directly to MSYS 1.0.11.
If you want to use the debugger, you may have to install it separately. This is the case with MinGW 5.0.2, it may be different in other versions. Download it from the same page, look for a package starting with gdb and ending with .exe. At the time of this writing (Apr 29) the current version was "gdb-5.2.1-1.exe". Install (double-click) that .exe, select all the default options (make sure you select the same MinGW directory as you did during the MinGW install).
I have received a report that gdb-6.3-2 does not work. So I would advise using the older version or waiting for a newer one.
Checkpoint:
gdb --version
should print the gdb version. This is optional.
MSYS 1.0.11
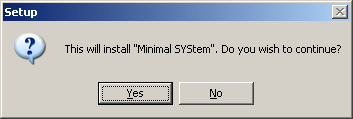
Unfortunately MinGW is not enough. We also need the MSYS tools from the same download page. Go there again, to the "Current" section and look for "MSYS Base System". Again, look for the file ending in .exe, as this time: "MSYS-1.0.11.exe". You may have to expand the "Release Candidate" section. Or you may use the link here to MSYS-1.0.11.exe. Download it and start it. You should get a window like this:
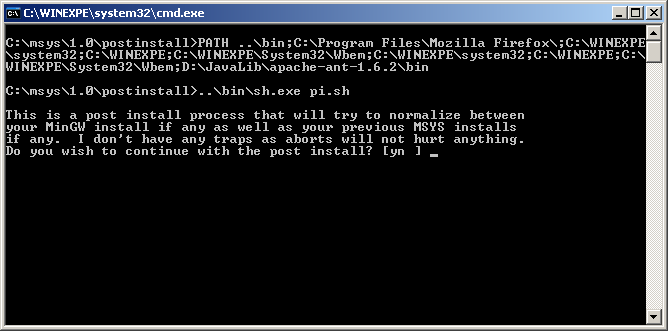
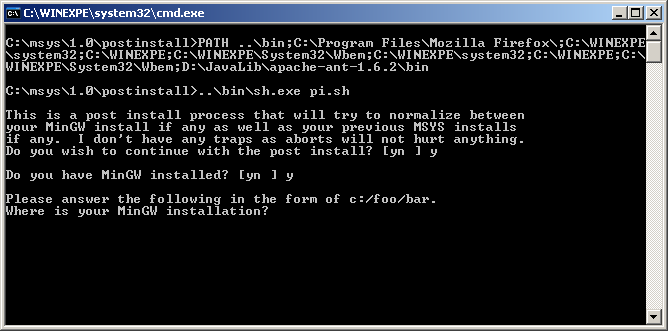
If you accept all the default options, after a while there should be a black and white window, similar to this:
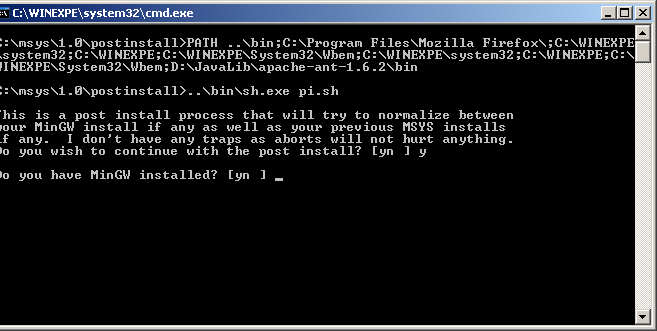
To continue the install type in y and then Enter. The next question reads like this:
Which you can also answer with y Enter. The next question is a little bit more tricky:
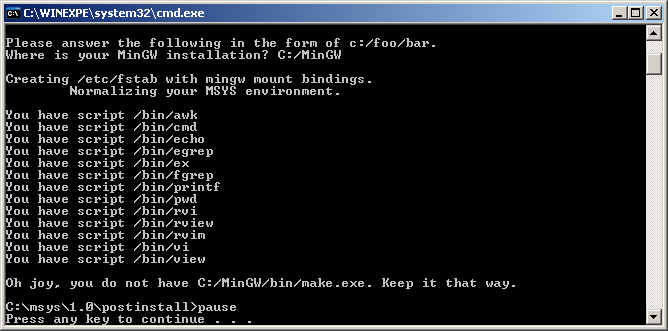
What they want to know is where you installed MinGW to and that you replace all backward slashes (\) by forward slashes (/). If you followed the instructions, the answer here will be:
C:/MinGW
Caveat: If you have not used the default paths, but instead have installed MinGW in a different location, such as C:/Program Files/MinGW, where the path contains spaces and / or is longer than 8 characters you may have to replace that particular path component with its DOS short pathname, such as C:/PROGRA~1/mingw.
Caveat2: The installer may be case sensitive. Please make sure you have written MinGW in the same capitalization as during your first install, in some cases you will have to enter c:/mingw (note capitalization!).
The very last question just asks you to press a key:
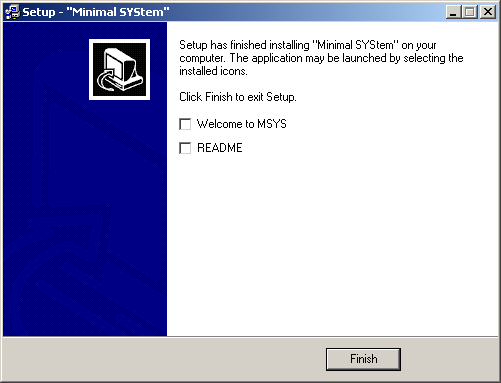
Where you can press any key you like to continue. Setup will come back and ask you if you want to read a welcome note and the README file. You probably don't want either one, but it does not hurt to look. Anyways, once you hit "Finish" you are done with the setup. Now you have to set up your Path environment variable.
Installing the CDT on Eclipse 3.4
This is only required if you did not download the CDT version as described above. Please check if you are able to create a new C++ project (as described in Hello, World!) before going through this section!
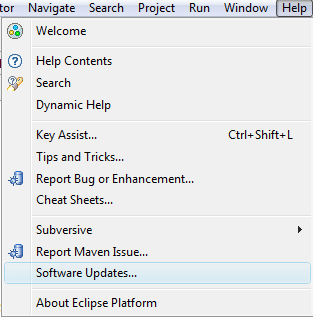
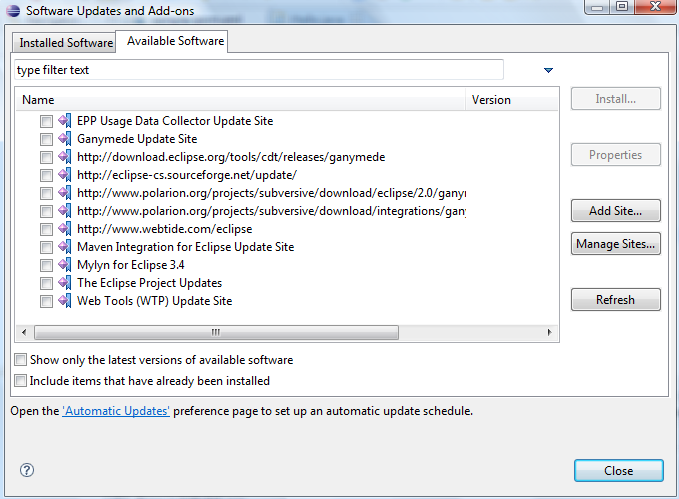
In the "Help" menu select "Software Updates..."
This will show you the list of available software update sites. If you are luck you already have the CDT update site configured. Search for an entry which contains the String "cdt", for example http://download.eclipse.org/tools/cdt/releases/ganymede.
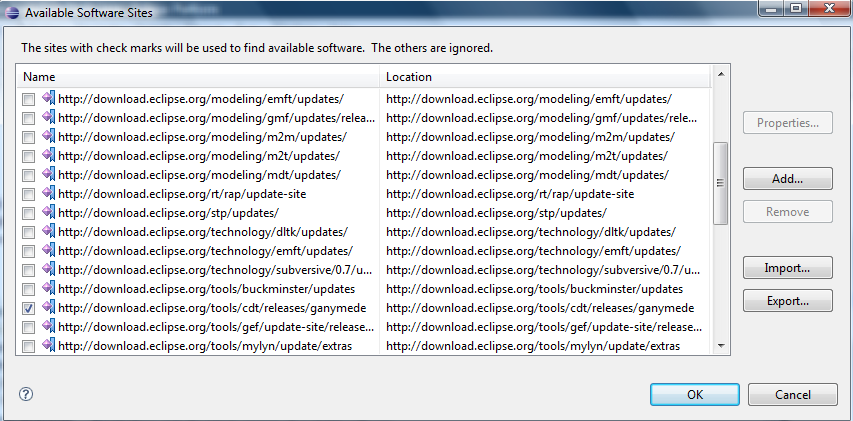
If there is no site for cdt available, go to "Manage Sites", and you will get a list of sites.
Again, search for a site containing "CDT". If there is no site available, add it (using the "Add..." button), adding http://download.eclipse.org/tools/cdt/releases/ganymede (the address may be different in future versions of Eclipse, this is for 3.4!)
Also, make sure the checkbox next to the Address is checked. Otherwise the site is configured, but ignored by Eclipse. Leave this page and go back to the main Software update page.
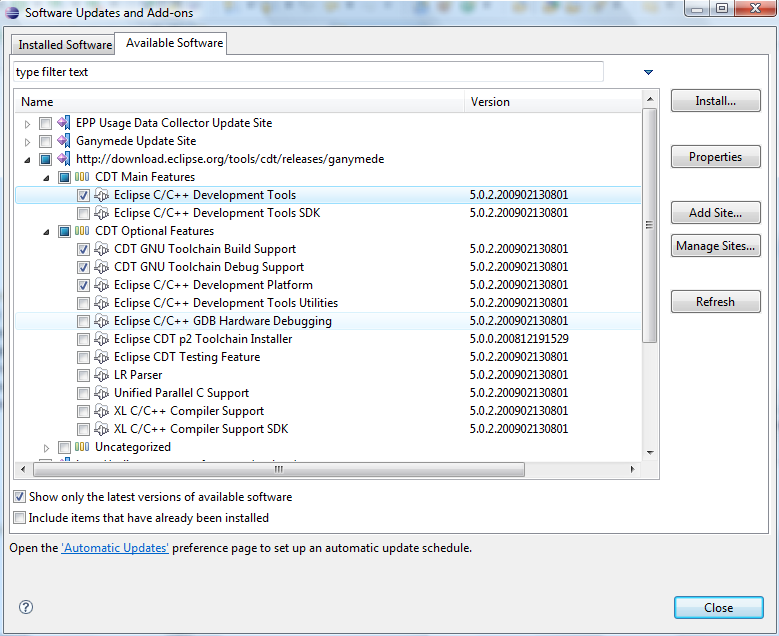
Expand the CDT site, and find the latest version of the CDT. Make sure you select at least the following:
- Eclipse C/C++ Development Tools
- CDT GNU Toolchain Build Support
- CDT GNU Toolchain Debug Support
- Eclipse C/C++ Development Platform
The select "Install..."
You will have to confirm the selection with "Finish"
Downloading and installing will take a while. Once its done it will ask you to restart Eclipse. This is a good idea, so select "Yes".
Once Eclipse has restarted you now need to configure it for your computer.
Hello, World! in older versions of CDT
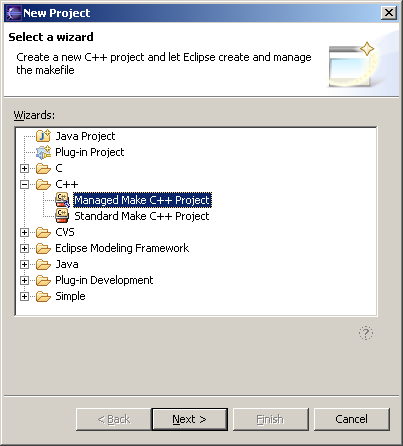
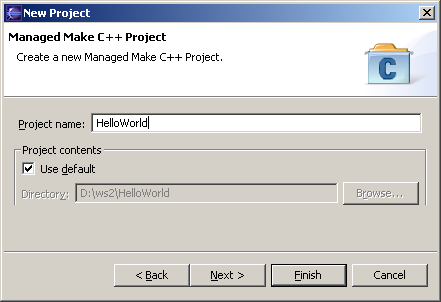
Once you are in Eclipse, you are given an empty workspace. You now have to start a new project. To do so, select "File" / "New" / "Project...". Expand the section "C++" and select "Managed Make C++ Project", then click "Next >".
On the next screen, you have to give your project a name. In this case, it will be "HelloWorld", however, you may use any name you like. Leave the "Use default" in "Project Contents" checked.
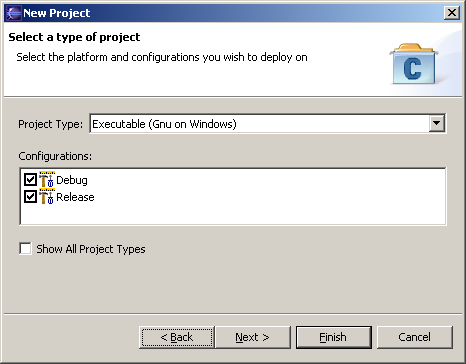
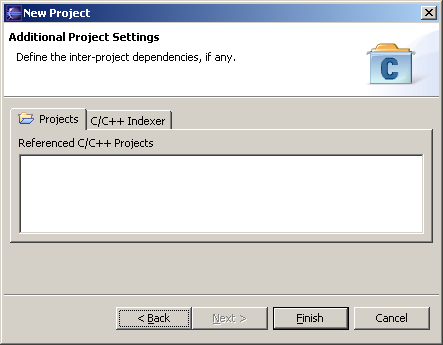
The next two settings about "Project Type" and additional settings are usually OK, so we'll just leave them:
Eclipse will now generate a few things, and then ask you if you want to switch to the C/C++ Perspective. This is a good idea, so say yes.
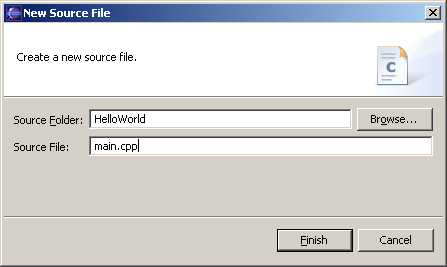
Great. You have a project now. However, it currently does not have any files. So select "File" / "New" / "C Source File". It will then ask you for the name of the file, type in something like "main.cpp".
You will immediately get an editor window for your file. Eclipse will also auto-build your project every time you save. So type in something like this and hit save, and it should compile automatically:
Now here comes the tricky part: On the left pane, select "C/C++ Projects", expand "Binaries" and you should see and executable (HelloWorld.exe). Now right-click that executable, and select "Run" / "Run Local C/C++ Application". If everything goes well your output will be in the bottom right window in the "Console" tab and it should say "Hello, World".
Congratulations! You have successfully installed a compiler, a build system and an IDE. You have successfully created, edited, compiled and run a project. You should now be able to start your own projects!
Eclipse 3.1 with CDT 3.0
Downloading Eclipse 3.1
Now we are finally ready to install Eclipse. Go to the Eclipse website and look for "Downloads". It will automatically try to figure out your OS and give you an option like "Download now: Eclipse Platform SDK 3.1, Windows.". Do it. You will receive a .ZIP file. Use either FilZip or your favorite ZIP Program (Windows XP and Mac OS X have .ZIP support build in) to unpack the file. Move the unpacked folder to any location, for example C:\Program Files\eclipse. You can now start Eclipse by double-clicking it.
First Run of Eclipse
However you installed eclipse, you should now be able to run it. Double-click the icon or start the appropriate script in UNIX and Eclipse's splash-screen will appear:
Immediately after that Eclipse will ask you for your workspace location. It defaults to: C:\Program Files\eclipse\workspace which is actually very bad. Depending on where you want to use Eclipse, please set your workspace to the appropriate folder. If you are in a computer lab, check their policy on personal home folders. If you are on your own computer, a place within your personal settings is usually best:
If you always want to use the same workspace, you may select the Use this as the default... and you'll never have to worry about workspaces again. This is usually a good idea once you've used Eclipse for a while. Finally Eclipse starts up with the welcome screen:
And if you select the "Go to the workbench" in the top right corner, then you are right in Eclipse and you can start developing in Java. However, since we want to develop in C++ just continue with the next section.
Installing the CDT
Eclipse by default comes with support for programming Java, the support for C/C++ (the C Development Toolkit) has to be installed as an update.
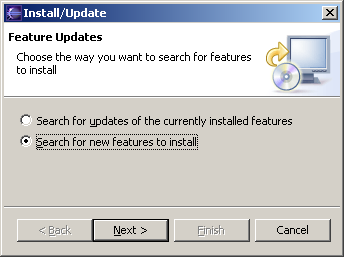
In the "Help" menu select "Software Updates" and the "Find and Install...". You should get something like:
Select "Search for new features to install", and then "Next >". You should get:
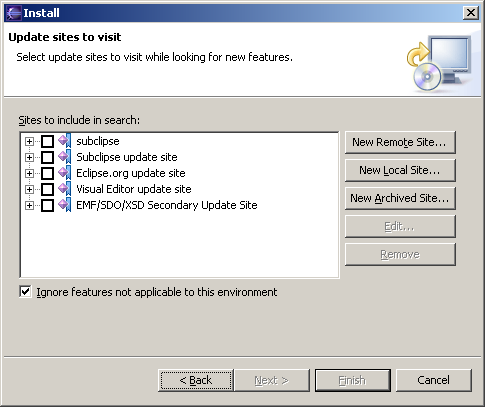
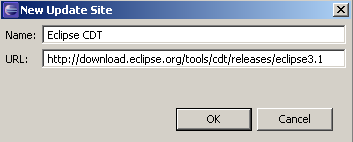
Leave "Ignore features not applicable to this environment" checked and de-select all update sites (you will probably have less in there than I do). Select "New Remote Site" and then enter the following information:
Note: What name you enter does not matter. Here is the URL for cut-n-paste: http://download.eclipse.org/tools/cdt/releases/eclipse3.1
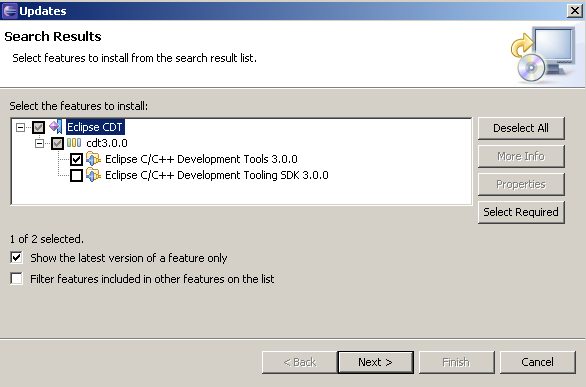
Hit "OK". Now select "Eclipse CDT" and then "Next >". It should connect to the Eclipse CDT update site and look for the newest version. Then it displays a window like this one:
Select the latest version of the "Eclipse C/C++ Development Tools". (3.0.1 at the time of this writing) Do not select any other features. Hit "Next >".
In the next window, you will have to "accept" the license, and then select "Next >".
It will again show you an overview, which you can just accept and select "Finish".
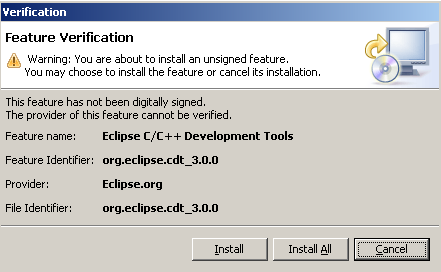
It will warn you that the Eclipse CDT is an "unsigned feature". But you can just ignore that and select "Install All".
Downloading and installing will take a while. Once its done it will ask you to restart Eclipse. This is a good idea, so select "Yes".
Once Eclipse has restarted you now need to configure it for your computer.
Eclipse 3.1 with CDT 3.0.0 (and 3.0.1) has a bug on windows! If you are on windows, please close eclipse, and delete the file spawner.dll in eclise\plugins\org.eclipse.cdt.core.win32_3.0.0\os\win32\x86. This bug appears every time you try and run short programs (they will not show any output). More information is available in Eclipse Bug 102043. This bug is fixed in CDT 3.0.2.
MinGW 4.x
MinGW 4.x comes with a new installer that asks much more questions than the old one. The current (Aug 05) version is MinGW 4.1.1.
Please note: The MinGW 4.x installer downloads parts of the MinGW suite during the install! You must have an internet connection during the install. If this is not an option for you, download the last version (3.1)
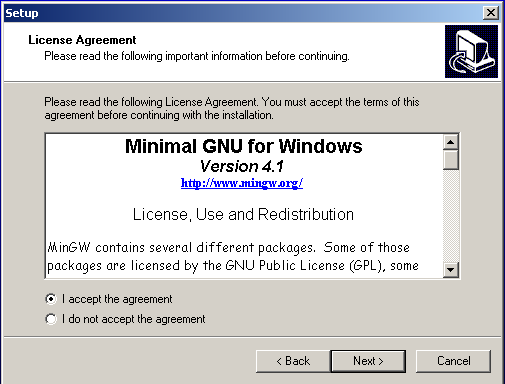
Most installation options are pretty straight forward. You will have to accept the license agreement:
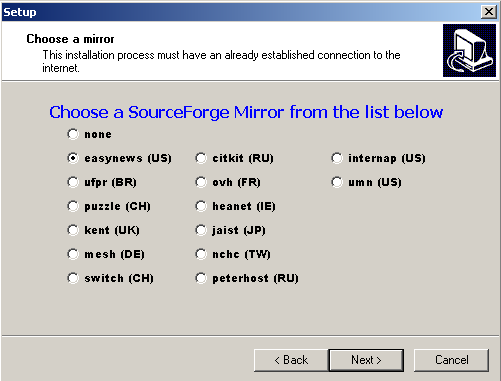
It will ask you for a download mirror. Of course, you should pick one close to your country. If you are installing from home in the us, use a commercial mirror, if you are installing from a university connection, chose a university mirror.
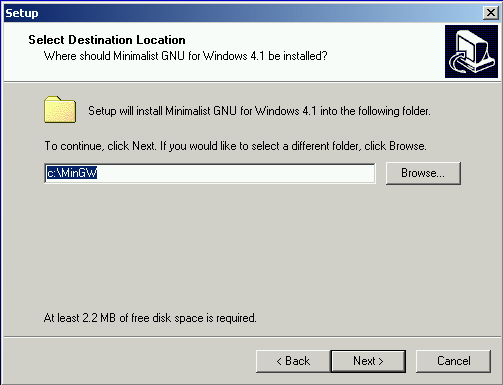
When installing MinGW, it is advisable to use the default directory C:\MinGW. Do not use a path that contains spaces, this will give you problems later on.
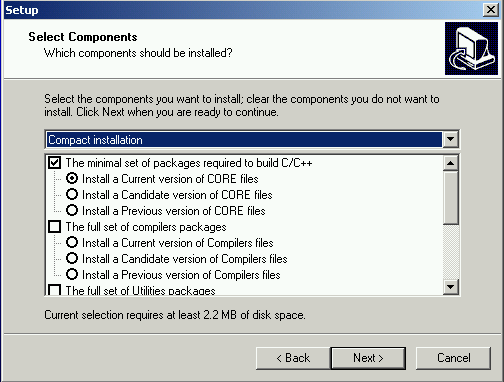
If all you need MinGW for is compiling your programs from within Eclipse, the Compact install should be enough:
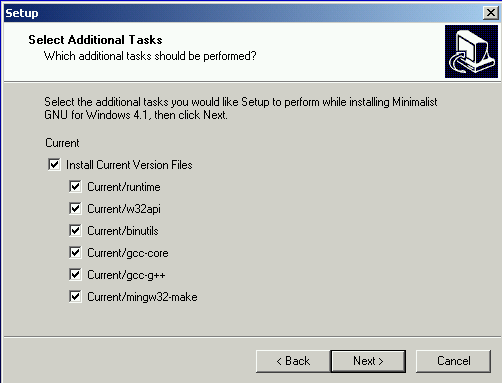
Next, it will ask you for additional tasks to perform. Select all of them:
MinGW will download and install your selected components. After a little while your installation is done. You will now need to install MSYS.
MinGW 3.1
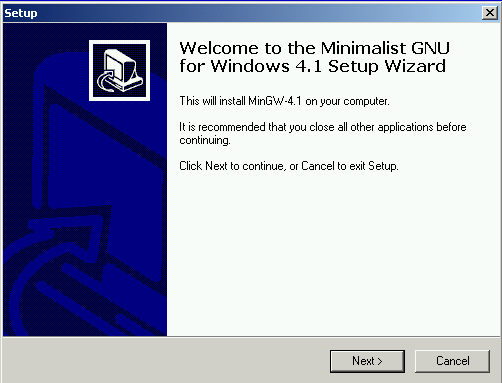
At the time of this writing this was "Download MinGW-3.1.0-1.exe", but the version number may be higher now. Once downloaded, start the program. It should look similar to this:
If you accept all the default options MinGW should install just fine.
Feedback
Do you have any comments how this document could be improved? Email the author. I'll be happy to make any changes that make the setup of the Eclipse CDT easier, or include information that is missing in this paper.

