Notice: This Wiki is now read only and edits are no longer possible. Please see: https://gitlab.eclipse.org/eclipsefdn/helpdesk/-/wikis/Wiki-shutdown-plan for the plan.
Getting Started With Aggregator (Buckminster)
Revision as of 08:37, 26 June 2009 by Unnamed Poltroon (Talk) (New page: ==Installing Eclipse and the Aggregator== # Install a fresh Eclipse 3.5 Platform from this location http://download.eclipse.org/eclipse/downloads/drops/R-3.5-200906111540/index.php # Start...)
Installing Eclipse and the Aggregator
- Install a fresh Eclipse 3.5 Platform from this location http://download.eclipse.org/eclipse/downloads/drops/R-3.5-200906111540/index.php
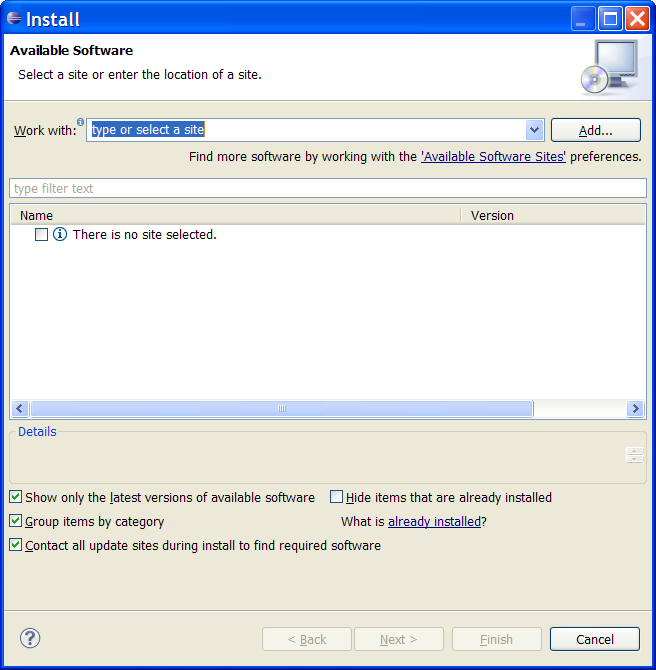
- Start the Eclipse and open the Install New Software wizard. You'll find in under the top menu Help
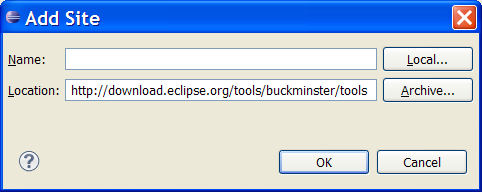
- Click the Add... button
- and enter the URL http://download.eclipse.org/tools/buckminster/tools in the Location field.
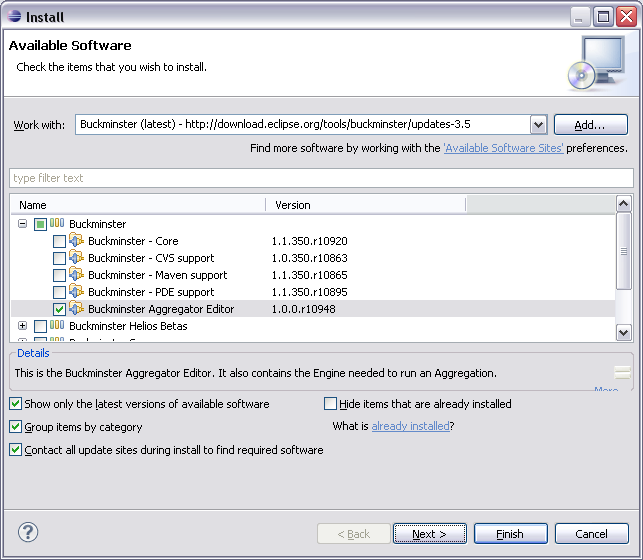
- Select the Buckminster Aggregator Editor and click Next twice.
- Accept the Eclipse Public License and click Finish
- Restart the IDE once the installation is finished.
Creating your first aggregation
- Create a new empty project. Here it's called aggregation.example but any name will do.
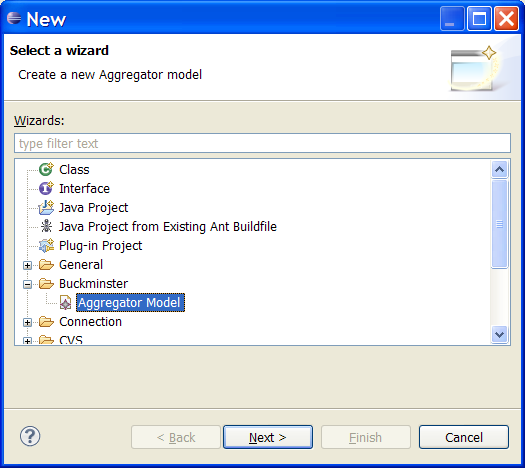
- Right click on the project and choose New -> Other... to bring up the New wizard.
- Select Buckminster -> Aggregator Model and click Next
- Name the aggregation. Here it's called example.build. Note that the name must end with .build
- Click Finish


