Notice: This Wiki is now read only and edits are no longer possible. Please see: https://gitlab.eclipse.org/eclipsefdn/helpdesk/-/wikis/Wiki-shutdown-plan for the plan.
Difference between revisions of "Linux Tools Project/PluginInstallHelp"
m (→Installing Linux Tools Project Content: (Proper line-spacing for images)) |
(Remove non update site updates to not give options which seems to be problem - https://bugs.eclipse.org/bugs/show_bug.cgi?id=443891#c9) |
||
| (5 intermediate revisions by the same user not shown) | |||
| Line 9: | Line 9: | ||
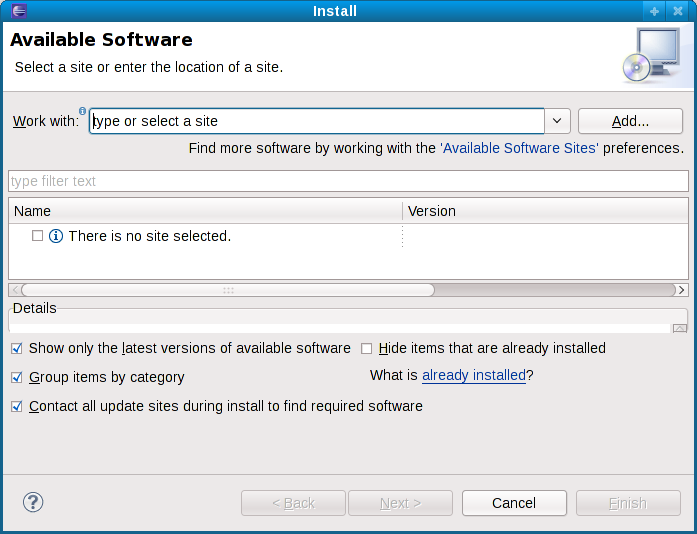
# Go to <u>Help</u> '''>''' <u>Install New Software...</u> to open the '''''Install''''' dialog. <br/>[[Image:LinuxToolsInstall.png]] | # Go to <u>Help</u> '''>''' <u>Install New Software...</u> to open the '''''Install''''' dialog. <br/>[[Image:LinuxToolsInstall.png]] | ||
# Click the <u>Add...</u> button; this will display the '''''Add Site''''' dialog. <br/>[[Image:LinuxToolsAddsitedialog.png]] | # Click the <u>Add...</u> button; this will display the '''''Add Site''''' dialog. <br/>[[Image:LinuxToolsAddsitedialog.png]] | ||
| − | # Enter http://download.eclipse.org | + | # Enter http://download.eclipse.org/linuxtools/update in the <u>Location:</u> field and "Linux Tools" in the <u>Name:</u> field and click <u>OK</u>. This will add the Linux Tools Project update site to the list of available sites. |
| − | # The Linux Tools Project update site should now be selected in the <u>Work with:</u> selection box. If it is not, you can select it from the list by clicking the down arrow and locating its entry. You can simply collapse the entry for this site to view content available for installation.<br/>[[Image:LinuxToolsInstall2. | + | # The Linux Tools Project update site should now be selected in the <u>Work with:</u> selection box. If it is not, you can select it from the list by clicking the down arrow and locating its entry. You can simply collapse the entry for this site to view content available for installation.<br/>[[Image:LinuxToolsInstall2 Juno.PNG]] |
# To install a feature/update, check the corresponding box and click the <u>Next</u> button, following the wizard. | # To install a feature/update, check the corresponding box and click the <u>Next</u> button, following the wizard. | ||
| − | |||
| − | |||
| − | |||
| − | |||
| − | |||
| − | |||
| − | |||
| − | |||
| − | |||
| − | |||
| − | |||
| − | |||
| − | |||
| − | |||
| − | |||
| − | |||
| − | |||
| − | |||
| − | |||
| − | |||
| − | |||
| − | |||
| − | |||
| − | |||
| − | |||
| − | |||
| − | |||
| − | |||
| − | |||
Latest revision as of 14:48, 10 November 2014
Installing Linux Tools Project Content
This article teaches users how to set up Eclipse to download and install content provided by the Linux Tools Project. It is intended for users who are attempting to do so for the first time.
Installing Updates From the Linux Tools Update Site
The easiest way to install plug-ins and other software provided by the Linux Tools Project is to directly download and install plug-ins from the Linux Tools Update Site. This can be done through the Install New Software dialog. To do so, follow these steps:
- Go to Help > Install New Software... to open the Install dialog.
- Click the Add... button; this will display the Add Site dialog.
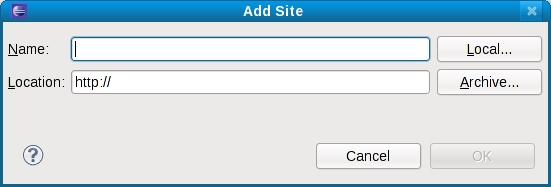
- Enter http://download.eclipse.org/linuxtools/update in the Location: field and "Linux Tools" in the Name: field and click OK. This will add the Linux Tools Project update site to the list of available sites.
- The Linux Tools Project update site should now be selected in the Work with: selection box. If it is not, you can select it from the list by clicking the down arrow and locating its entry. You can simply collapse the entry for this site to view content available for installation.
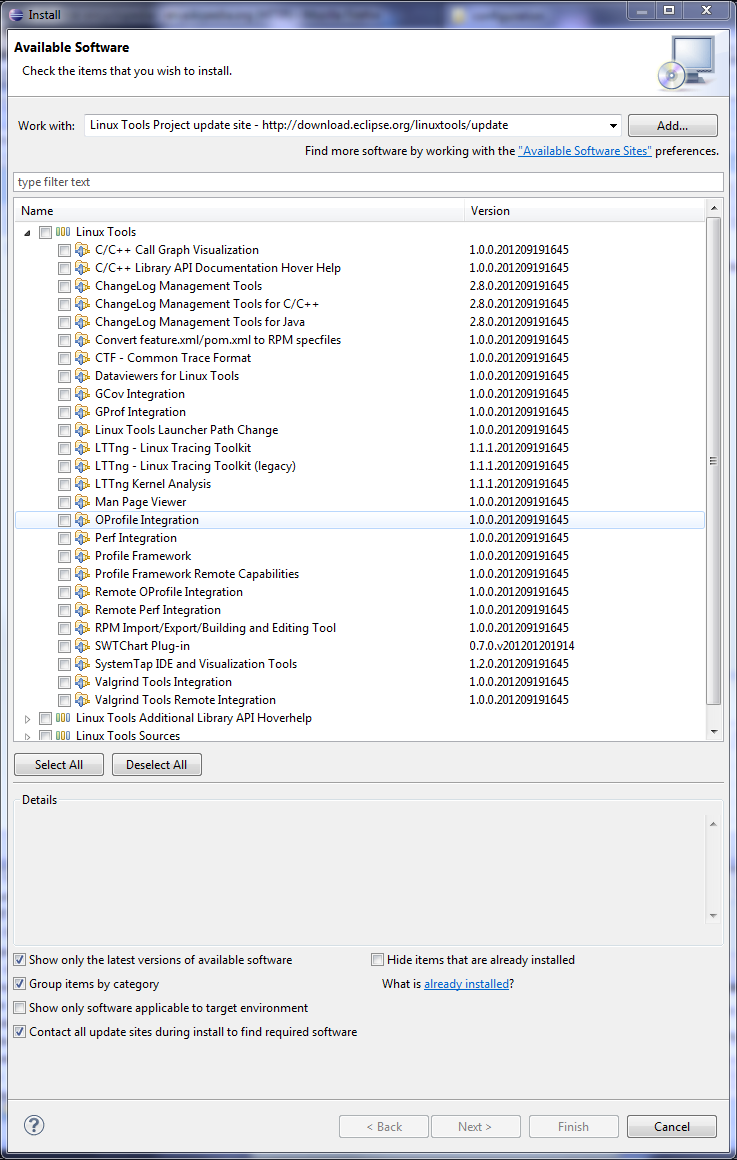
- To install a feature/update, check the corresponding box and click the Next button, following the wizard.


